


Thinking Outside the Box Blog Hop time with all these lovely global Stampin' Up! Demonstrators. Welcome everyone and whether you've come from Yoshiko's blog or just joined here with me Zoe Tant I hope you'll enjoy our hop this month which features tutorials for


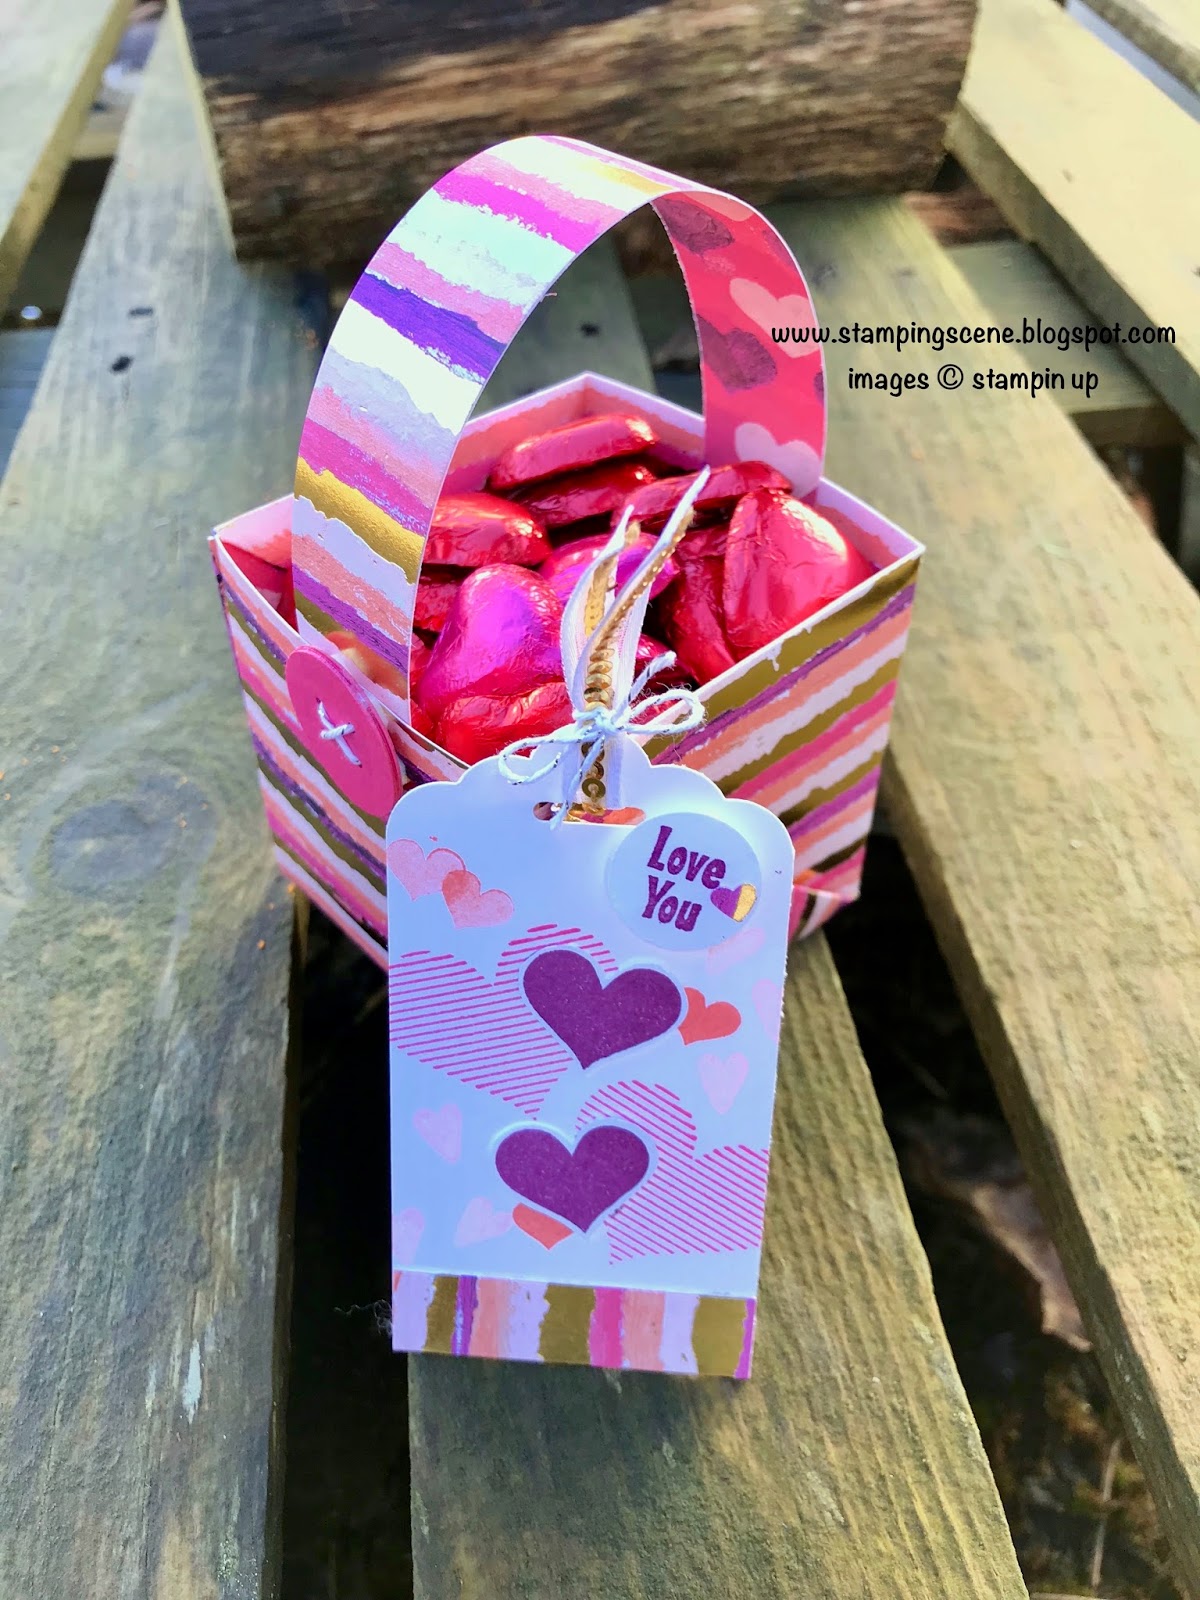
I've used an origami box pattern from Pinterest increased the size to use a full sheet of designer series paper and added a handle to make this sweet basket that only requires glue for the handle. You can make a coordinating tag that could be attached to the handle but the folding of the basket itself provides a handy pocket in which to tuck your pretty tag. You can see how to make it in my youtube video below.
The basic measurements and products used are listed below
1. Stampin Up Sweet Soiree Designer Series Paper one cut a 12" x 12" piece so that you have one strip which is 3" x 12 " and another which is 9" x 12"
2. Score the 9" x12" piece at every 3 inches on both sides of the paper so that you have 12 squares that are 3" x 3"
3. Score the 3" x 9" piece on the 3" side at 1.5inches all the way down. This will fold in half to form your handle and should be stuck on the open side with tear and tape (double sided sticky tape). You will also need to add tear and tape on each end of the strip on one side only up to 3 inches in so that when placed inside the basket it sticks to the inside of the basket.
I've added a box on each side of the handle using Stampin Up Berry Burst 3/8" (1cm) metallic edged ribbon and it also appears on my tag.
The tag features stamps from the Stampin Up Cake Soiree set which has coordinating dies called Sweet Cake which I've used with double sided adhesive sheets and old olive card. When purchased as a bundle (stamps & dies) you can save 10%. I've also used the popular Stampin Up tag topper punch to create the tag shape and some berry burst card stock. To partially fill your basket you can add some berry burst shred that comes in a mixed colour way bag with white and silver also in the Spring catalogue.
Of course you can make the basket in various colour ways and here is the Valentine basket I made and showed in the video.
Thanks for visiting my blog today and I look forward to seeing you soon
Zoe xx
Please enjoy the rest of the hop. You'll love Annette's project over in The Netherlands.


Blog Hop List
1. Tanja Kolar (Germany)
2. Yoshiko Endo (Japan)
3. Zoe Tant ( United Kingdom)
4. Annette Elias (Netherlands)
5. Sharlene Meyer ( New Zeeland
6. Dena Rekow (USA)
7. Beate Wacker (Austria)
8. Aude Barbara (France)

8 comments:
Yes, another origami basket! LOVE IT!
Greatings from Austria
Beate
Oh I love Origami< And so wel explained. Great idea to use the pockets on the outside!
Thank you Beate. I love yours too and thank you xx
Thank you my friend and pleased it was clear. xx
So gorgeous, Zoe. This idea of the message card is brilliant. Love it!
What a gorgeous box/basket, can't wait to try it! TFS xxx
What a great way to give a gift in a box like this. Very clear instructions too. Have a lovely crafty week, Angela xXx
I really love your box: looks so romantic and like a fresh english rose garden.
Thank´s for being part of our amazing team.
Hugs Tanja
Post a Comment