My STAMPING PAPERCRAFT blog - Stamping Scene

Hello and welcome to my blog. I'm a paper craft addict and love sharing my passion for paper crafting . I run online and face to face card making, memory keeping and all sorts of 3D projects. I also sell many of the products I use. If you'd like more information do drop me an email. Thank you for visiting I hope to see you again soon. Zoe x
Showing posts with label stampin up demo blog hop uk. Show all posts

Tuesday, 27 October 2020

Christmas favour box tutorial using Stampin' Up! Poinsettia Place DSP.


origami gift box with lid using stampin up poinsettia place dip


It's our last Tantalizing Stampers blog hop sharing fun ideas for using patterned papers or as we call them at Stampin' Up! Designer Series Papers, DSP for short. 

Today I've used the Poinsettia Place pack of papers to create an origami box and have then added a lid using Garden Green card and some of the offcuts of paper for a little more decoration.  You can see exactly how to make the base of the box on my Youtube channel.  There I made the box into an Easter basket, but I decided a box full of surprises is probably more appropriate for the festive season that is fast approaching. 

To make the lid for this size of box I cut a piece of card 51/2" square.  I scored on each side at 1 3/16" and cut two of the shortest score lines up to the first perpendicular score line.  I then rotated the card through 180 degrees and cut the opposite two short score lines.  I added glue to the outside fold edge of each small square and then formed the box lid. 

origami box tutorial

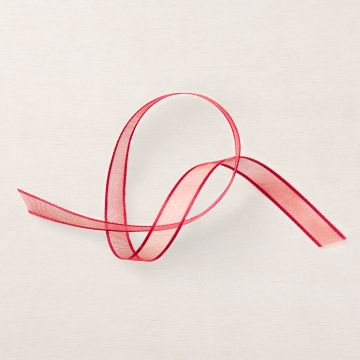
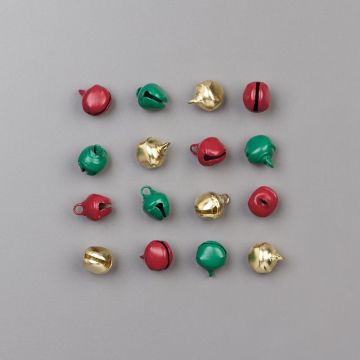
I then added decoration using the off cut 3" x 12" DSP, red ribbon and tiny bells threaded onto gold thread.  
I attached these by looping the thread through a hole i created in the box lid and covered on either side with DSP and card, making sure I secured the ends of the thread with double sided tape before hiding them. 
Christmas table favour origami box tutorial


Here is the video to show you how to make the box.  You can then add the lid by making it in a coordinating colour.  You can create similar boxes using A4 paper or card by using a piece that is cut to 21 x 28 cm and score on the short side at 7, 14 cm and on the long side at 7, 14 and 21 cm. The process is the same. Create a lid with a piece of card cut at 12.4 cm square and score on all sides at 2.5cm


You can see more inspiration from other members of my team, The Tantalizing Stampers via the thumbnails at the bottom of this post. 

Thanks for popping by I hope you have fun making the box. 

Keep safe and keep crafting Zoe x
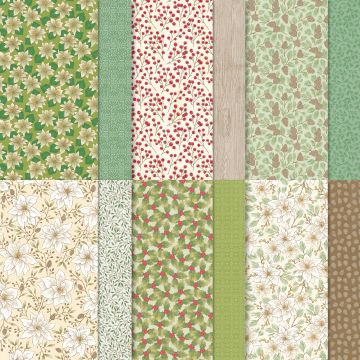
stampin up poinsettia place DSP


Real Red Sheer Ribbon


jingle bells for craft projects red gold green


You are invited to the Inlinkz link party!

Click here to enter

Friday, 30 March 2018

Totally Techniques Blog Hop - Crinkle Special


Easter Card with Stampin Up Layering Oval Dies and Basket Weave Embossing folder

Welcome to our Totally Techniques blog hop for March 2018.  If you've arrived from Shannean's blog you've already seen a fabulous example of our technique this month which was chosen by Annette Elias and we are showcasing the 'Crinkled Paper' process. I've used it to create the top layer for each of my Easter Eggs and in a similar but slightly different way the basket also.  
To create the crinkle effect I used off cuts of whisper white card and basically screwed them up.  I also spritzed with a little water to make the card more pliable.  I opened the scrunched balls and used an ink pad to sweep ink across the card and on the whole just the creases pick up the ink.  I also used a sponge to smudge ink around the edge of each egg to define the edges.  With the lemon lime twist and daffodil delight eggs I also embossed each piece of card prior to scrunching them up to add even more texture.  I used embossing folders Polka Dot Basics on one and Petal Burst on the other.    
Using my Layered Ovals dies I cut the eggs out and also added a scalloped matting layer using the same set of dies in the same colour of each egg.  I've used ribbon and enamel dots to add decoration.  For the two smaller eggs I used white organza ribbon which in the case of the melon mambo egg I put my hand inside an empty embellishment bag and pulled the ribbon over the same colour ink pad and then dried it with my heat tool which also melted the ribbon and gave it a gathered appearance.  I did the same heating with white ribbon on the yellow egg.  The large egg has night of navy gingham ribbon.  
Cute Easter card using Hello Easter stampin up stamp set and the Layering Oval dies
I made the basket by first cutting one side of a box shape and then prior to sticking the sides in place I put it through the big shot with the SAB Basket Weave embossing folder and then ran the ink pad over it in the same way as the crinkled card earlier to add shading to the basket.  

The eggs themselves are layered and I built up the layers with glue dots and stampin dimensionals.  Luckily this card will be hand delivered so I don't need a box for posting.

My trusty Teeny Tiny Sentiments helped me with a simple sentiment and I cut it out with the stampin' up! classic label punch.  My sweet bunny is from the Stampin Up spring catalogue set Hello Easter.  

Hope you like this new technique. 
Zoe x

Don't forget that Saleabration finishes at 10.45pm tomorrow night so be sure to get your order in before then if you wish to benefit from our fabulous free gifts with purchase.  Each £45 spend on product earns a free gift.  SHOP NOW

Enjoy the rest of the hop by going via the next buttons on each blog or following the list below.  Next stop is Lynsay in Canada.


  1. Annette Elias - The Netherlands
  2. Shannean Moncrieff - Australia
  3. Zoe Tant - UK - You're here
  4. Lynsay Mahon - Canada
  5. Satomi Wellard - Japan
  6. Nadine Weiner -  Germany
  7. Paula Dobson - New Zealand
  8. Barbara Meyer - Austria
  9. Kelly Acheson - USA

Friday, 24 February 2017

Stampin' Up! Independent Demonstrators Techniques Blog Hop

Another month another Stampin' Up! Independent Demonstrators global Totally Techniques Blog Hop.  Our technique this month is all about 'reflection'.  This is a fun and easy technique and all you need your stamp, ink and the acetate imaging sheet from your Stampin' Up! stamp-a-ma-jig, stamp positioner.

If you've arrived here from Nadine's blog what did you think of her wow project?  You're here now with Zoe Tant Stampin' Up! UK demo and I've used the perfect set for nature lovers and also a great set for men's cards, Stampin' Up! The Wilderness Awaits.


So the reflection technique is achieved when you stamp an image onto your card stock and then stamp the image again onto your imaging sheet. Stamp it carefully so as not to smudge it.  Then turn the imaging sheet through 180degrees and flip it so as to place it onto your card stock below the original image.  Do this carefully and don't allow the imaging sheet to move.  Then gently rub the imaging sheet sheet so that the inked image on it goes as a reflection image on your card stock.  

I've actually heat embossed my first image in whisper white and then used my aqua painter, markers and re-inkers to colour the Mallard and the reeds.  I also used a watercolour wash to colour the sky and add water to the reflection pool.  

I've added some burlap with machine stitching and sentiment from Wetlands stamp set along with some foliage from the Wetlands set too!

Your next stop on the Totally Techniques blog hop is to Barbara Meyer in Austria.  Thanks for joining our hop and please do comment along the way so we can visit you too.  

Enjoy hopping Zx


1. Zoe Tant - that's me
2. Barbara Meyer - Austria 
3. Mathilde Kortekaas - The Netherlands 
4. Patrice Halliday-Larsen - New Zealand
5. Amy Koenders - USA
6. Shelagh Freemantle _ Canada 
7. Shannean Moncrieff - Australia
8. Nadine Weiner - Germany

SaveSaveSaveSave
SaveSaveSaveSave