My STAMPING PAPERCRAFT blog - Stamping Scene

Hello and welcome to my blog. I'm a paper craft addict and love sharing my passion for paper crafting . I run online and face to face card making, memory keeping and all sorts of 3D projects. I also sell many of the products I use. If you'd like more information do drop me an email. Thank you for visiting I hope to see you again soon. Zoe x
Showing posts with label fancy fold card. Show all posts

Friday, 29 November 2024

How to make Front Flip cards with Totally Techniques


front flip card fancy fold card tutorial


Hi there and welcome to  November's Totally Techniques Blog Hop.  If you want to add a little movement to your card you'll love our technique this month.  We are sharing Front Flip cards with you which can be simple or more detailed to suit your own style.  

I've gone for a pretty simple version because when I started to create it my brain didn't want to go in the right direction. Have you had days like that?  

I've used a fun set called Submarine Life and you'll possibly notice a new cheeky character inside the card who you will find in the new year in our Saleabration  (SAB) brochure.  SAB if you are new to Stampin' Up! shopping is a fabulous promotion that runs from 7 January next year until the end of February and you can get bonus freebies with your orders.  Check back for more information coming.  

Instructions

1. Cut a piece of card 14.8cm x 21cm 

2. With the card in landscape position measure and draw in a feint pencil line 5.25cm from the left edge from top to bottom of the card. 

3. Cut a circle that will form the outer edge of your image piece and score it across the midde.  Position the circle so that the fold lines up top and bottom on the feint pencil line.  The circle should be in the centre section of the card.  

4. Use some washi or low tack tape to position the same die used for the circle ontop of your cut circle on the card.  You now need to partial die cut half the circle by only passing the card partially through your die cutting maching.  

5. Now use an eraser to remove the pencil line and then score above and below.  Use the scratch circle to make sure your scoring is where the pencil line was.  Also score the card on the long side for the width of the card at 10.5cm. 

6.  Fold the score lines above and below the circle to fold the outer edge back towards the centre fold of the card. 

front flip card tutorial


7.  You can now decorate your card.  Choose some patterned paper (DSP)  and also cut two circles in white that are smaller than your original circle die for stamping.  Also cut 3 coordinating circles with the original larger circle die to act as matt layers.  One will  help to cover an miscut that you may have achieved, like me (oops!) on the front and inside of your flap section and the other goes behind my seagull image. 

8. Stamp and colour white circles before sticking onto your card.  

9.  I used Stampin' Write Markers to colour around my stamped images and add highlights.  Again in SAB you may want to join our team and benefit from the SAB offer of some bonus Stampin' Write Markers when you join along with £130 of stamping goodies for just £99 and free shipping. For more details please subscribe to my newsletter above to get all the information. 

submarine life stampin up front flip card


Do visit the other members of the Totally Techniques group for other ideas and videos and if you prefer inches you'll find them on some of the other's shares. 

Thanks for stopping by.

Keep stamping!
Zoe x

You are invited to the Inlinkz link party!

Click here to enter


Supply List

Subtles Stampin' Write Markers


Submarine Life stamp set


COMING SOON


From 3 December 2024


Wednesday, 15 February 2023

New at SU blog hop - Decorative Borders meet Kind and Sincere


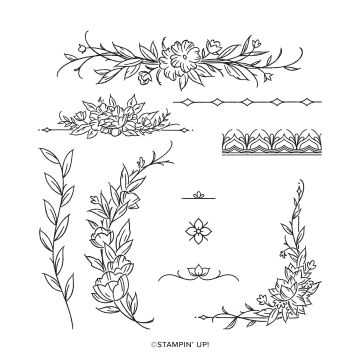
stepper card using stampin up decorative borders stamp set and alcohol blends


Hello and welcome to my blog and the New at SU blog hop. I've been away for quite a while now with things going on in family life that have made me take a step back for some months from crafting, but hopefully back and building up speed again now with this fun hop sharing cards using no white card and a bundle from our new spring catalogue. Many of the bundles were already chosen by the time I got my act together and so I've created a bundle using the Decorative Borders and Kind and Sincere stamp sets to create this simple stepper card and also add some #simplestamping.  

You can find lots of stepper cards to follow and I've gone with EU measurements.  

  1. card base 21 cm x 14.8 cm
  2. Score on the long side for 3cm at 3cm, 6cm and 13.4cm on both sides. 
  3. cut from the inside 3cm point of the 3cm score line right up to the 3cm inside point of the 13.4 cm line on both sides. 
  4. Score between the two cut lines at 10.5cm on the long side. 
  5. Fold the score lines to form mountain - valley  - mountain from the 3 cm score lines.
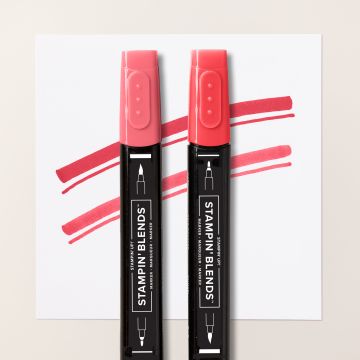
You can then decorate your card base how you wish. I've added a rectangle of card for the centre section which I have stamped on. This piece is 10cm x 8.2cm.  I've stamped on it with Tuxedo Black Memento ink so that I could then add some extra colour with my Stampin' Blends, alcohol markers.  I've also stamped part of the sentiment from the Kind and Sincere set on this piece and added a fussy cut 'Thanks' from the same set which I heat embossed using Versamark ink and white embossing powder.  

A sprinkling of pearls and some white ribbon finished this section which I adhered having once stamped some tone on tone ie yellow ink on yellow card designs from the Decorative Borders set.  

These cards always look more difficult than they are and can be very effective.  

I hope you enjoy the hop. 

thanks for stopping by and enjoy the hop.

Hugs Zoe x

Blog Hop Index


Supply List

decorative borders stamp set

Decorative Borders


Kind and Sincere stamp set text

Kind and Sincere


alcohol blends markers for colouring cardmaking

Alcohol markers

Stampin' Blends