My STAMPING PAPERCRAFT blog - Stamping Scene

Hello and welcome to my blog. I'm a paper craft addict and love sharing my passion for paper crafting . I run online and face to face card making, memory keeping and all sorts of 3D projects. I also sell many of the products I use. If you'd like more information do drop me an email. Thank you for visiting I hope to see you again soon. Zoe x
Showing posts with label stampin up demo blog. Show all posts

Thursday, 15 October 2020

Watercoloring on embossed image using Stampin' Up! So Much Love stamp set

watercoloring on embossed image with ink pads and water painters using stampin up set so much love
WOW I'm really chuffed how this random card turned out. I love it when you tinker and you end up with a card that you are so pleased with it, you want to send to yourself.   I will part with it of course, but I never thought I could watercolour, but with a bit of play, ink, water painters and kitchen towel you can do anything. The good thing is ONE SHEET IS PLENTY when it comes to the kitchen towel too!
The  layout of this card or perhaps you'd call it the fancy fold was taken from a beautiful swap that I received from team member Linda Gilbert at Linda's Craft Room.  I really liked her Forever Fern version and have done several using different stamps and colours, but this one I'm particularly fond of. 


watercoloring on heat embossed image happy birthday card


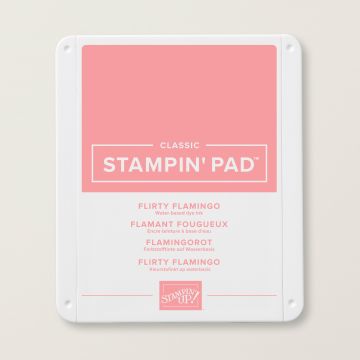
I've used a super cute simple stamp set called So Much Love and stamped partial images onto watercolour paper using Versamark ink, added white embossing powder and heated it.  Once cool I think used the pack of 3 water painters in the Stampin' Up! AC to take ink from the inside lid of Flirty Flamingo and Granny Apple Green ink pads to colour the images.  I find it easier to do if you use one brush to first add a watery layer to the part of the image you want to paint before adding ink with one of the other painters.  It helps the ink move around more freely and allows for novices like me to recover if there is too much or too little ink.  You can mop up over enthusiastic adds with the kitchen towel.  I moved around the image allowing parts to dry before going back to their neighbouring petals/leaves.  Once dry I went back to some parts like the flower buds to add more ink to deepen the colour.  

Linda used embossed card for the stripes down the sides of the bottom layer, but for this one I stamped on the inside of the base card before adhering the art work section.  

The sentiment I did in the same way, embossed it first then cut to size before watercoloring the background.   I love the additon of a simple bow in gold trim from the Forever Greenery trim pack. Just be sure to knot the end of the roll as it can fray easily. Here I wanted the ends to unravel but you can also add a knot to each end of the bow for a more formal finish. 

I also like to sometimes add some detail by stamping a partial image in the main colour on the inside of the card. 

I hope you like my watercolored card.  If you have any watercoloring tips please do share them in the comments. 

Thanks for visiting 

Keep safe and keep stamping 

Hugs Zoe x
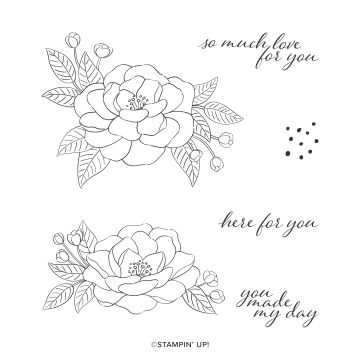


stampin up so much love stamp set


Forever Greenery Trim Stampin Up


stampin up water painters


flirty flamingo ink pad stampin up

Thursday, 12 October 2017

Autumn Creations for Moving Along with the Times

Painted Harvest from Stampin' Up! is just perfect for the theme chosen by me for Team As Moving Along with the Times challenge starting today. 

We'd love to see your designs with an autumn theme and you can see the rest of the design teams designs at MAWTT.  


These cards are all based on a simple design with slightly different 'tweaks' the ones below are smaller 9.9cm square cards that you can get 3 out of a sheet of A4 card.  


My favourite part is the copper trim bow.  The trim starts as a ribbon but once you've tied a bow you can 'tease' the threads apart to give it some body and more of a 3D appearance.  It can also be used to slide treats inside it.  

I hope you'll join us at MAWTT for this easy challenge with a wide open theme. 

Thanks for popping by.

Zoe x


Friday, 16 December 2016

Busy busy but so much fun


Stampin' Up! UK demonstrator Zoe Tant sharing set Greetings from Santa

Oh my it's been a busy busy time in this household.  I've for once got my Christmas cards made and am almost up to date with writing and posting.  I made the ones above in two colour ways some traditional and some not so.  I used the lovely Stampin' Up! set Greetings from Santa as I love this cute little tree and it's a super Merry Christmas stamp too! 
I've also been celebrating my recent success, proving that you are never too old to learn something new as I passed my Grade one cornet exam.  I was so nervous, but am oh so proud of myself and of course Charlie who passed his Grade 4 cornet.  I think he's safe though as I won't be catching him for the foreseeable future. 


I've also spent lots of time with lovely folk like this gentleman at the Woodhall Spa Welcome club where I invited members to make cards for the Stampin' Up! Christmas Cheer Challenge which asked demonstrators to organise events to make cards for families staying in the Ronald McDonald Houses this Christmas due to having a sick child in hospital some distance from their homes.  I also did the same stamping with my nephews and niece.

I have also been working on getting Christmas spirit in to George Clueknee who as you can see is taking his time on reaching 'smile' level.  He'll get there soon though I'm sure.

I'll be back with some more cards soon, but in the meantime I wish you fun in your preparations for the festive season.

Hugs Zx

Thanks for stopping by with Stampin' Up! UK Demonstrator Zoe Tant see you again soon.

SHOP ONLINE for STAMPIN UP HERE

Thursday, 18 February 2016

Moving along with the times - Words only


Stampin' Up!'s new set Enjoy the Little Things is perfect for using with the project kit of the same name, but today I've used one of the stamps to make my card for the Moving Along with the Times challenge set by my lovely blogland friend Christine.  In addition to Enjoy the Little Things, you'll see touches of Work of Art and Timeless Textures stamp sets, both Stampin' Up! and embellishments of Everyday Chic washi tape, silver thread and It's my Party enamel dots.  I also used the medium star  and confetti stars punches.  


Inside the card you can continue your stamping using Endless Birthday Wishes stamp set to add more  'words' and a smidge of decoration.  You could use any colour way for a card like this to suit the recipient, but I used Mint Macaron, Pool Party, Smoky Slate and archival basic black.

Do join in our challenge at MAWTT and go check out the other design team cards for more inspiration.


Coincidentally the confetti star border punch that I used for the mini stars is on special until next Tuesday.  You can order it online in my Stampin' Up! Shop.  Please use the link in the sidebar.

Wednesday, 5 August 2015

Stampin' Up! Reflection Technique Tip


It's Happy Birthday to our lovely neighbour Dawn today.  She loves her garden and so I've made a card using one of my favourite sets from the Stampin' Up! UK annual catalogue, From the Garden. 
It's such a cute set and perfect for anyone who enjoys their garden.  My friend Mikaela made a fab gift set for her friend's birthday recently and you can see it and find out more here on the Stampin' Up! website.  She bought the set especially to make a gift for her friend who's surname is Spice! 


You'll find that blackberry bliss and mint macaron work really well together from our Stampin'  Up! in colour ranges.  To give some depth to a card like this you can stamp twice in order that you can cut out the plant pots and add them over your original stamped image with stampin' dimensionals to give some depth.  I've also added some epoxy stickers to give more detail.  

I wanted to add the watering can from the stamp set, but wanted it the opposite way around so to do this I stamped the image onto my Stampin' Up Stamp-a-ma-jig imaging sheet and then carefully turned it over the add the ink that stays on the sheet to my card.  Hence you'll see it's a muted image but is just enough to be seen subtly on my card.


I've also stamped another sentiment inside the card which came from Butterfly Basics another current favourite of mine, along with the welly boots from the garden set.  
I've gift wrapped her present in the same colours so it makes a lovely combination.  

Happy Birthday Aunty Dawn as she's known in our house!

Remember you can visit my Stampin' Up! Online Shop to take a closer look at these beautiful stamp sets.

Thanks for stopping by and have a great day! 
Zx