My STAMPING PAPERCRAFT blog - Stamping Scene

Hello and welcome to my blog. I'm a paper craft addict and love sharing my passion for paper crafting . I run online and face to face card making, memory keeping and all sorts of 3D projects. I also sell many of the products I use. If you'd like more information do drop me an email. Thank you for visiting I hope to see you again soon. Zoe x
Showing posts with label stampin up christmas cards. Show all posts

Friday, 29 September 2023

Reverse Masking for simple but effective handmade card design

handmade christmas card showing reverse masking technique with stampin up rubber stamps uk zoe tant demo


Hi everyone hope you are all keeping well and welcome to the monthly Totally techniques Blog Hop.  This month we are sharing ideas and tips for the reverse masking technique.    

It's an easy one to do and you don't need many supplies.  This is how I created mine. 
handmade christmas card showing the reverse masking technique with zoe tant stampin up uk demo

I die cut a deckle edged rectangle and then used a decorative mask and blending brush to create a back drop for my design.  I added ink over the exposed area of card.  Leaving the mask in place I stamped the holly from Sending Cheer stamp set.  

I've added a sentiment which is stamped in red and gold embossing and then attached it to the debossed side of a dry embossed piece of green card.  It's an easy technique that you can add to or make even simpler with no bling or embossing.  

Have fun on the hop and we'll see you again soon. 

Zoe x

You are invited to the Inlinkz link party!

Click here to enter


Sunday, 14 February 2021

Blue Poinsettia's on a cold Sunday


poinsettia card using stampin up craft products

Oh boy it's been chilly here in Lincolnshire and was supposed to warm up a little this afternoon, but the wind is still howling and we have ice and snow still sitting around, but the stoves are lit and it's snuggly and I've joined the lovely crew of the Christmas Card Club with our fortnightly share.  I've gone for the Anything Goes option today and a blue frosty card to suit the day. 


I used a sponge brayer to colour the embossed background with Balmy Blue ink and then set about creating some beautiful Poinsettias by heat embossing the images in silver and using the dies to cut them and some foliage.  I stamped the sprigs and holly leaves in Misty Moonlight and used a blender pen to drag some of the ink across the berries and as you can see the holly leaves are stamped on Balmy Blue card. 

card making supplies from stampin up with zoe tant

I made it all sparkle with some silver foil card die cuts and if you look closely you can see I've added some Wink of Stella, and there are a handful of navy rhinestones too.  

Keep safe, warm and well and keep stamping. 

Hugs Zoe x

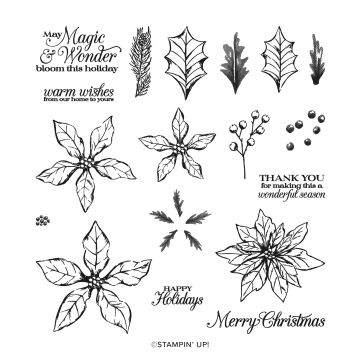
poinsettia petals stamp set

Poinsettia Petals Stamp Set


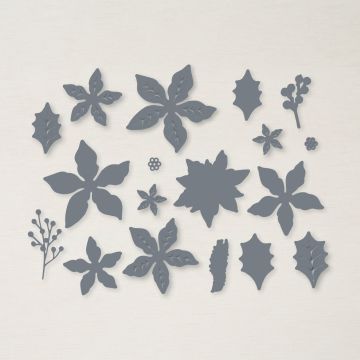
poinsettia dies stampin up card making

Poinsettia Dies


Sunday, 22 November 2020

Nature's Beauty Christmas Card

Nature's Beauty Christmas Card

 Welcome to our lovely selection of cards featuring deer for the Christmas Card Club challenge set by Gwen.  I was inspired by the very talented Tracy Evans and her recent use of a stencil to create a focal point on her card before adding stamping and fussy cut additions for this card.   I chose to create a circle stencil using a die and vellum and used my new blending brushes that will be available in the Stampin' Up! spring mini catalogue.  Whilst leaving my stencil in place once I have ink blended my green circle I added some water splatters that I left for a few seconds before drying with kitchen towel and then added more and sprinkled salt crystals ontop to also lift some of the colour. You need patience though to let it all dry, which I don't have sometimes as I'm too keen to move on, are you the same?  

Once all dry, in my case with a little help from kitchen paper and a heat tool I stamped the trees and the deer.  I stamped the deer also on a piece of scratch card and used a blender pen to move some of the ink from the stamped image around to colour the deer, but maintain the texturing created as part of the stamped image.  I fussy cut this second deer out carefully and removed much of the detail on the ground to give a little depth created only by adding the cut out image to the one on my circle using just glue dots for a little bit of height, but not too much.  

I also added the sentiment.  My artwork was created on shimmery white card stock so it has a little sparkle and of course this card stock works better than plain white which doesn't react too well with the water splattering.  I've added a narrow Early Espresso matt layer before adhering it all to my brushed copper foil card which I embossed using a new folder called Painted Texture that you will also see in the Spring Mini out soon.  

We have several friends in Australia and of course snowy scenes are not the best for Christmas cards and so this will be a perfect card to send down under.  

We've had some fab walks recently not least yesterday when we found a little sunshine and reached a bench for a quick photo stop, but as you can see our pup isn't one for sitting still. 


Hope you have a happy Sunday and are able to enjoy some fresh air and sunshine.  

Keep safe 

Zoe x

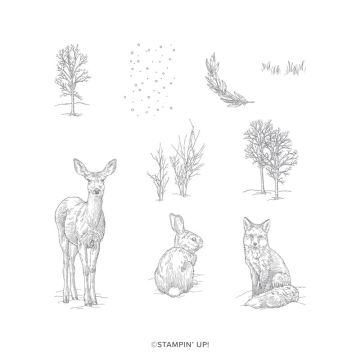
nature's beauty stampin up stamp set


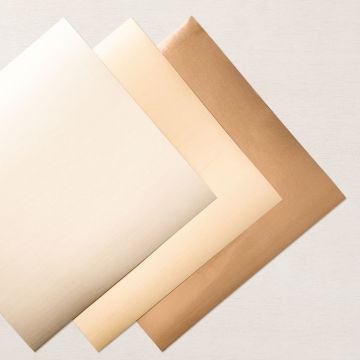
brushed metallic card stock for card making craft


blender pens for colouring stamping card making


November One Day Sale starts Monday 23 November at 11pm until 1050pm on Tuesday 24 November. 


Wednesday, 16 October 2019

Christmas Gleaming for a WOW bauble or two....

Stampin' Up! hit the bauble nail on the head with this beautiful stamp set called Christmas Gleaming. I've had lots of fun playing with it.

First of all I created a Brusho colour wash with Prussian Blue on shimmery white card.  I painted water onto the card and then added the Brusho powder and watched it explode.  I then used and aqua painter to move it around the card.  Once happy with the wash I allowed it to dry a little before using my heat gun to finish the drying process.  I then used Grey Granite ink to sponge on a design that faded out as it came off the colour wash.  I used one of the Basic Pattern Decorative masks from the Stampin' Up! winter catalogue to do this.  You can use a sponge or dauber either will work for this.  I also used added some Night of Navy splatter using my marker pen nib flicking it out of the lid.   The other splattering was done with watered down Tombow on the end of an aqua painter brush and then before it dried I added some Dazzling Diamonds glitter.  I left this to dry while I stamped the two ornaments/baubles from the stamp set in Versamark ink and  heat embossed with copper powder onto watercolour paper.  I used Merry Merlot ink from inside the ink pad lid and an aqua painter to first wet the paper and then add colour and drag it across each image to create some light/shade.  In between layers of ink I mopped off excess water with a paper towel and occasionally used my heat gun to dry.  Care is needed that you don't over heat the embossing.  I also dyed some white silver metallic trim ribbon in water and Merry Merlot ink in a small pot.  I left it overnight to sit and absorb the colour.  It dried really quickly pegged on the washing line in the breeze.  This was used for the bows.

Finally I stamped a sentiment from the set in Versamark and again heat embossed with copper powder.  I've added a layer of whisper white card and mounted the whole design and a thick whisper white card base.

I like the different colour scheme and ornaments really pop from the wash.  Although the ribbon isn't perhaps as dark as I might have wanted I was too impatient to finish the card.

Happy Wednesday all, half way to the weekend .

Hugs and thanks for popping by

Zoe x

Challenge Entry
Craft Stamper Take it Make it Challenge - Anything goes


Sunday, 12 May 2019

Christmas Card Club - Children at Christmas

Our lovely Kate, has chosen the theme of Christmas with children for us this fortnight. At first I was stumped but then remembered I had a stamp from a very long, long time ago that was this small boy excited about his Christmas gifts.  It is from my stash and not even sure where it came from. However it goes well with the Ready for Christmas Stampin' Up! set.  The sentiment is part of the set and is stamped in Poppy Parade with the flourish in Garden Green.  I used the tree and staircase to create a scene and having created a paper mask of the boy was able to stamp the tree and stairs before stamping the boy.  I did however stamp the boy again onto thick white card stock so that I could use my Stampin' Blends to colour him in.  I then fussy cut him out and I'm afraid I took off his arms and legs which he regained when I added the cut image over the top of the stamped one. It also helps to add a little depth doing this.  I found that my stamparatus helped enormously for stamping the stairs and tree and getting them in the right position.  I used 3 shades of green for the tree and added some silver pen, a gold foil star and red rhinestones for the Christmas treatment.  Turned out fine in the end for Kate's theme and after all you often hear folk say "Christmas is for the children". 

The Ready for Christmas stamp set is retiring at the end of this month along with many other Stampin' Up! sets from the annual and Spring/Summer catalogues. If you haven't bought your favourite stamp set yet be sure to check out the retiring products in my Stampin' Up! Shop. 

Thanks for popping by.

Zoe x


Sunday, 5 February 2017

Christmas Card Club - Stampin Up Holly Berry Festive Foliage


Another fortnight another Christmas Card Club challenge, but I've been really organised this week and have 3 to share with you.  Rachel set the challenge of Festive Foliage, all my cards use the Stampin' Up! retired set Holly Berry Happiness, but if you like Holly the punch is still available.  Above I've used the fabulous Stitched Shape dies and the Layering Circles which includes some scallop edged circles to create a focal point.  I used the 3 step stamping set to create the image and added a separately stamped bow which you can punch out easily.  Love the metallic enamel shapes for my bit of bling.  Do you ever stamp your envelopes too?


This card uses the same holly set with another sentiment from Tin of Tags set.  I've heat embossed the image with copper embossing powder and added night of navy holly berries.  A simple matting layer onto a base card also in night of navy card stock. 


A vintage version of card number 2 with the outline of the holly again embossed before I stamped in the leaf colour and berries.  A little smudging with a sponge around the edge of my base and matting layer of crumb cake with the same ink to soften the edges.  

A veritable trio of wreaths sharing plenty of festive foliage.

Have a great week.  Zx

Friday, 16 December 2016

Busy busy but so much fun


Stampin' Up! UK demonstrator Zoe Tant sharing set Greetings from Santa

Oh my it's been a busy busy time in this household.  I've for once got my Christmas cards made and am almost up to date with writing and posting.  I made the ones above in two colour ways some traditional and some not so.  I used the lovely Stampin' Up! set Greetings from Santa as I love this cute little tree and it's a super Merry Christmas stamp too! 
I've also been celebrating my recent success, proving that you are never too old to learn something new as I passed my Grade one cornet exam.  I was so nervous, but am oh so proud of myself and of course Charlie who passed his Grade 4 cornet.  I think he's safe though as I won't be catching him for the foreseeable future. 


I've also spent lots of time with lovely folk like this gentleman at the Woodhall Spa Welcome club where I invited members to make cards for the Stampin' Up! Christmas Cheer Challenge which asked demonstrators to organise events to make cards for families staying in the Ronald McDonald Houses this Christmas due to having a sick child in hospital some distance from their homes.  I also did the same stamping with my nephews and niece.

I have also been working on getting Christmas spirit in to George Clueknee who as you can see is taking his time on reaching 'smile' level.  He'll get there soon though I'm sure.

I'll be back with some more cards soon, but in the meantime I wish you fun in your preparations for the festive season.

Hugs Zx

Thanks for stopping by with Stampin' Up! UK Demonstrator Zoe Tant see you again soon.

SHOP ONLINE for STAMPIN UP HERE

Thursday, 20 October 2016

Stampin' Up! Forever Evergreen


I talked about this Stampin' Up!  Forever Evergreen stamp set in my Christmas Card Club post as I used one of the other sentiments from the set and also explained it coordinated with a super Christmas Tree making kit.

However today I've used it to add garlands of fir with some lovely ornaments hanging from them.  I used my blender pens to colour them in with ink from the lid of my ink pads.  It works best on watercolour paper, but if you are quick you can create a little shading on our whisper white card stock.  I used some Candy Cane Lane paper to add a border and machine sewed it all together.  The bows on the ornaments are done using the 'fork' bow technique using a plastic fork tee her!  The bakers twine is whisper white with a real red sparkle twist in it which is super for parcel wrapping and neat embellishments on cards.  It comes with a roll of this and straight real red twine too!

This stamp set is easily overlooked in the catalogue as it's under the Forever Evergreen tree kit and can't really be seen in the picture and there are no other card pictures to show you what you can do, but I think it is fab so do take a look on page 35 of the Stampin' Up! UK winter catalogue.

I'll share some more cards with this set soon.

Zx

Sunday, 7 August 2016

Christmas Card Club - Stampin' Up! Shaker Card


Just back from a fantastic family road trip in France primarily to visit Olivia's french exchange friend Zoe, and for us to meet her lovely parents Ghislaine and Mattieu.  This is us in Cahors by the unique 3 towered bridge, although the quick witted of you will see the photo is of only 2 towers! It seems ironic to be sharing Christmas cards with photos like the one above when the temperature reached 38C whilst we were there also when today at home too is by UK standards warm and sunny.  

As a result of a week of drinking wine, eating cheese and delicious Canard Magret and Fois Gras (when is France and all that...... it would be rude and foolish not to partake),  I'm late with my fortnightly Christmas Card Club challenge card which has most definitely proved to be a challenge. I have struggled to take a good picture for my card challenge set by  Margaret who asked us for a card with baubles and I thought I'd go for a simple shaker card, but it the picture doesn't show how pretty and delicate it is in real life.  


I've stamped in versamark and then added 'heat and stick' powder and heated it very gently before adding Stampin' Up! gold glitter to the snowflake from Holly Jolly Greetings and the border from Peace this Christmas both sets are in the annual catalogue. The shaker beads are from my stash and the bauble is hanging on gold thread wrapped around the card multiple times and a bow with the new natural trim ribbon with gold.


Now all that remains is the usual post holiday chores and whilst the sun shines I'm off to do more washing!!! Oh joy.  

Please do visit the other ladies in the club who have lots of great ideas for bauble inspired Christmas cards for you.

Enjoy the remainder of your weekend and have a great week.

Zx


Sunday, 15 May 2016

Christmas Card Club - Snowy Trees


It really does seem odd that I'm posting a Christmas card today when the sky is beautifully blue, the birds are singing and the spring flowers are bobbing gently in the breeze.  It's also my 50th birthday and so it's been a slow relaxing start. However it is Christmas card challenge and the theme of Snowy Trees was set by Christine who is also my teamie over at MAWTT.

I've case'd a card today from Tamara Bertram, but added a couple of my own touches including some of the new Stampin' Up! copper embossing powder which is just divine. I absolutely love it and you can see from my previous Stampin' Sneak Peek post that it is going to feature in the new Stampin' Up! catalogue more than once.


I've also used the large pine tree from Lovely as a Tree stamp set, the timeless classic set that so many of you adore, along with splatters from Timeless Textures.  I made a mask using a piece of copier paper and cut a rectangle from the centre using my Stampin' Trimmer.  Sponges work really well to add colour in gentle layers to build up a background in tip top taupe and the spatters and other texturing stamping was added in sahara sand ink.  I love the that the sentiment says 'Happy' and doesn't it look great in copper. It's a stamp from Oh What Fun which has carried over from the last AW catalogue.

You might have also noticed the gorgeous shade of blue card and ink.  It's called Dapper Denim and is one of the new 5 in colours arriving soon.  It's going to be great for masculine cards.

Wishing you a happy Sunday and week ahead and please wear a smile for the week to help me celebrate my half century.

More soon. Zx

Sunday, 1 May 2016

Christmas Card Club - Poinsettias or Angels

Oh I don't know about you, but this last week or so we've gone into hibernation.  It's been so cold and what with snow and frost the log fires have been burning in our home.  At last though a few signs of Spring are returning and once again the sun is shining here in Lincolnshire this morning.  However that didn't stop us having a Sunday lie in.  Our plan if the weather holds is to play tennis later and walk the dog, so the slow start was fair don't you think!

Our Christmas card club challenge was set this fortnight by Mary who asked for us to use Poinsettias or Angels. I went for my trusty retired stamp set with these fabulous holly berry sprigs and the gorgeous water colour style Poinsettia.

I started with vanilla card and stamped in tip top taupe using the fabulous texture set from Stampin' Up! Timeless Textures to set up a subtle background with just basic stamping.  There's a neat little stamp with spatters that just added a little 'vintage' style and i also used my gold Wink of Stella pen on this stamp to add just the smallest amount of sparkle.  You might just catch it in the picture.  This ties in with the gold heat embossed outline of the flower and the gold foil matting layer.

The remainder of the flower was stamped with cherry cobbler ink in a two step stamping process and the holly i stamped in archival black ink and then used ink from the ink pad lids of always artichoke and cherry cobbler with a blender pen to add colour.  It allows you to add different depths of colour for a little shading if you wish.

Finally a sentiment from Good Greetings which was a freebie a season or so ago.

I hope Sunday is going well for you and wish you a sunshine week.

More soon.
Zx

Timeless Textures
140514
£25/€34 
wood mount
As this is a set that you will mix and match the textures and many of the stamps use the same size block I'd advise a purchase of wood mount so that you can pick them up easily and use without having to change block every minute.
You can find it along with ink pads, card stock and gold foil card in my online shop by clicking on the stamp set.


Sunday, 17 April 2016

Christmas Card Club with Stampin Up Gorgeous Grunge

Stampin Up Gorgeous Grunge makes a fun Christmas Card Wreath

I promised this morning I'd be back with another quick post. I'm a little later than planned as I was late home from Onstage 2016 at Telford and was happy, but shattered and so slept in.  My earlier post was scheduled.
 Our day was so much fun yesterday.  I travelled over on Friday with some friends and we stayed once again in the most delightful B&B.  On arrival, we sat in the victorian sitting room with its roaring log fire, drank tea and ate homemade scones, strawberry cake and for those that liked walnut and coffee cake there was some of that too.  I was ready to curl up and snooze then, but headed out to the CentreStage event laid on by Stampin' Up! for senior managers.  We had a short presentation and then a delicious meal and we received a gorgeous back pack which is the same colour as a new colour coming in soon. I will share a pic tomorrow as I'm not allowed just yet.  I can share some of the fun at the event though.


Table I sat at were awarded some balloons as a bit of fun. So here is me before I took them back to our B&B for my friend Mikaela's little boy to find when he woke up the next morning.  He's only 5 and I'm sure he loved the outgoing in colour balloons!  
The tables were beautifully laid also and decorated with these stunning flowers. 

Yesterday at the actual Onstage Event we were given a copy of the new Stampin Up 2016 - 2017 catalogue and you can almost see it here as my bestie Emily received hers!  Sorry to tease, but we can't quite show it all just yet.


Now my card for  this fortnight's Christmas Card Challenge.  Our challenger this time is Valery who set the theme of Red Berries.  I've created a fun, modern wreath card and used real red candy dots for my berries.  I stamped around in a rough circle using one of the stamps from Gorgeous Grunge in garden green ink, added the berries and also cut a red foil card bow using a die from The Wonderful Wreath Framelits.  There is also the inevitable bling of some tiny rhinestones for added sparkle.

Don't forget to visit the others in our challenge who have some great inspiration for Red Berries.

More soon.
Zx