My STAMPING PAPERCRAFT blog - Stamping Scene

Hello and welcome to my blog. I'm a paper craft addict and love sharing my passion for paper crafting . I run online and face to face card making, memory keeping and all sorts of 3D projects. I also sell many of the products I use. If you'd like more information do drop me an email. Thank you for visiting I hope to see you again soon. Zoe x
Showing posts with label nature's beauty stampin up. Show all posts

Thursday, 1 April 2021

Join our April challenge.

nature hand made card with rabbit from Nature's Beauty stampin up with zoe tant

 Over at MAWTT this month we are sharing cards with birds and or animals on them.  I couldn't resist using this sweet rabbit from the Nature's Beauty stamp set along with some pretty flowers from Sweet Strawberry stamp set.  It seemed appropriate with the challenge starting as the Easter weekend is upon us. Happy Easter all let's hope the weather is kind.  

I stamped the rabbit in Grey Granite ink onto a die cut stitched circle and then stamped again on an off cut of card so that I could fussy cut out the body to then decoupage it onto the one stamped on the circle to add some depth.  I've added flowers and leaves stamped with Pear Pizzazz, Soft Sea Foam, Grey Granite and Blushing Bride.  The Sweet Strawberry is a two step stamp set which makes it easy to have a bolder outline of an image and then stamp the fill in colour.  

I added some score lines for detail scoring on the reverse of the design layer and some marker pen spots.  

A simple card for Spring.  We've got lots of seeds planted in trays and are hopeful for a good crop from our garden this year.  It's great to get the whole family involved and we loved it last year. 

Please do join in the challenge over at Moving Along with the Times. You can find it HERE. 

Keep safe and enjoy the long weekend 

Hugs Zoe x


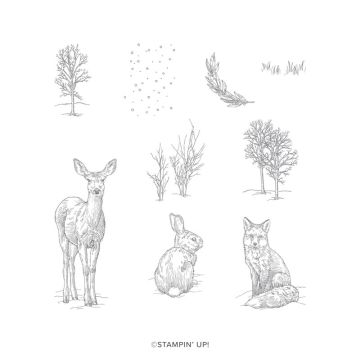
Nature's Beauty Stamp Set

Nature's Beauty


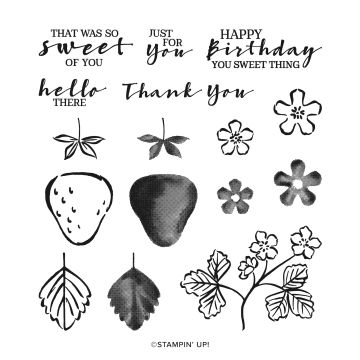
sweet strawberry stamp set stampin up with zoe tant demo uk

Sweet Strawberry 


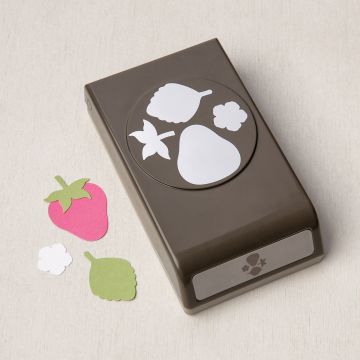
strawberry builder punch for paper craft

Strawberry Builder Punch


SHOP ALL PRODUCTS

Sunday, 22 November 2020

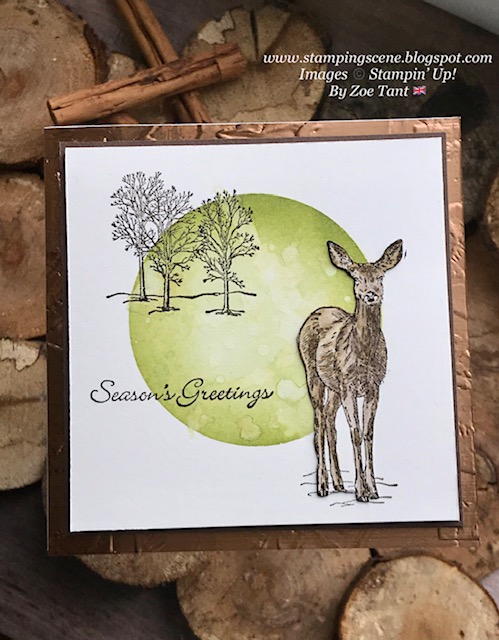
Nature's Beauty Christmas Card

Nature's Beauty Christmas Card

 Welcome to our lovely selection of cards featuring deer for the Christmas Card Club challenge set by Gwen.  I was inspired by the very talented Tracy Evans and her recent use of a stencil to create a focal point on her card before adding stamping and fussy cut additions for this card.   I chose to create a circle stencil using a die and vellum and used my new blending brushes that will be available in the Stampin' Up! spring mini catalogue.  Whilst leaving my stencil in place once I have ink blended my green circle I added some water splatters that I left for a few seconds before drying with kitchen towel and then added more and sprinkled salt crystals ontop to also lift some of the colour. You need patience though to let it all dry, which I don't have sometimes as I'm too keen to move on, are you the same?  

Once all dry, in my case with a little help from kitchen paper and a heat tool I stamped the trees and the deer.  I stamped the deer also on a piece of scratch card and used a blender pen to move some of the ink from the stamped image around to colour the deer, but maintain the texturing created as part of the stamped image.  I fussy cut this second deer out carefully and removed much of the detail on the ground to give a little depth created only by adding the cut out image to the one on my circle using just glue dots for a little bit of height, but not too much.  

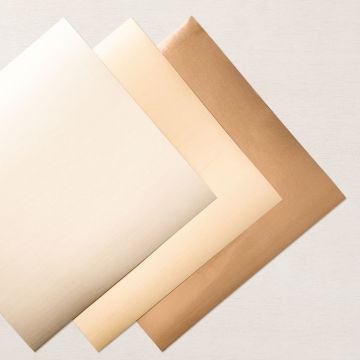
I also added the sentiment.  My artwork was created on shimmery white card stock so it has a little sparkle and of course this card stock works better than plain white which doesn't react too well with the water splattering.  I've added a narrow Early Espresso matt layer before adhering it all to my brushed copper foil card which I embossed using a new folder called Painted Texture that you will also see in the Spring Mini out soon.  

We have several friends in Australia and of course snowy scenes are not the best for Christmas cards and so this will be a perfect card to send down under.  

We've had some fab walks recently not least yesterday when we found a little sunshine and reached a bench for a quick photo stop, but as you can see our pup isn't one for sitting still. 


Hope you have a happy Sunday and are able to enjoy some fresh air and sunshine.  

Keep safe 

Zoe x

nature's beauty stampin up stamp set


brushed metallic card stock for card making craft


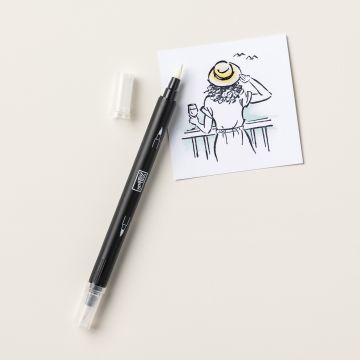
blender pens for colouring stamping card making


November One Day Sale starts Monday 23 November at 11pm until 1050pm on Tuesday 24 November. 


Sunday, 12 April 2020

Happy Easter

I do wish you greetings for the Easter season, but I'm actually sharing a Christmas card with you today as it turns out to be our next fortnights share for the Christmas card club.  our them this time is Christmas Critters and so I used the utterly stunning Nature's Beauty stamp set that was featured in the Stampin' Up! Winter mini, but it is has carried over and I'm pleased to say is still raising money for mental heath charities with £2 from the sale of each set being given to charity.  Do get in touch if you'd like to support.  Many are really struggling with the challenge of COVID 19 and so any help we can give is great.

So my card is very simple.  I used the leaf stamp from the same set to heat emboss a silver design around the edge of a piece of Purple Posy card and then used a dauber to blend some ink over it to deepen the colour.  I stuck this onto a DL size card base to one side and then added a simply stamped sentiment which is punched out with the classic label punch.

The beautiful background that the rabbit sits on is a piece of Feels Like Frost designer series paper. This paper was tremendously poplar for last Christmas and will return again later in the year. It makes for easy cards with little needed as you can see to create a scene for a Christmas Critter!

To give some depth to the rabbit I first stamped him onto the paper with memento black ink and coloured him using my alcohol blends markers.  I then stamped it again on thick white card, coloured and fussy cut out the body and the front ear.  I then adhered those to the one on the paper using mini glue dots to raise it a little but not too much to create a little 3D effect.

Do visit the other ladies in our club to get some inspo for Christmas cards.  Now you have time to make them you can stock up on supplies in my Stampin' Up! Online Shop.

Happy Easter to all and I hope you've not eaten too much chocolate.

Zoe x


Friday, 27 September 2019

The Chalkboard Papercraft Technique - Do you know it?

Stampin' Up! demonstrators share the Chalk Board Technique tutorial 


I'm sharing the Chalkboard Technique today.  It's a fun and easy process and you don't need to be an expert papercraft technician to achieve some great results.   It's our theme set by Annette Elias our dutch demonstrator for the Totally Techniques Blog Hop this month.  

I've used Stampin' Up! sets Nature's Beauty,  Cup of Cheer dies that match the Cup of Christmas stamp set and also one of the two reward stamp sets from the Winter catalogue that you can earn with a qualifying spend.  It's called Greatest Part of Christmas and is a sentiment set perfect for the European market as well as the wider Stampin' Up! population.  
My first card above was simply done by positioning all but two of the sentiments from the Greatest Part of Christmas.  Firstly I swept, patted and smudged my embossing buddy across a piece of black card.  If you've not come across the embossing buddy before it's a little fabric pouch filled with powdery stuff or FU FU dust as we used to call it when I was in the Royal Navy.  It helps to stop excess embossing powder from sticking to your project where you don't want it as the natural oils in your skin leave mini  marks just by handling the card and the embossing powder has a habit of sticking to them.  The FU FU removes this and helps to just get embossing powder on the stamped image only.   

OK so now you know all about FU FU I can tell you that I patted it across the card to give the impression of chalk dust!  I then positioned my piece of card onto my Stamparatus (stamp positioning tool) to place the clean stamps face down to get them where I wanted and so that I could pick them up with the stamping plate of the tool.  The picture below shows this.   You might think ooh her card is too short, but I took the photo with a scrap after I'd finished the card.  By putting the stamps in place like this they will all stamp together and if a section wasn't ink well enough I can revisit it and improve the intensity of the images by adding more ink and placing the stamps down on the card again. 
Once the images were stamped I used a sponge to gently smudge the ink again to enhance the chalk dust look.  I added white baker's twine to the background before sticking this piece onto a piece of whisper white card with Stampin' dimensionals.  I added two candy canes decorated with holly and berries, all cut using the Stampin' Up! Cup of Cheer dies.  I raised the top cane using some of the new black Stampin' dimensionals from the Halloween section in the winter catalogue.  They are great for a project like this as they don't show on black or darker card if they peep out around the sides.  Some red rhinestones add an extra bit of sparkle.  


My second card was just as simple.  I cut a stitched label and used the embossing buddy again and then stamped the fox from the awesome Charity stamp set Nature's Beauty.  Stampin' Up! are donating £2.50 from the sale of every set to Mental Health UK so you get a fab stamp set and also donate to a good cause at the same time. 

One of the images is a super fox and I   stamped him with Versamark, added white embossing powder then heated it.  I then used the snow stamp from the same set and stamped around the fox with craft white pigment ink. I smudged it with the sponge and added a little more ink at the bottom to create the effect of the ground.  Before sticking it onto the matt layer I stamped in black ink the twiggy bushes across the layer and added the sentiment.  


To finish I added two frosted epoxy droplets and matted the whole project onto a thick white card base.  

As I said a very simple but effective technique and you can see a quick 2 minute video from the Stampin' Up! team HERE that shows these different effects. 

You can also see some more inspiration from all the other lovely global demonstrators on our blog hop by clicking on each thumbnail picture below.  

Thanks for stopping by and see you soon.

Zoe x


You are invited to the Inlinkz link party!

Click here to enter