My STAMPING PAPERCRAFT blog - Stamping Scene

Hello and welcome to my blog. I'm a paper craft addict and love sharing my passion for paper crafting . I run online and face to face card making, memory keeping and all sorts of 3D projects. I also sell many of the products I use. If you'd like more information do drop me an email. Thank you for visiting I hope to see you again soon. Zoe x
Showing posts with label card making tutorial. Show all posts

Friday, 27 August 2021

Stampin' Totally Techniques Blog Hop - watercoloring


watercoloring tips technique blog hop stampin up seasons of joy stamp set

stampin up totally techniques blog hop with uk demo zoe tant

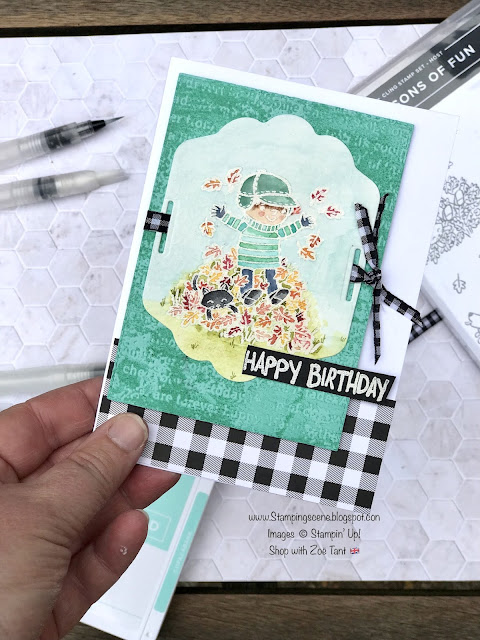
Welcome once again to the Totally Techniques Stampin' Up! international demonstrator blog hop. Kelly Acheson chose our watercoloring technique for this month and I've had fun with this super cute image from the set called Seasons of Joy in the Stampin' Up! winter catalogue.  It's a free set when you place a qualifying order, host a party online or in person or just gather orders with friends and submit together.  

I stamped my image onto Fluid 100 water colour paper using a Whisper White pigment ink pad.  I then added white embossing powder before heating.  

To reduce any curling of the paper I used the largest brush first of all to paint water front and back over the paper.  They say if you do the same to the front as the back it will help with this and the same goes for heat embossing. I usually start on the underside/back of the card to reduce the chance of blowing powder off my image before it melts.  


Using the same brush I added some Soft Sea Foam ink to the image to create a background around and on the leaves.  Each time I added colour I used my heat tool to dry the ink. Occasionally your paint brush may download more watery ink than you want so a piece of kitchen paper is handy too.  I then went back in to add the different colours to the leaves occasionally starting with the lighter colour before adding the slightest amount of a darker colour for them to blend.  I dried off sections as I went and then returned to add more colour if needed.  I took the ink from the inside lid of the ink pads I used.  

I found the hands weren't so easy on this cute chap and so put gloves on instead to match his trousers lol! The cat had several layers of ink to build up the colour so that he was visible playing in the leaves.  By embossing the image it is more forgiving than perhaps no line watercoloring but can leave you with very small gaps to add any ink.  

As I dried each section I could return with more ink and the finishing touch was to add with a marker some additional grass blades for a little depth. I didn't do this until the whole piece was well and truly dry. 
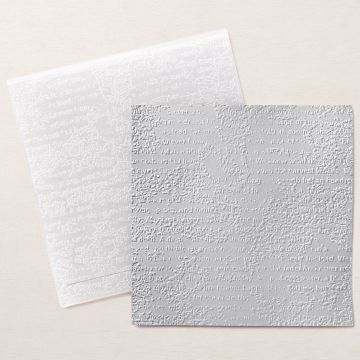
Once finished I used the largest brush to add a watery wash of blue and green before drying and die cutting.  I then added a piece of Coastal Cabana card which I embossed with ink on the Timeworn Type 3D embossing folder.  

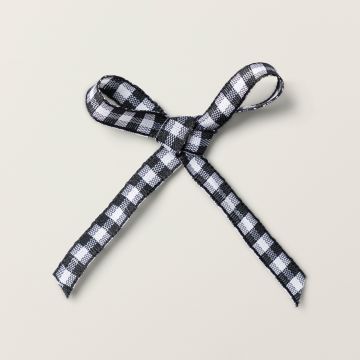
 A simply embossed sentiment, with ribbon and coordinating paper was the finishing touch. 

The colours used included Tuxedo Black Memento ink, white craft, Cajun Craze, Mango Melody, Calypso Coral, Old Olive, Soft Sea Foam, Misty Moonlight, Bermuda Bay, Coastal Cabana, Just Jade and Cherry Cobbler. 

Enjoy the hop.

Keep safe and keep stamping 
Zoe x

You are invited to the Inlinkz link party!

Click here to enter


Join the team and share the fun
Contact me for details 


stampin up seasons of joy stamp set

free stamp set with qualifying purchase

ink pads for rubber stamping lots of colours


Timeworn Type 3D embossing folder


black and white gingham ribbon for craft


Wednesday, 5 May 2021

More ideas with babywipe technique for paper crafters


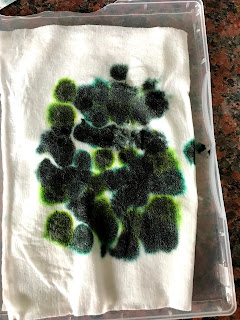
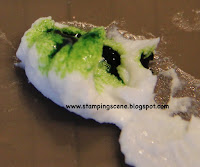
 At the weekend I joined the Totally Techniques International blog team to share with you lots of ideas for the baby wipe technique.  I have an 'after' product for you today.  To recap you need to add drops of ink from a few re inkers onto a folded baby wipe which you place on a non porous surface. I find that a stamp case works well and i keep the occasional broken one, (usually the I've trodden on it or the dog might have  tasted a corner) especially for this technique and others like shaving foam etc.  

baby wipe technique ink on baby wipe zoe tant

Next step is to use it as a multicoloured ink pad. 

And stamp multicoloured images as you can see in my last Stampingscene post to create a beautiful background or stamped images that can be die cut and used as a focal point. 

You will want to have plenty of card ready for this as you can create lots from one wipe and keep them for other projects.  However as the ink spreads through the wet wipe the colours merge and so you can get extra use from it depending a little upon the colours as it can end up not quite so pretty.  I firstly added a laser cut sheet from the Dandy Laser-cut paper to the homemade ink pad and then used an old brayer to run over the sheet.  It pushes the paper into the ink and creates a multi-coloured laser cut piece. 
dandy laser cut papers on homemade ink pad

As I type this one is currently drying on a window sill.  I will use this as a background for another card.  You can then also see that the brayer has some ink on it and has also silhouetted some of the dragonflies where the brayer didn't hit the inky wipe.  I've used this on another piece of white card and will again use for another card. 
Finally I have also once the dragonfly laser sheet was removed repeated this action a few times to create sheets that I can die cut images out of or use as a background.  I store these in plastic wallets and can use as and when and in the case of my card I'm sharing today.  I used the Quiet Meadow Bundle in the new Stampin' Up! annual catalogue to die cut some of the images to create such a card.  

Tip for the butterfly as it cuts it as though it is wings closed.  Cut one piece with your inked background uppermost and then cut with it on the un inked side to get an opened winged butterfly. 

The stamps from the bundle add some simple stamping and some retired enamel dots finish the piece along with the end of the label die in the bundle tucked underneath the layers.  This is a great way to use up off cuts or minor mistakes on a shifting die through your die cutting machine.  

I used the colours Granny Apple Green, Just Jade, So Succulent and Evening Evergreen.  You can see all the colours and bundles in our new catalogue online on my website or contact me to arrange for your own paper copy to browse and enjoy full of lovely products but also lots of project inspiration.  

Thanks for dropping by, keep safe and keep stamping 

hugs Zoe x

stampin up quiet meadow bundle

Evening Evergreen Re-inker stampin up with zoe tant
Evening Evergreen Re-inker 


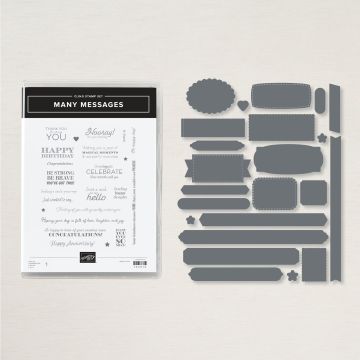
many messages bundle stampin up with zoe tant

Friday, 27 September 2019

The Chalkboard Papercraft Technique - Do you know it?

Stampin' Up! demonstrators share the Chalk Board Technique tutorial 


I'm sharing the Chalkboard Technique today.  It's a fun and easy process and you don't need to be an expert papercraft technician to achieve some great results.   It's our theme set by Annette Elias our dutch demonstrator for the Totally Techniques Blog Hop this month.  

I've used Stampin' Up! sets Nature's Beauty,  Cup of Cheer dies that match the Cup of Christmas stamp set and also one of the two reward stamp sets from the Winter catalogue that you can earn with a qualifying spend.  It's called Greatest Part of Christmas and is a sentiment set perfect for the European market as well as the wider Stampin' Up! population.  
My first card above was simply done by positioning all but two of the sentiments from the Greatest Part of Christmas.  Firstly I swept, patted and smudged my embossing buddy across a piece of black card.  If you've not come across the embossing buddy before it's a little fabric pouch filled with powdery stuff or FU FU dust as we used to call it when I was in the Royal Navy.  It helps to stop excess embossing powder from sticking to your project where you don't want it as the natural oils in your skin leave mini  marks just by handling the card and the embossing powder has a habit of sticking to them.  The FU FU removes this and helps to just get embossing powder on the stamped image only.   

OK so now you know all about FU FU I can tell you that I patted it across the card to give the impression of chalk dust!  I then positioned my piece of card onto my Stamparatus (stamp positioning tool) to place the clean stamps face down to get them where I wanted and so that I could pick them up with the stamping plate of the tool.  The picture below shows this.   You might think ooh her card is too short, but I took the photo with a scrap after I'd finished the card.  By putting the stamps in place like this they will all stamp together and if a section wasn't ink well enough I can revisit it and improve the intensity of the images by adding more ink and placing the stamps down on the card again. 
Once the images were stamped I used a sponge to gently smudge the ink again to enhance the chalk dust look.  I added white baker's twine to the background before sticking this piece onto a piece of whisper white card with Stampin' dimensionals.  I added two candy canes decorated with holly and berries, all cut using the Stampin' Up! Cup of Cheer dies.  I raised the top cane using some of the new black Stampin' dimensionals from the Halloween section in the winter catalogue.  They are great for a project like this as they don't show on black or darker card if they peep out around the sides.  Some red rhinestones add an extra bit of sparkle.  


My second card was just as simple.  I cut a stitched label and used the embossing buddy again and then stamped the fox from the awesome Charity stamp set Nature's Beauty.  Stampin' Up! are donating £2.50 from the sale of every set to Mental Health UK so you get a fab stamp set and also donate to a good cause at the same time. 

One of the images is a super fox and I   stamped him with Versamark, added white embossing powder then heated it.  I then used the snow stamp from the same set and stamped around the fox with craft white pigment ink. I smudged it with the sponge and added a little more ink at the bottom to create the effect of the ground.  Before sticking it onto the matt layer I stamped in black ink the twiggy bushes across the layer and added the sentiment.  


To finish I added two frosted epoxy droplets and matted the whole project onto a thick white card base.  

As I said a very simple but effective technique and you can see a quick 2 minute video from the Stampin' Up! team HERE that shows these different effects. 

You can also see some more inspiration from all the other lovely global demonstrators on our blog hop by clicking on each thumbnail picture below.  

Thanks for stopping by and see you soon.

Zoe x


You are invited to the Inlinkz link party!

Click here to enter

Friday, 27 October 2017

Totally Techniques Blog Hop - Embossing Paste Tutorial


Our Totally Techniques blog hop is sharing fun projects using Stampin Up embossing paste this month.  This is a card from a  recent Card Club class where we used the paste to make several fun cards and textures.  

I love the hot air balloon die from Up and Away thinlets and with the individual dies included to cut different back ground coloured pieces you can make some gorgeous balloons in any colour way you wish.  Here I've used bermuda bay, calypso coral and lemon lime twist.  

To add the paste is easy.  

1.  Put a small amount of paste onto a silicon mat using one of the set of three palette knives. 


2. Add some ink from a re inker bottle - JUST ONE DROP to start with. 

 3. Mix it in using the palette knife.
 4. Put your card stock underneath a mask and temporarily adhere the mask to your work space with painters masking tape and carefully spread the coloured paste where you want it to go, spreading it gently through the mask.
5. Once you have put all you want onto the piece carefully remove the masking tape and lift the mask.  Allow the paste to dry before carrying on with your project. 

To finish my card I added different matting layers and stamped a sentiment from the Stampin Up hostess set In the City and added some enamel stars and ribbon.

A bright, cheerful card that would suit girls and boys alike.

You can see another card we created using the paste at my card club with Stampin Up Lovely as a Tree.

Have fun on the hop and thanks for stopping by here.


4. Zoe Tant   That's me here in the UK