My STAMPING PAPERCRAFT blog - Stamping Scene

Hello and welcome to my blog. I'm a paper craft addict and love sharing my passion for paper crafting . I run online and face to face card making, memory keeping and all sorts of 3D projects. I also sell many of the products I use. If you'd like more information do drop me an email. Thank you for visiting I hope to see you again soon. Zoe x
Showing posts with label lincolnshire crafter. Show all posts

Friday, 26 April 2024

How to do mirror stamping - Totally Techniques Blog Hop


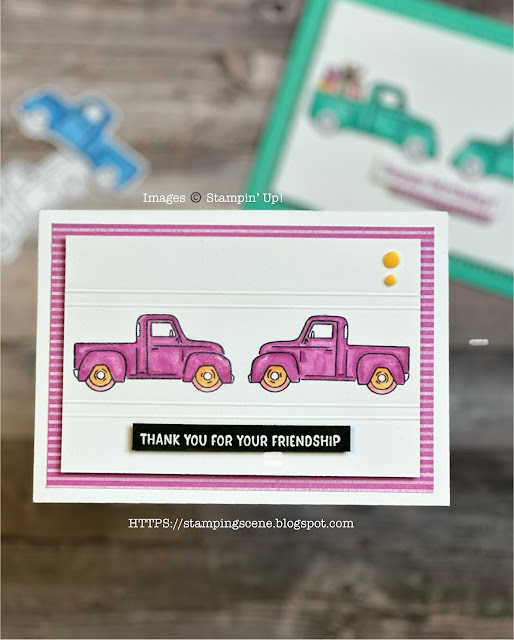
friendship handmade card with Trucking Along Stampin Up stamp set

 
totally techniques blog hop sign

Welcome crafty friends have you ever wanted to reverse an image or mirror it to create one image looking at the same but in reverse?  Here is one way and you'll find others on our global Stampin' Up! demonstrator blog hop. 

I've used the online exclusive stamp set Trucking Along with some of our new In Colors which are launching on 1 May.  

All you need is a silicon mat, black ink, white card and an outline stamp to get started.  The video will show you how to create simple cards like mine with the same image reversed or mirrored.  I've added detailing to the above and below cards by using the scoring tool on my trimmer or you could use a scoring board. Flip your design face down so that you score on the reverse to 'push' the card up or emboss it on the front.  

For more detailing you can add mini pennants with offcuts of your papers and coordinating embellishments.  With Stampin' Up!'s colour coordination through ink, paper, card and gems it is easy to create a coordinating design.  I love the new In Color resin dots perfect for simple additions on handmade cards like this. 

I also used Stampin' Blends, alcohol markers in coordinating colours to colour my images.  I chose not to mirror the truck contents because getting them stamped into exactly the right spot would make it tricky , but of course you could fussy cut to add them once you have done the mirror technique in my video. 


handmade card using the mirror stamping technique

Thanks for stopping by and below are the supplies I used and the links to the other wonderful stampers in the Totally Techniques Blog Hop Team. 
Hugs all Zoe x

You are invited to the Inlinkz link party!

Click here to enter


Supply List


Friday, 27 August 2021

Stampin' Totally Techniques Blog Hop - watercoloring


watercoloring tips technique blog hop stampin up seasons of joy stamp set

stampin up totally techniques blog hop with uk demo zoe tant

Welcome once again to the Totally Techniques Stampin' Up! international demonstrator blog hop. Kelly Acheson chose our watercoloring technique for this month and I've had fun with this super cute image from the set called Seasons of Joy in the Stampin' Up! winter catalogue.  It's a free set when you place a qualifying order, host a party online or in person or just gather orders with friends and submit together.  

I stamped my image onto Fluid 100 water colour paper using a Whisper White pigment ink pad.  I then added white embossing powder before heating.  

To reduce any curling of the paper I used the largest brush first of all to paint water front and back over the paper.  They say if you do the same to the front as the back it will help with this and the same goes for heat embossing. I usually start on the underside/back of the card to reduce the chance of blowing powder off my image before it melts.  


Using the same brush I added some Soft Sea Foam ink to the image to create a background around and on the leaves.  Each time I added colour I used my heat tool to dry the ink. Occasionally your paint brush may download more watery ink than you want so a piece of kitchen paper is handy too.  I then went back in to add the different colours to the leaves occasionally starting with the lighter colour before adding the slightest amount of a darker colour for them to blend.  I dried off sections as I went and then returned to add more colour if needed.  I took the ink from the inside lid of the ink pads I used.  

I found the hands weren't so easy on this cute chap and so put gloves on instead to match his trousers lol! The cat had several layers of ink to build up the colour so that he was visible playing in the leaves.  By embossing the image it is more forgiving than perhaps no line watercoloring but can leave you with very small gaps to add any ink.  

As I dried each section I could return with more ink and the finishing touch was to add with a marker some additional grass blades for a little depth. I didn't do this until the whole piece was well and truly dry. 
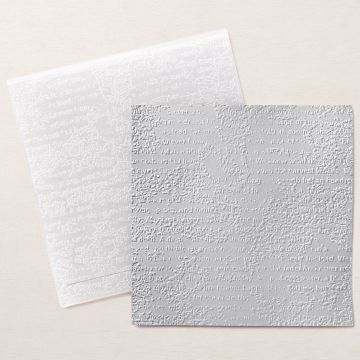
Once finished I used the largest brush to add a watery wash of blue and green before drying and die cutting.  I then added a piece of Coastal Cabana card which I embossed with ink on the Timeworn Type 3D embossing folder.  

 A simply embossed sentiment, with ribbon and coordinating paper was the finishing touch. 

The colours used included Tuxedo Black Memento ink, white craft, Cajun Craze, Mango Melody, Calypso Coral, Old Olive, Soft Sea Foam, Misty Moonlight, Bermuda Bay, Coastal Cabana, Just Jade and Cherry Cobbler. 

Enjoy the hop.

Keep safe and keep stamping 
Zoe x

You are invited to the Inlinkz link party!

Click here to enter


Join the team and share the fun
Contact me for details 


stampin up seasons of joy stamp set

free stamp set with qualifying purchase

ink pads for rubber stamping lots of colours


Timeworn Type 3D embossing folder


black and white gingham ribbon for craft


Tuesday, 6 October 2020

Simple Ideas for using Stampin' Up! designer series papers from the Tantalizing Stampers

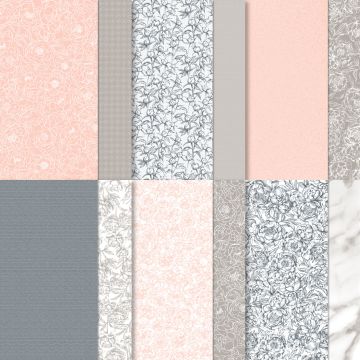
ideas for using stampin up peony garden dsp

tantalising stampers DSP ideas for Stampin Up October 2020 discount packs

Starting today and each Tuesday this October the Tantalizing Stampers are going to share some simple, fun ideas using the Designer Series Papers (DSP) that are on special offer this month. 

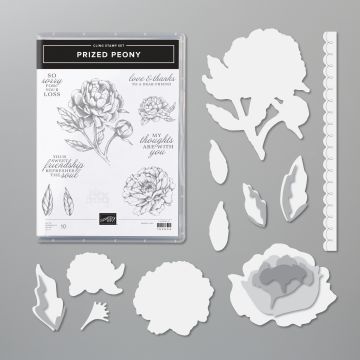
Today I've used the Peony Garden DSP and Peony dies to make a card that you can keep in your 'made cards' box and add just the right sentiment when you need it.  

The Peony Garden papers include the colours Basic Gray, Gray Granite, Petal Pink and Whisper White.  Here I've added a border using the dies and Soft Sea Foam card stock along with some Elegant Faceted Gems that are part of the Garden Peony Suite of products in the Stampin' Up! AC.  

I used a strip of DSP 7.5 x 14.3 cm adhered to a C6 white card base.  I've also die cut a white Peony and added some sponging in Petal Pink ink along with some Soft Sea Foam leaves which are fun because you can die cut detail pieces that you can sponge and give depth and definition to with some tone on tone ink sponging.  

Very easy to do and that gorgeous die cut flower says everything on it's own.  Although I do love the sparkly gems too.  

Do pop around the hop via the pictures below to see what the rest of the team have done with some of our October special offer papers.  

Happy Tuesday all, 

Hugs Zoe x

peony garden dsp


peony garden bundle


elegant faceted gems petal pink clear white stampin up uk


You are invited to the Inlinkz link party!

Click here to enter

Friday, 27 September 2019

The Chalkboard Papercraft Technique - Do you know it?

Stampin' Up! demonstrators share the Chalk Board Technique tutorial 


I'm sharing the Chalkboard Technique today.  It's a fun and easy process and you don't need to be an expert papercraft technician to achieve some great results.   It's our theme set by Annette Elias our dutch demonstrator for the Totally Techniques Blog Hop this month.  

I've used Stampin' Up! sets Nature's Beauty,  Cup of Cheer dies that match the Cup of Christmas stamp set and also one of the two reward stamp sets from the Winter catalogue that you can earn with a qualifying spend.  It's called Greatest Part of Christmas and is a sentiment set perfect for the European market as well as the wider Stampin' Up! population.  
My first card above was simply done by positioning all but two of the sentiments from the Greatest Part of Christmas.  Firstly I swept, patted and smudged my embossing buddy across a piece of black card.  If you've not come across the embossing buddy before it's a little fabric pouch filled with powdery stuff or FU FU dust as we used to call it when I was in the Royal Navy.  It helps to stop excess embossing powder from sticking to your project where you don't want it as the natural oils in your skin leave mini  marks just by handling the card and the embossing powder has a habit of sticking to them.  The FU FU removes this and helps to just get embossing powder on the stamped image only.   

OK so now you know all about FU FU I can tell you that I patted it across the card to give the impression of chalk dust!  I then positioned my piece of card onto my Stamparatus (stamp positioning tool) to place the clean stamps face down to get them where I wanted and so that I could pick them up with the stamping plate of the tool.  The picture below shows this.   You might think ooh her card is too short, but I took the photo with a scrap after I'd finished the card.  By putting the stamps in place like this they will all stamp together and if a section wasn't ink well enough I can revisit it and improve the intensity of the images by adding more ink and placing the stamps down on the card again. 
Once the images were stamped I used a sponge to gently smudge the ink again to enhance the chalk dust look.  I added white baker's twine to the background before sticking this piece onto a piece of whisper white card with Stampin' dimensionals.  I added two candy canes decorated with holly and berries, all cut using the Stampin' Up! Cup of Cheer dies.  I raised the top cane using some of the new black Stampin' dimensionals from the Halloween section in the winter catalogue.  They are great for a project like this as they don't show on black or darker card if they peep out around the sides.  Some red rhinestones add an extra bit of sparkle.  


My second card was just as simple.  I cut a stitched label and used the embossing buddy again and then stamped the fox from the awesome Charity stamp set Nature's Beauty.  Stampin' Up! are donating £2.50 from the sale of every set to Mental Health UK so you get a fab stamp set and also donate to a good cause at the same time. 

One of the images is a super fox and I   stamped him with Versamark, added white embossing powder then heated it.  I then used the snow stamp from the same set and stamped around the fox with craft white pigment ink. I smudged it with the sponge and added a little more ink at the bottom to create the effect of the ground.  Before sticking it onto the matt layer I stamped in black ink the twiggy bushes across the layer and added the sentiment.  


To finish I added two frosted epoxy droplets and matted the whole project onto a thick white card base.  

As I said a very simple but effective technique and you can see a quick 2 minute video from the Stampin' Up! team HERE that shows these different effects. 

You can also see some more inspiration from all the other lovely global demonstrators on our blog hop by clicking on each thumbnail picture below.  

Thanks for stopping by and see you soon.

Zoe x


You are invited to the Inlinkz link party!

Click here to enter

Sunday, 21 July 2019

Christmas in July - trees

Christmas in July for Christmas Card Club Challenge - Trees

Stampin' Up! will launch its winter catalogue in September so with just a few sets in the catalogue this challenge from Christine has not been as easy as you would initially think with a simple Christmas theme of  'Trees'.  However where there's a will there's a tree!  

I've made a very simple card using the new Heirloom frames dies and embossing folders.  I added some Versamark ink to the embossing folder before adding my die cut frame to the folder.  Once dry embossed I added silver embossing powder to the frame for heating.  It has a enhanced the dry embossed texture, not perfectly but just enough to highlight the detail of the frame.  Using the middle die cut section of the frame I've added a silver heat embossed tree from the Rooted in Nature set, a Stampin' Up! favourite, and a gold heat embossed sentiment from Itty Bitty Greetings.  I've layered the image and frame onto a matt layered dry embossed with the Subtle 3D folder which does exactly as its name suggests - adds a subtle texture.  

A trio of rhinestones give a little more sparkle for a finishing touch.   

For beginner stampers you could cut a frame using a trimmer and stamp a pattern onto it, or indeed use a ruler and pen to create a frame directly on your card or then cut out with paper snips. 

It's been a very busy fortnight for us getting Charlie ready for a very important interview which he did really well in and also getting kit sorted for his trip to South Africa to research elephant migration patterns, bird counts and also some open water diving.  Our first message from him said "here safe, bags arrived too, at camp probs wont talk much!'   I guess I should be pleased to know he is there safely.  Teenage boys hey......

There's more inspiration for Christmas card making on my fellow Christmas Card Club ladies blogs so do take a look as July is traditionally a good month for early prep for the festive season and getting your handmade cards made.  

Thanks for popping by. 

Zoe x


Please contact me for more details zoetant@live.co.uk 
or check out the Join Stampin' Up! button at the top of this page.