My STAMPING PAPERCRAFT blog - Stamping Scene

Hello and welcome to my blog. I'm a paper craft addict and love sharing my passion for paper crafting . I run online and face to face card making, memory keeping and all sorts of 3D projects. I also sell many of the products I use. If you'd like more information do drop me an email. Thank you for visiting I hope to see you again soon. Zoe x
Showing posts with label embossing. Show all posts

Sunday, 11 April 2021

Robins for Christmas Card Club


robin christmas card design idea with zoe tant
Happy Sunday and what a strange one it is.  One minute lovely sunshine and the next hail or snow.  I've also spotted  a friend's photo on facebook showing inches of snow that settled overnight a little further north and west from here admittedly.  

However it does make it seem a little less crazy that it is Christmas Card Club Challenge today and Margaret asked for Robins as the Robin is her favourite bird.  I don't possess any Robin stamps apart from this one that I carved using a kit a few years ago, but I think it does the  job and I managed to stamp him onto the branch featured in a new set coming soon.  

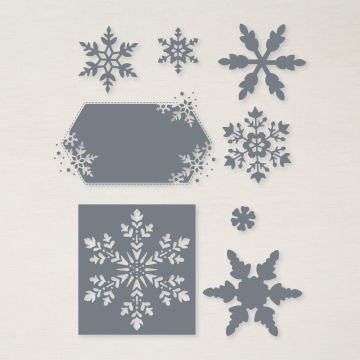
I started with a snowflake background inspired by today's weather which is just white on white die cuts using So Many Snowflake dies which will also return in our new annual catalogue.  Before die cutting I added double sided adhesive sheet to my card to make it much easier to attach them to the card layer.  

The Robin I coloured with Stampin' Write markers to blend the colours and give a slight feather look before stamping.  My sentiment is simply white heat embossed and is from the Snow Wonder set on the carryover list from the winter catalogue.  A strip of designer paper just adds a touch more colour.  

Keep warm and safe lovely readers and enjoy looking at the other Robins around the club members.  

Hugs Zoe x

So Many Snowflake dies © Stampin' Up!


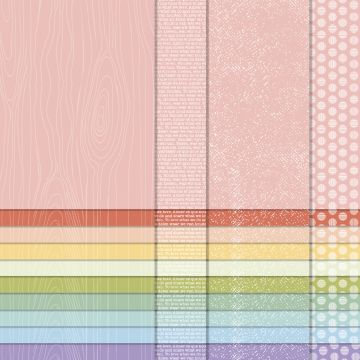
subtle designer series paper for card making


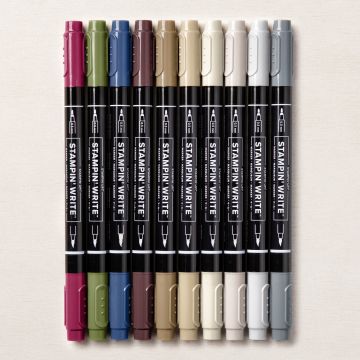
Neutrals stampin write markers for use on stamps for craft


Friday, 27 November 2020

More Stencils and mask techniques on our Totally Techniques Blog Hop


Welcome to our November Totally Technique Blog Hop. This month we are sharing ideas and tips for using stencils/masks.  I love getting inky and so went with the Basic Pattern Masks in the annual catalogue and first of all used my new blending brushes, which will be available to order in January from the Spring Mini, to add colour from lightest to darkest through the stencil for the card below and then I used embossing paste over the inky stencil/mask to create the detail on the card above. 

Most difficult part was trying to get a half decent photo on a dull day even with lighting these just did not want to play.  As my daughter, Liv said 'They look so amazing in real life!' You'll just have to take her word on it.  

So for the card below I used one blending brush and first of all added Balmy Blue ink directly from the ink pad onto my old Stamp a ma jig plastic sheet.  I held the stencil in place on my cardstock, but you might err on the side of caution more than me and so you may want to add some tape around the card to hold it in place onto your work surface.  I would also colour a larger piece of card that you can then use dies to cut the shape you want.  

Before adding any ink to the card  you need to make sure that you prime the brush before adding to your card stock.  Don't just swipe the brush over the ink pad really get it inky.  Then blend it into to the brush on a piece of plastic like a stamp positioner sheet.  When you are ready to add to the card start off the card to avoid any heavy ink marks.   The stencil will get inky too which is fine, but don't wipe it off if you want to use for a second card like the one above.  

As you add the darker inks then you can choose where you add different shades.  As I said I used the same brush and worked through the different blues including Coastal Cabana and Pacific Point.  

Once I was done with the inking I moved the stencil carefully to one side.  I then made sure the pattern was dry before die cutting with the Stitched Rectangle dies.  I layered it with white layers and added some die cuts from Stitched Stars and Painted Labels dies in silver foil card. 


For the top card I die cut a stitched rectangle from vellum and placed it under the inky stencil ink side uppermost.  I then carefully added a think layer of embossing paste and allowed the ink from the stencil to mix with the paste as I moved it over the stencil.  Be sure to remove the stencil carefully while the paste is still wet and then allow it to dry.  In the mean time wash the stencil and other paste tools. Do not allow the paste to dry on the stencil or it won't come off.  

I've added simple sentiments to both cards from a new spring set called Art Gallery and let the stencilled patterns be the focal points.  

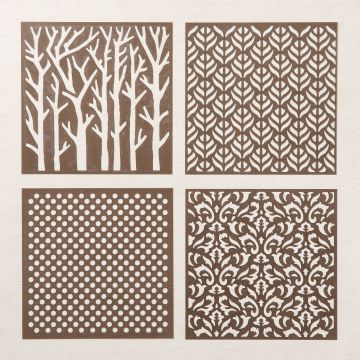
Basic Pattern Masks


embossing paste white for card making and crafts


Embossing Paste


stitched star dies stampin up

Stitched Stars Dies


Don't forget this is a blog hop so you can visit other international blogs to see their ideas for stencils and masks. 

Keep safe and keep stamping

Zoe x


You are invited to the Inlinkz link party!

Click here to enter

Friday, 9 October 2020

Which creature is your favourite?

stampin up birthday card using From All of Us with Zoe Tant

I love this fun stamp featuring all these cheeky creatures.  The stamp set is call From All of Us and it really is a fabulous group of friends or perhaps it could be your family members? Who would be who!  

I've created this card for the MAWTT - Moving Along with the Times, October Challenge.  I watercolour washed a background onto watercolour paper with a rough spot for the stamp to go in left blank.  I then stamped with Tuxedo Black Memento ink which is what you need to then colour with alcohol markers in my cast Stampin' Blends.  I've limited colours at the moment and ideally would have made the monkey a different colour, but I tweeked it with my colour lifter and dabbled with different colours to make him a different colour to the bear. 

I added sentiments from the same set by stamping onto patterned papers from the In Good Taste pack and used die cut matt layers in Early Espresso.  The sentiments are embossed and to get the colour I first stamped onto Versamark then gently onto the Early Espresso Pad, before adding clear embossing powder.  

What a fun bunch they are don't you think? 

Our challenge in case you hadn't guessed is animals and or birds over at MAWTT this month so why not join us.  

Below is a second card I made using the same stamp, but I fussy cut out the Ostrich.  She is kinda sassy and reminds me of someone close to my heart.  If you watched I'm a Celebrity Get Me Out of Here last year you'll remember Caitlin Jenner and her motto for each day of 'Another Day to Excel'.  Similar message here and in the current world we live in I think we all need to make every day AWESOME.


ostrich card using from all of us stampin up stamp set with zoe tant uk demo

Have a great weekend and come back on Sunday for another round of Christmas Card Club inspiration.  We are sharing Father Christmas/ Santa cards this fortnight. 

Keep safe and keep crafting.  

Zoe x


from all of us stamp set


 From All of Us stamp set


stampin up alcohol markers

Stampin Blends

Alcohol markers


Tuesday, 3 March 2020

Positive Thoughts for one and all


I really enjoyed playing with this beautiful stamp set and coordinating dies.  The stamps are in the Stampin' Up! Spring catalogue and called Positive Thoughts and the dies are available as an extra purchase during Saleabration (SAB) , but I think may be coming back later too.  They are called Nature's Thoughts dies.  It's one of those eclectic bundles and gives you lots of individual stamps and dies that will work together but also with other stamp sets.  If you buy both the stamps and dies during Saleabration, your purchase instantly earns you a free gift from the SAB offering and there are new gifts available from today.

I used subtle colours in the main including So Saffron, Calypso Coral, Soft Sea Foam plus neutral Soft Suede and added in some gold heat embossing and gold foil.

Cards like this are great for keeping in a box and adding a sentiment as and when you need it.

We are now in the last month of Saleabration so if you don't want to miss out on getting bonus goodies with your shopping then check out the latest free gifts with qualifying purchase.


The Flowering Foils papers are proving to be popular. You can see them here.


Wishing you all a lovely weekend.

Zoe x


Thursday, 5 December 2019

Moving Along With The Times - my challenge

Today it's time for my challenge on the Moving Along with the Times blog.  I'm asking everyone to create a card with either Santa or his elves or both on.  I've used the ever so cute #Elfie stamp set to create a simple, but effective card. 

I stamped this happy little fellow in black Memento ink on to a piece of whisper white card and then used my Stampin' Blends aka alcohol markers to colour him in.  Colours used included Poppy Parade, Granny Apple Green and Crumb Cake all in light and dark shades as well as Soft Suede dark.  

Regular visitors will know that I love bling and so I gave him rhinestone bells on his cute shoes and glitter enamel dots for detail and if I'm honest to cover the finger smudge!!! Yes we all have them.  

With a black journalling pen I added some freehand doodles around the edge of my design to act as a frame and then matted this layer onto a card base. 

My sentiment is from Itty Bitty Christmas which I received free as a gift for achieving enough points as a Stampin' Up! Demonstrator last year to attend the incentive trip.  If you'd like to know more about joining Stampin' Up! and my team so that you too can enjoy discounts and the opportunity to earn rewards please do contact me at zoetant@live.co.uk for more information.  Start the new year with a new hobby or business. 

Thanks for dropping by.

Zoe x


Friday, 30 August 2019

How to use embossing paste inspiration - Totally Technqiues Design Team Blog Hop


I've a mixed media card this month for the Totally Techniques blog hop with a few techniques, however our theme is to share ideas on using embossing paste as challenged by Satomi our Japanese demo.  

You may not be aware but we have two different embossing pastes. There is straight forward white and then shimmery white. You can find them on page 181 of the current annual catalogue. 
I used mine to add some texture to the seascape that I created by first using a soft sponge brayer to add Mint Macaron and Balmy Blue ink to create a back ground.  I also used the brayer over a fruit stringy bag from the supermarket to create even more depth to the watery scene.  I also stamped with second and third generation ink the subtle sentiment of 'Time for a new adventure' from Itty Bitty Greetings in different directions across the piece in Night of Navy and some Dandelion seeds from Dandelion Wishes and some bubbles from Sailing Home stamp set.  I also added silver heat embossed bubbles to the matt layer of Night of Navy cardstock.

Next I added the circles of embossing paste using a homemade stencil made with vellum and various circle punches.  I mixed some of the shimmery white paste with a little retired silver, but later added more circles with just shimmery white.  


Using the Smooth Sailing dies I created another stencil to sponge on seaweed in Pretty Peacock, and Shaded Spruce  at the base of the sea scene and also added some die cut vellum seaweed which I left 'clean' or coloured on the reverse with Pretty Peacock Stampin' Blend or added some clear wink of Stella.  Vellum was also used to create a further matt layer which was embossed with the Corrugated embossing folder.  Some pearls coloured with Stampin' Blends were added for a pebbly seabed. 
The fish was created using the Faux Metal technique and the stamp is from Best Catch stamp set which is just perfect for the fishermen in your life.  
To finish my design I added two ribbon loops to hang the design from a die cut strip of card using again the Smooth Sailing dies.  It gives the effect of a tapestry/picture being suspended from a hanging rail.


Lots going on but the simple addition of embossing paste as depth and texture and is so easily done. I hope you'll visit everyone else on the hop and have a go with these fun pots of paste.  
Play with ink to create a watery scene using Best Catch, Sailing Home and Well Said

Now please do visit the other talented ladies around the globe to enjoy all our embossing paste tips.  

Thanks for stopping by.

Happy crafting
Zoe x

You are invited to the Inlinkz link party!

Click here to enter

Sunday, 21 July 2019

Christmas in July - trees

Christmas in July for Christmas Card Club Challenge - Trees

Stampin' Up! will launch its winter catalogue in September so with just a few sets in the catalogue this challenge from Christine has not been as easy as you would initially think with a simple Christmas theme of  'Trees'.  However where there's a will there's a tree!  

I've made a very simple card using the new Heirloom frames dies and embossing folders.  I added some Versamark ink to the embossing folder before adding my die cut frame to the folder.  Once dry embossed I added silver embossing powder to the frame for heating.  It has a enhanced the dry embossed texture, not perfectly but just enough to highlight the detail of the frame.  Using the middle die cut section of the frame I've added a silver heat embossed tree from the Rooted in Nature set, a Stampin' Up! favourite, and a gold heat embossed sentiment from Itty Bitty Greetings.  I've layered the image and frame onto a matt layered dry embossed with the Subtle 3D folder which does exactly as its name suggests - adds a subtle texture.  

A trio of rhinestones give a little more sparkle for a finishing touch.   

For beginner stampers you could cut a frame using a trimmer and stamp a pattern onto it, or indeed use a ruler and pen to create a frame directly on your card or then cut out with paper snips. 

It's been a very busy fortnight for us getting Charlie ready for a very important interview which he did really well in and also getting kit sorted for his trip to South Africa to research elephant migration patterns, bird counts and also some open water diving.  Our first message from him said "here safe, bags arrived too, at camp probs wont talk much!'   I guess I should be pleased to know he is there safely.  Teenage boys hey......

There's more inspiration for Christmas card making on my fellow Christmas Card Club ladies blogs so do take a look as July is traditionally a good month for early prep for the festive season and getting your handmade cards made.  

Thanks for popping by. 

Zoe x


Please contact me for more details zoetant@live.co.uk 
or check out the Join Stampin' Up! button at the top of this page.

Thursday, 9 November 2017

Moving Along with the Times - Trees


Stampin' Up! Lovely as a Tree

Today is the start of a new challenge at Moving Along With The Times. Our challenge theme is Trees.  Come and join in as I know many of you will have some kind of tree stamp, punch or other way of creating a tree for your project.

Stampin' Up! Lovely as a Tree is a timeless classic stamp set and I've used it here on a piece of watercolour paper that I had handy when I had excess ink on an aqua painter brush and didn't want to waste it so I did a very simple colour wash on the small square of paper about 3" square.  I let it dry after washing a couple of times and kept it in a safe place.  The 'safe place' is key as if you are anything like me you put things away so safe you can never find them!  

Onto the colour wash I stamped part of the longer border type stamp from the set using a post it note to mask off the part of the stamp I didn't want to use whilst I inked it, discarding it before I actually stamped.  I used a stamp-a-ma-jig to position the second layer of stamping in versa mark so that I could add some sadly retired heat and stick powder and then glitter.  You'll see I offset the glitter layer in order for the shadow layer in black to show.

I'ves layered with basic black, island indigo (the wash colour) and silver foil card off setting the final two layers.  A sentiment from Stampin' Up! Watercolour Christmas and some basic rhinestones and it makes an elegant but striking card.  Oh and I mustn't forget the black bakers twine bow attaching the gorgeous mistletoe sprig from the Stampin' Up! Year of Cheer Suite embellishments.

Join us HERE for our MAWTT challenge and do come visit me again.

You can buy most of the products I've used by visiting Zoe's Stampin Up Online Shop.

Thanks for stopping by 

Zoe x

Tuesday, 2 December 2014

Christmas Card Club - Silver Bells


The countdown to Christmas is well and truly on now and it also means another Christmas Card Club challenge. This one was set by Asha with the theme of Silver Bells in line with that lovely Christmas song.

City sidewalks, busy sidewalks 
Dressed in holiday style. 
In the air there's a feeling of Christmas. 
Children laughing, People passing 
Meeting smile after smile 
And on every street corner you'll hear.

Silver belIs, silver beIls 
It's Christmas time in the city. 
Ring-a-ling, hear them sing. 
Soon it will be Christmas day.

Strings of street lights, even stop lights 
Blink a bright red and green 
As the shoppers rush home with their treasures. 
Hear the snow crunch, see the kids bunch. 
This is Santa's big scene. 
And above all this bustle you'll hear.

I panicked a little as I wasn't aware that I had anything remotely like a bell in my stamp stash and punch art wasn't happening for me, but then like many I remembered a stamp set that I earned for free from Stampin' Up! that had sat unused and unloved on my shelf for a rainy day or perhaps for a lovely Christmas card challenge!  It's called Embellished Events and is a great set to cover all events through the year.  Now it's out I'll be using it more for sure.  The bells are from that set and could be used as wedding bells too and don't they look great surrounded by the 3 step stamping Wondrous Wreath set from the Stampin' Up! Autumn/Winter catalogue.  I wanted to add layers to the card, but not just white, but I also wanted some texture rather than smooth foil sheets and so I used my silver metallic encore ink pad to cover the edges of one matting layer and then heat emboss it with silver powder to give a less 'pristine' shimmer.  My sentiment is from the freebie set Good Greetings. 

I offered the chance to win one of these sets on a previous post if you visited my Stampin' Up! Facebook page to like it and comment on the post featuring the Good Greetings set.  

The draw has taken place and the winner is Lorraine Collett. Congratulations Lorraine  I think you wanted clear mount so let me have your addy and I'll get it in the post to you. 

Thanks for stopping by and don't forget to visit the other ladies in our challenge club to see their interpretation of the challenge.

Until next time.....
Zx
Challenges
Crafty Hazelnut's extra Christmas Challenge - Anything goes.


Friday, 10 February 2012

Petal Cone Die exclusively from Stampin' Up!

Valentine's day is fast approaching so I have a project to share with you made with Stampin' Up! 's petal cone die in the big shot.  It uses the gorgeous glimmer paper from our Spring Mini  ( click spring mini to view the catalogue) and also the stamp set You Are Loved.

To create the scalloped border around the heart I used a straight strip of cardstock (basic black) and the scallop border punch along one side.  Then cut from the opposite side small slits towards the point between each scallop making sure not to cut too far. This then allows you to shape the piece of card around a curved border.  I've added some pearls to the heart design and using a versamarker was able to mark and heat emboss the bird with clear embossing powder to give some texture. 

The top is tied closed with some of our basic black striped grosgrain ribbon which I cut in half along its length and then sealed the cut edge with a heat gun.  I didn't want to use the full width of the ribbon and now have a spare piece for another project.

Hope your day of love is filled with just that..........
Zx

Challenges

Tuesday, 8 February 2011

One for the boys!

stampin up demonstrator zoe tant

Life is back now to it's normal taxi service this week after the end of the panto and the usual extra curricular activities have kicked in for my children.  However apart from my MIL staying I am free to get back to crafting a bit and so made this card for a friend and as it was for a chap thought I'd share it with you because I think it is fair to say that it is a theme that we all struggle with.
The Celebrations DSP are fab for this type of male card with rich primary colours and I've teamed them up with various shades of blue and used a retired clear button to add some texture.  Under the button I punched several circles in matching colours to make a different feature and I've sewn on the colours with silver elastic thread.  Paper piercing and the crimper add more texture and the sentiment is from the Punch Bunch sale-a-bration set.  This was embossed in white using the craft whisper white ink  pad and white emboss powder and I've also stamped it in poppy parade on poppy parade cs and cut out the piece I wanted to highlight the greeting. 
Happy Birthday Stuart.
Back soon with more.
Hugs Zx

Saturday, 8 August 2009

Season of Joy

Here are a couple of ways to use the Season of Joy stamp set. The above card is one that I demonstrated at Maria's workshop. She wanted me to show uses for the Many Marvellous Markers she had bought. This is very simple, but can take some time as you colour each part of the stamp. It could be enhanced by putting brads in the centre of each of the flowers or for an even simpler use you could emboss the whole image in gold on perhaps red or black card.

Here I've used the tree, greeting and swirl and embossed them in white. The tree is embossed on designer series paper which gives an instant background. It's easy to do you just need to be careful not to overheat so as not to burn the paper! In real red I've stamped the little flower to link in with the real red card matt. The scallop punch adds some texture and although not very clear I've used the 1/16th inch punch to put a pattern down the scallop and show the green underneath. I think embossing on DSP would probably look even better if the DSP were a darker shade.
The options are numerous. Over to you! More Christmas cards coming soon.
Bye for now
Hugs
Zx

Saturday, 13 June 2009

Season of Joy

Last week at a workshop the hostess asked if I would (I'm saying this very quietly so as not to offend!) do Christmas cards!!!!!!!!!!!!!!!!!! Of course I obliged, but for those that were filled with dred at the thought of festive frivolities I also demonstrated this card using what on the surface appears to be a stamp set just for Christmas. But in fact Season of Joy is for life and not just for Christmas as this pretty card shows.
I've stamped in only orange the swirl across the base card. The flowers become Poinsettias at Christmas, and yet here embossed in white onto only orange cardstock they are just pretty flowers. The words are from Basic Phrases and once again it shows that you don't need lots of colours to create neat cards!
Thanks for checking in! Don't forget to leave a comment and then I know who has visited.
Hugs
Zoë