My STAMPING PAPERCRAFT blog - Stamping Scene

Hello and welcome to my blog. I'm a paper craft addict and love sharing my passion for paper crafting . I run online and face to face card making, memory keeping and all sorts of 3D projects. I also sell many of the products I use. If you'd like more information do drop me an email. Thank you for visiting I hope to see you again soon. Zoe x
Showing posts with label saleabration. Show all posts

Tuesday, 3 March 2020

Positive Thoughts for one and all


I really enjoyed playing with this beautiful stamp set and coordinating dies.  The stamps are in the Stampin' Up! Spring catalogue and called Positive Thoughts and the dies are available as an extra purchase during Saleabration (SAB) , but I think may be coming back later too.  They are called Nature's Thoughts dies.  It's one of those eclectic bundles and gives you lots of individual stamps and dies that will work together but also with other stamp sets.  If you buy both the stamps and dies during Saleabration, your purchase instantly earns you a free gift from the SAB offering and there are new gifts available from today.

I used subtle colours in the main including So Saffron, Calypso Coral, Soft Sea Foam plus neutral Soft Suede and added in some gold heat embossing and gold foil.

Cards like this are great for keeping in a box and adding a sentiment as and when you need it.

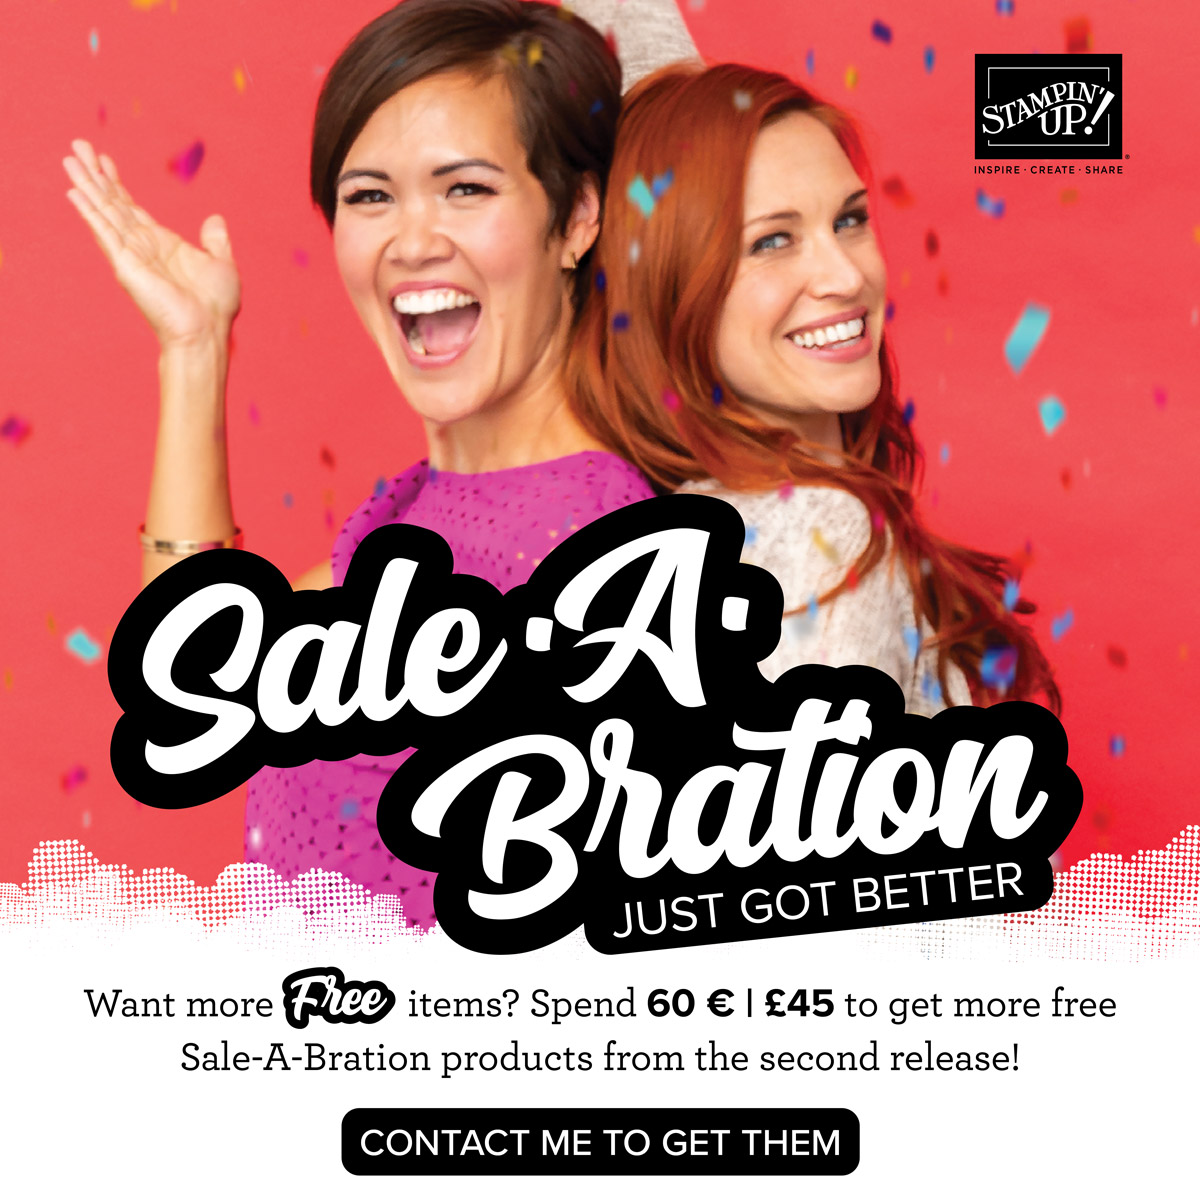
We are now in the last month of Saleabration so if you don't want to miss out on getting bonus goodies with your shopping then check out the latest free gifts with qualifying purchase.


The Flowering Foils papers are proving to be popular. You can see them here.


Wishing you all a lovely weekend.

Zoe x


Friday, 22 February 2019

Z Fold Cards for Totally Techniques Stampin' Up! International Demonstrator Blog Hop


Welcome to our Totally Techniques Blog Hop for February. Our lovely French demo, Marine, chose our technique this month and so we are showing you different types of Z Fold Card tutorials.  If you've come from Kelly's blog in the USA I'm sure you've been WOW'ed already with her fab project.

Z Fold cards often open the opposite way to which I have created mine, but as you'll see from my photos I wanted the frogs to look as though they are talking to each other and therefore looking at each other so I made it so that you pull it right to open instead of left. Confused? probably but I wanted to also show that you can flip templates and make them work for you.

I used the idea from this link on SplitcoastStampers and turned it around and also made it work for metric measurements. US readers can follow the link for imperial measurements.

You'll need a piece of card that is 26cm x 10cm.
1. Score on the long side at 6cm up 2.5cm to point A.
2. Score on long side at 12cm all the way across the card.
3. Score at 18cm from point B which is 2.5cm up from the bottom edge of the card all the way to the top.
4. Cut from point A to B which is 2.5cm from the bottom edge. 
5. Carefully fold the score lines.  The short fold between A and B comes out towards you as a mountain fold and the larger fold above it is a valley going away from you as you look at it.
6. Try not to fold from point B down to the bottom edge just the fold above it which is a mountain towards you also.

You now can decorate your design.  The measurements I used are below for each numbered section.

Part 1 
matt layer is  11.5cm x 7 cm
dsp 11cm x 6.5cm

Part 2
matt layer is 5.5cm x 2cm
dsp 5cm x 1.5cm

Part 3
matt layer is 13.5cm x 2cm
dsp 13cm x 1.5cm

Part 4
matt layer is 7.5cm x 7cm
dsp 7cm  x 6.5cm

Then making sure you only add glue to the back of part 1 and 2 adhere the Z fold to a single piece of card which is 14.8 and smidge cms x 10.5cm ie a quarter sheet of A4.


I just adore these cute frogs from Stampin' Up! Saleabration set So Hoppy Together.  They are so much fun and you can do lots with them.  They are also free with a qualifying order until the end of March 2019.  Also in March you'll be able to purchase a set of dies to coordinate with them.  I used Stampin' Blends (alcohol markers) to colour them in and create some shading with the light and dark pens of Garden Green and Pineapple Punch.   I've added sentiments from the same So Hoppy Together stamp set in Poppy Parade and some red rhinestones to tie the colours together.


Next on the hop is Shannean and she has a fabulous card to share with you so don't forget to keep hopping on.  


  1. Zoe Tant - UK - You're here
  2. Barbara Meyer - Austria
  3. Annette Elias - The Netherlands
  4. Nadine Weiner - Germany
  5. Satomi Wellard - Japan
  6. Marine Wiplier - France
  7. Kelly Acheson - USA
check back for this Stampin' Up! UK promotion in March 2019


SHOP NOW

Tuesday, 6 March 2018

Eclectic Means Easy

As you know Stampin' Up! has a big, HUGE, promotion every January through to March offering free gifts with purchases and the gifts are always amazing stamp sets, papers or embellishments. Most are never available to buy, but they are all very desirable and one of this year's fab gifts is Eclectic Expressions which to look at as a stamp set image doesn't possibly grab you, but the crafting and stamping possibilities are endless and really simple when you are stuck for a quick card.


All you need are basic supplies stamps, paper and ink and if you have them you can then embellish with ribbon and/or rhinestones, dots or whatever you have in your stash.  Although I haven't used it here white ribbon is a great staple to have as you can always use your Stampin' Blends alcohol markers to colour it to match your project.

In my card today I've used inks in pear pizzazz, bermuda bay and island indigo.  I've added night of navy ribbon and old olive and dapper denim enamel spots.  I used my new Stamparatus which is the best stamp positioning tool to hit the market (coming very soon for ordering)  to stamp my thank yous perfectly on my white card and then I've added the circles which are made in such a way as to appear watercolored. The stamps are textured and therefore give some subtle definition and texture to your stamping.  The stamped piece is then matted onto pear pizzazz and island indigo card.

You could make it even simpler by just tying the ribbon around the stamp white card, but I chose to add a strip of tear and tape (double sided sticky tape) to the card making sure to overlap it top and bottom to tuck the ribbon ends away.  You can then just remove the backing from the sticky and work down pinching the ribbon as you go and pushing it onto the sticky strip.  I've added a bow separately with a glue dot.  If you don't like bows have you tried the 'bunny ears' technique?  Just make two similar size loops in your ribbon and then tie them in a single knot.  It might need a little tweaking but it's by far the quickest and easiest way to tie a bow.

Remember that this stamp set is free with a purchase of £45 from my Stampin' Shop through until 31 March 2018.

Have fun with this abstract set that has all the basic sentiments you need too!

Hugs Zoe x

Tuesday, 27 February 2018

Stampin' Up! Incentive Trip Blog Hop - Smooshing Technique


Stampin' Up! Incentive Trip Blog Hop 
It's time for our hop this month and the theme is anything goes from the Stampin' Up! Spring catalogue or items from Saleabration that you can earn FREE with purchase until the end of March.  

I've used product from the Stampin' Up! Sweet Soiree Suite including the stamp set Cake Soiree, specialty Sweet Soiree papers and Sweet Cake frame lit dies.  To make adhering the die cut flowers and leaves easier I used the double sided adhesive sheets from the Stampin Up annual catalogue which are great with detailed or delicate fiddly dies that aren't easy to attach to projects without getting messy normally.  You can see how to use these sheets in the video below and also learn about one way of doing the Smoosh Technique which I used on the flowers once they had been heat embossed with silver embossing powder and die cut.  If you are new to paper crafting there are also some tips in the video about heat embossing too.  


With a few flowers left from my original card and tag I used them and some offcuts to create a second card and also used the stampin up basket weave textured impressions embossing folder which is part of the free Blossoming Basket Bundle when you shop with a £90 order.  It has really deep embossing offering lots of fabulous detail.  

The colours I've used for the projects are berry burst, calypso coral, old olive, silver and white.  The second card is a DL size with a base of thick whisper white card.   The basket which would be great for Mother's day treats is easy to make and you can see more details and a video tutorial on this Stampingscene post. 

All products used can be bought in my Stampin' Up! UK online shop. 

Thanks for visiting me today and I hope you enjoy the hop. 

Hugs Zoe x


Sunday, 18 February 2018

Christmas Card Club - Reindeer and Friends


Stampin' Up! Merry Mistletoe Stamp Set


It's my choice for the Christmas Card Club Challenge this fortnight and way back when we did the list I chose Reindeer and or their friends as the theme.  I've taken a very elegant reindeer from Stampin Up set Merry Mistletoe and added him to the new elegant Saleabration free gift paper Springtime Foils which seems a contradiction in terms when posting about Christmas, but hey you just have to get use from all your papers as much as you can. They are no use sat on the shelf and attract unwanted attention from partners who might just question what you've spent recently, so I find using them distracts husband from making unwanted comments tee hee. 

This stunning set of papers are as the name implies foiled. They are a mixture of patterns and come with silver, gold and copper foiling.  I chose this one which has gold and silver and then added some old olive using my Stampin Blends alcohol markers as the paper has a shiny/glossy coating and the Stampin Blends work perfectly on this card.  If you like foiled card take a look at my last post with a tutorial for an Easter Basket using stampin up Sweet Soiree foiled papers. 

I stamped my deer with chocolate chip ink onto whisper white and cut a partial circle with the stitched shape framelits and also a silver foil layer using one of the layering circle dies which is a mix of scalloped edged and plain circle dies.  The sentiment is also from Stampin Up set Merry Mistletoe and that is heat embossed with gold powder then matted onto a layer of chocolate chip card as is the foiled paper.  A loop or two of metallic edged ribbon and a stampin petal passion embellishment add that bit of pizzazz that I like on my projects and a simple, but elegant card is achieved.  

This card was really quick and easy to complete and had the added bonus of the therapuetic colouring thrown in.  I hope you'll enjoy visiting our merry clan of ladies and our early preps for the festive season.  

Thanks for popping by today.  

Zoe x

P.S. You can see the new Saleabration free gifts with purchase on my stampin up website.


Tuesday, 23 January 2018

Stampin' Up! Alaska Incentive Trip Blog Hop January 2018


Stampin' Up! has it's biggest promotion of the year every new year and this one is just the same with some fabulous free gifts available to party hosts, demonstrators, shoppers and also anyone who chooses to join and enjoy the benefits of being part of a big family of crazy crafters.  Everyone can earn points on their purchases and for helping others get the most out of being part of the team and some save their points to achieve the amazing annual incentive trip.   Many of us join together each month to share our projects with you our fabulous blog readers.  This is January 2018's blog hop of Stampin' Up! Alaska incentive trip achiever's.  Welcome and enjoy the tour!

I'm sharing a funky card using one of the free sets I mentioned which is in the Saleabration booklet from Stampin' Up! . The stamp set is called Epic Celebrations. When I first saw it I knew I had to have it as it could have been designed for Charlie my guitar playing, trainer loving, music and internet surfing teenage son.  It's perfect really for boys of all ages, but so so perfect for Charlie.

I've also used the new to Stampin' Up! Brusho Crystals to create a fun background on glossy card.  I've then stamped the guitars onto a piece of window sheet and coloured them in with my Stampin' Blends alcohol markers.  They work on acetate and dry fairly quickly, but be sure the ink is dry before you use the sheet.  I also stamped and coloured in a pair of 'converse' style trainers and a headset with the Stampin' Blends and then fussy cut them out with Stampin' Snips.    To complete the card I used a stapler to attach the splattered background to the window sheet then stampin dimensionals to adhere this layer to a real red matt layer and night of navy card base.   You can see all the free gifts on offer in my Stampin' Up! shop.

If you like the idea of discounted craft products and possibly a free cruise in somewhere exciting like Alaska then please do contact me for more details if you are from the UK, France, Germany, The Netherlands or Austria.
contact me at zoetant@live.co.uk 

Now it's time to visit the other blogs for more spring and saleabration catalogues.  You are here with Zoe Tant in the UK, but you can visit the others by clicking down the list below. 

Thanks for stopping by. 

Zoe x


Thursday, 30 March 2017

Moving Along with the Times - Into the Woods


Stampin' Up! Swirly Scribbles just right for adding detail to Serene Scenery Designer Series Papers for the our Team A challenge at Moving Along with the Times (MAWTT).  Our theme is 'Into the Woods'.

I absolutely adore these designer papers that are not only designs but also some sheets are actual images and the pack of 48 sheets comes in 6" x 6" and is not to be missed.  It is very stroke-able but as you get 4 sheets of each double sided design you can use at least one of each side and still have one to stroke.  I know dear readers you are just like me and want to keep it just to look at and with this pack you can.

You can stamp a sentiment on the 'bokeh' printed part of the design and mine is from Stampin' Up! Butterfly Basics and the golden butterflies are die cut from gold foil card with the Sunshine Wishes dies.  You can make mini flowers with part of the Tree Builder punch and gently push on the middle of each flower on a piercing mat with a stylus to create some texture and then just add a pearl or similar in the middle of each.  My flowers are whisper white and daffodil delight and the final extra is my choice of bling with gold thread and gold enamel shapes.

Join at MAWTT for our challenge and check out the other DT for more inspiration.

P.S.   Sale-a-bration at Stampin' Up! 2017  finishes tomorrow. Shop now for those last minute free gifts with purchase.

Sunday, 8 January 2017

Christmas Card Club - Anything Goes

Stampin' Up! Sale-a-bration free gifts for all

2017 is in full swing already with children back at school and Stampin' Up! has launched it's new Spring catalogue and annual 3 month Sale-a-bration promotion and so for our first Christmas Card Club challenge set by Margaret I couldn't resist sharing this card which I posted on Facebook recently.  Margaret set us an easy task to make a card with an anything goes theme.  Bless her she's easing us back in gently.  My card features this fabulous funky chicken from the FREE stamp set Hey, Chick.  Isn't it fun.....

I stamped him/her on shimmery white card stock in black Staz On and then used a blender pen to pick up ink to colour the image with ink from my stampin up ink pad lids.  The antlers are from Foxy Friends and fairy lights from Tin of Tags.  I used a stampin marker to add the wire.  I cut the image out using my set of stitched frame lit dies that come with ovals, squares and circles and added a matting layer with the layering ovals dies.  The 'hey, chick' is heat embossed with white powder on basic black card and the Happy Christmas is from the Tin of Cards stamp set.

A fun card and thanks to Margaret for the simple start to our Christmas Card Club challenges so that I could share it with you.

Happy New Year to all.

Hugs Zx

Find out more about Saleabration here

Thursday, 17 March 2016

Moving Along with the Times - My Challenge

STAMPIN' UP! SALE-A-BRATION FLOWERING FIELDS
It's my challenge over at Moving Along with the Times MAWTT and I asked folk to use the theme In The Garden.  For my card I played with ink on watercolour paper and then stamped on the floral images from the Stampin' Up! sale-a-bration set Flowering Fields.  It's such a pretty set and has been really popular with my customers.  It reminds me of one called Pocket Silhouettes that I had in my starter kit now 8 years ago when I joined Stampin' Up!

I've used brights colours Old Olive, Daffodil Delight, Tangerine Tango and Rich Razzleberry.  Some white perfect accent dots and another SAB favourite the metallics glimmer tape which is awesome.

Please do join our challenge and visit the other DT blogs.  It's easy, just for fun and at least one of the design team will come visit you.

Thanks to Wendy our talented organiser who has kindly done the loading of the challenge as I've been checking up on my parents as Dad is now home from hospital, but it took a while as the anaesthetic did not agree with him.  We'll have some laughs soon about the things he said whilst under the influence when he's stronger. Again thanks to all who have sent get well wishes. It really is kind and much appreciated.

I look forward to seeing your cards in the challenge.

Zx

Just a few days left of Saleabration so if you would like a free stamp set please visit my online shop to order £45 (excl. P&P) and you can choose your freebie or if you think your wish list is longer than £99 you should think about our starter kit which is £99, but contains £160 of your chosen products until the end of the month.  Ask me more more details or if you can't wait join now by clicking on the Join button below.


Wednesday, 28 January 2015

Stampin' Up! UK Saleabration continues!

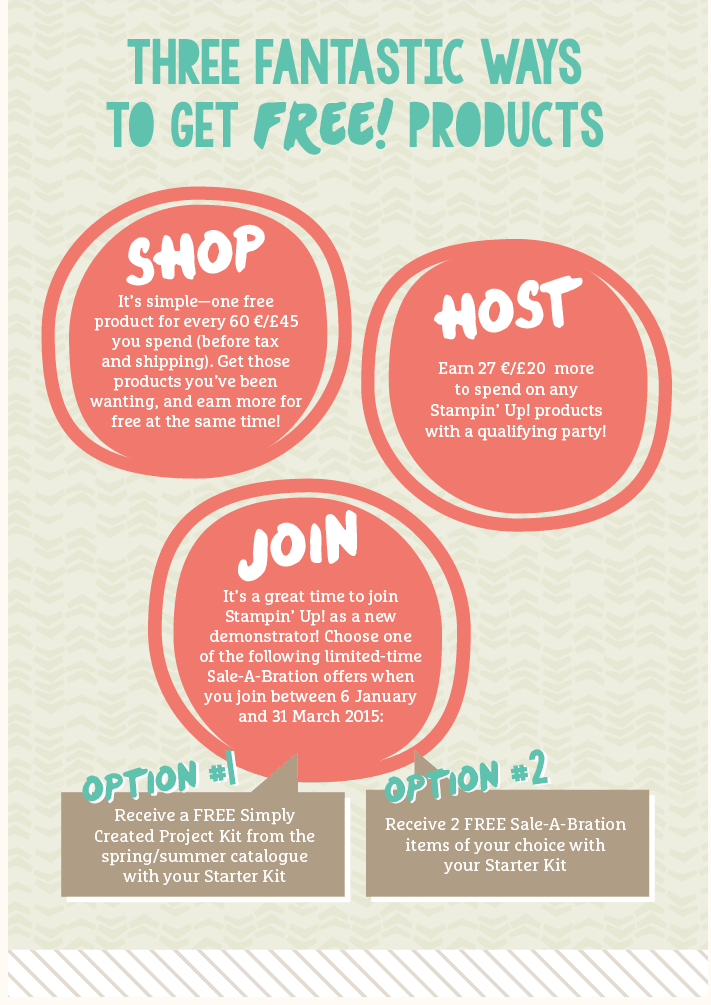
Yes it's that time of the year when Stampin' Up! gives you more for your money. You can get free products in 3 ways


  • Shop - every £45 spent will earn you a free gift from the Stampin' Up! UK brochure 
  • Host - there are bonus hostess spends on offer with qualifying shopping at your party
  • Join - Receive extra product in your personally chosen kit and option 3 includes a new starter bonus from me to go with your choice of option 1 or 2.
I'll be back very soon with some looks at the Saleabration freebies and spring and summer catalogue inspiration.  

Zx