My STAMPING PAPERCRAFT blog - Stamping Scene

Hello and welcome to my blog. I'm a paper craft addict and love sharing my passion for paper crafting . I run online and face to face card making, memory keeping and all sorts of 3D projects. I also sell many of the products I use. If you'd like more information do drop me an email. Thank you for visiting I hope to see you again soon. Zoe x
Showing posts with label sailing home stampin up. Show all posts

Monday, 12 April 2021

Sailing Home Lighthouse Masculine Card

nautical masculine birthday card using Sailing Home stamp set

 Well we woke to a white rape seed crop in the field behind our house but a beautiful scene.  It's melting now as the sun is shining, but still a bit chilly. 


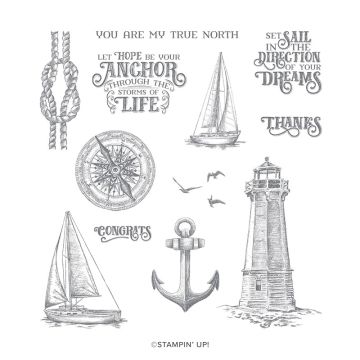
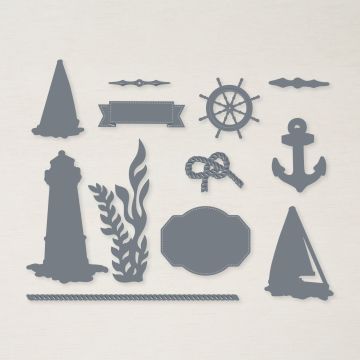
Today I'm sharing a masculine birthday card, one of those we all seem to struggle with.  I've used the ever popular Sailing Home stamp set and Smooth Sailing dies.  I'm so pleased that the stamps and dies will continue to be in the popular list as they are making an appearance for another year in our new annual catalogue next month.  

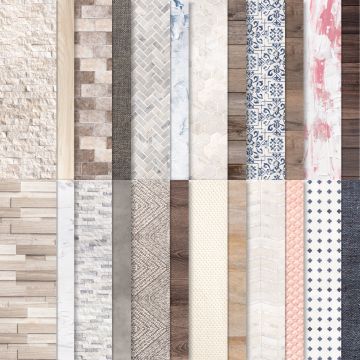
I kept the colour palette very simple starting with a piece of designer series paper, yes it is and it created the perfect background for all these images and die cuts.  I stamped the compass directly onto the paper but everything else is die cut and stamped.  To colour the lighthouse and anchor I used a blender pen to drag the colour in from the image outline.  It allows you to create light and shade really easily and if I can manage it, it clearly doesn't need too much skill!!  Looks effective though don't you think?

I've also added a gilded leafing border and a stampin dimensional to the compass with gilded leafing to just make it all stand out and regular visitors know I love a bit of bling.  To add the leafing I used tear and tape and then added the gold. I didn't want it quite as wide as the tear and tape so cut off half the width of each border and used them on another card.  We don't want too much bling for the chaps. 

Stamping onto your patterned papers can create a whole new effect for you and also get you using those papers that we all stroke for too long fearful of wasting the sheet.  Go and have a go you know you want to.....

Hope you have a great week. 

Zoe x

Sailing Home stamp set from Stampin Up with zoe tant


smooth sailing dies for craft die cutting card making


in good taste designer series paper dsp stampin up with zoe tant

Tuesday, 1 September 2020

Create a scene for the MAWTT September Challenge


It's been a long time since I've been able to join in as part of the design team at Moving Along with the Times.  Life and health have got in the way, but I'm just about on time this month YAY! as they launch the challenge of 'Create a scene'.  

For my scene I've used the popular stamp and die set, Sailing Home with Smooth Sailing dies.  I've created a neutral colour combo giving it a sort of sepia look.  I stamped the lighthouse using Soft Suede ink and then used one of my new paint pens, the smallest nib, to move the colour from the stamped image across it to effectively colour it in.  I did the same with the sailing boat, but used Early Espresso to give a darker shade and hopefully create some distance between the two and hit the challenge theme of a scene.  To create the sea I took a tip from my team member Dawn Howard and used the Birch background stamp to create waves.  

I've added some simple die cut details and sentiment all from the stamp set or dies.  

You can join in our MAWTT challenge here.


Have a good month and Welcome September, it's sunny with us today but cool so we are also doing some gardening while we can.  

Happy crafting and be safe.  

Zoe x


stampin up smooth sailing dies


Smooth Sailing Dies


stampin up sailing home stamp set with zoe tant uk demonstrator

Sailing Home stamp set

Sunday, 1 March 2020

Ah hoy there!


The March Challenge at Moving Along with the Times starts today.  We're sharing anything but a card projects and asking you to join us and share your projects over on the MAWTT blog HERE

I've used one of Stampin' Up! 's mini pizza boxes and decorated it to make gift packaging for a present for the men in your life.  I've used some of the Golden Honey specialty designer series paper which is a free gift with purchase when you spend £45 in my Stampin' Up! shop until the end of March or while supplies last.  


I cut pieces of the paper as follows
Top   31/4" x 314" 
Sides 3/4" x 3 1/4" and you need 4. 

To the top of my gift box I added some embellishments made using the Stampin' Up! set Sailing Home from the annual catalogue and the coordinating dies Smooth Sailing.  The anchor and compass were heat embossed in gold before either being die cut or punched out with the 1 1/2" circle punch. Some gold foil rope die cuts and a sentiment from Label me Bold makes it a perfect gift box.  

The compass is really neat as the needle can be die cut separately and then using a brad can rotate on the compass face.  

The pizza boxes can double as treat boxes and are just the right size for a tasty cookie for work colleague gifts or kids treats. The inside of the box is food suitable with a lining to stop any cookie flavour leaking through.  

I hope you'll join us at MAWTT this month and thanks for stopping by. 

Happy March 

Zoe x


Friday, 30 August 2019

How to use embossing paste inspiration - Totally Technqiues Design Team Blog Hop


I've a mixed media card this month for the Totally Techniques blog hop with a few techniques, however our theme is to share ideas on using embossing paste as challenged by Satomi our Japanese demo.  

You may not be aware but we have two different embossing pastes. There is straight forward white and then shimmery white. You can find them on page 181 of the current annual catalogue. 
I used mine to add some texture to the seascape that I created by first using a soft sponge brayer to add Mint Macaron and Balmy Blue ink to create a back ground.  I also used the brayer over a fruit stringy bag from the supermarket to create even more depth to the watery scene.  I also stamped with second and third generation ink the subtle sentiment of 'Time for a new adventure' from Itty Bitty Greetings in different directions across the piece in Night of Navy and some Dandelion seeds from Dandelion Wishes and some bubbles from Sailing Home stamp set.  I also added silver heat embossed bubbles to the matt layer of Night of Navy cardstock.

Next I added the circles of embossing paste using a homemade stencil made with vellum and various circle punches.  I mixed some of the shimmery white paste with a little retired silver, but later added more circles with just shimmery white.  


Using the Smooth Sailing dies I created another stencil to sponge on seaweed in Pretty Peacock, and Shaded Spruce  at the base of the sea scene and also added some die cut vellum seaweed which I left 'clean' or coloured on the reverse with Pretty Peacock Stampin' Blend or added some clear wink of Stella.  Vellum was also used to create a further matt layer which was embossed with the Corrugated embossing folder.  Some pearls coloured with Stampin' Blends were added for a pebbly seabed. 
The fish was created using the Faux Metal technique and the stamp is from Best Catch stamp set which is just perfect for the fishermen in your life.  
To finish my design I added two ribbon loops to hang the design from a die cut strip of card using again the Smooth Sailing dies.  It gives the effect of a tapestry/picture being suspended from a hanging rail.


Lots going on but the simple addition of embossing paste as depth and texture and is so easily done. I hope you'll visit everyone else on the hop and have a go with these fun pots of paste.  
Play with ink to create a watery scene using Best Catch, Sailing Home and Well Said

Now please do visit the other talented ladies around the globe to enjoy all our embossing paste tips.  

Thanks for stopping by.

Happy crafting
Zoe x

You are invited to the Inlinkz link party!

Click here to enter

Friday, 31 May 2019

Totally Techniques Stampin' Demonstrator Blog Hop sharing Sponge Stencilling


Welcome to the Stampin' Up! Global Demonstrator Totally Techniques  May Blog Hop 
Shannean Moncrieff down in Australia chose our Totally Techniques theme this month and so we are sharing cards demonstrating the stencil sponging or sponge stencilling technique.  I've got a couple of ideas to share starting with this one which also show cases a new suite of products from the 2019 -2020 Stampin' Up! catalogue which is available for shopping on Tuesday 4 June.  This bundle is called the Sailing Home Suite and is going to be an awesome suite of products for male cards, holiday scrapbooking and much much more.  

So to begin I used a layered circle die to create a very simple circle stencil from a piece of vellum.  As you can see I fixed it to my work space using painters tap which also held a piece of whisper white card underneath it just where I wanted it.  I used sponges and a combination of Balmy Blue, Seaside Spray, Pretty Peacock and So Saffron to spong my circle.    I started with the lighter shade of blues and left almost white space to create a moon in the sky and using a small circle punch and a post it note created a mask just to keep a rough circle for this purpose.  The So Saffron gives a glow to create the impression of a not quite dark sky.  


I stamped the sailing boat in Night of Navy ink with the top of the mast just overlapping the moon. 

I then cut the same size circle from a larger piece of whisper white card which was 10 cm x 14.3cm.  I also added a sentiment in Early Espresso and separately stamped the lighthouse and die cut it out.  I used the sponges to add some shading having coloured the stamp with marker pens to stamp a double coloured image.  I gently added light into the top of the lighthouse using a So Saffron marker pen.  I made sure that when I used stampin dimensionals to stick the layers together that the lower layer with the sponged circle lined up with the top layer and did not protrude beyond this top layer.  

I added some silver thread using dimensionals to adhere it to the back of the top layer and some Tranquil Texture  Sprinkles to each thread before sticking across the circle with another set of Stampin' dimensionals.  If you wrap the thread around the dimensional several times and then double mount the dimensionals to give sufficienct depth for the beads to slide as you can see here in this mini video. 

Check out the video for the hidden extra  HERE


A second way to sponge stencil is to use a pre-made stencil similar to one in the Stampin' Up! pattern party decorative masks pack.  Using the same stencil I created with the vellum above, I used it to create a mask to reveal only a circle of the card layer.  I slid the decorative stencil/mask under the vellum.  As shown below.

With sponges and a dauber I added different colours over the stencil.  To control where the colour went I used the circle die cut to create the top layer for the first card to mask parts of the circle and more painters tape.
Additionally for the small circles I used a marker pen to add a deeper shade of blue.
To control the amount of ink that is on each sponge I use a piece of acetate, plastic embellishment bag or the stamp a ma jig sheet if you still have one to rub small circles having added ink to each sponge directly from an ink pad. This allows the ink to sink into the sponge and reduces the chances of having a heavy spot of ink when you first start to add the ink.
To finish the second card I stamped a simple sentiment and added some rhinestones and basic adhesive backed sequins to the design and then mounted the stamped/stencilled layer onto a  matt layer of Pretty Peacock before adding to a whisper white card base.

Copies of the new catalogue will be coming through your door very soon if you've shopped with me in the past 6 months or indeed will be given out at my new catalogue launch party on Saturday 22 June.  If you are local and would like to come along please email me for the details.  However if you'd like a copy to browse please do contact me to arrange for one to be posted to you.
You can contact me at zoetant@live.co.uk or message me on facebook at www.facebook.com/zoetant

Now please do carry on with our Global blog hop and see more inspiration for this inky technique.  You can visit the other demonstrator blogs by clicking on each picture below.

Thanks for visiting Zoe x


You are invited to the Inlinkz link party!
Click here to enter

Friday, 24 May 2019

Thinking Outside the Box Hop - It's been a while


For the Thinking Outside the Box blog hop today we are sharing different versions of a folded box in that I mean a box with a fold over top.  I've made a simple box of Smarties look much more than just a simple box of Smarties.


To make this box you'll need two pieces of card stock, I used thick whisper white.  The first piece makes an open box for the Smarties to stand in and the second creates the fold over lid/flap.

Part 1 the box   - cut a piece of card 3 1/4" x 9" .  On the  long side score at 1 1/4", 4 1/4", 5 1/2" and 81/2".  On the short side score @ 1 1/4"

Part two the lid - cute a piece of card 3" x 8 1/4". On the long side score @ 4" and 5 1/4"

If you wish to stamp on either of these pieces now is the time to do it. I used the soon to be launched Sailing Home Stampin' Up! set using Sahara Sand ink and the anchor stamp.  I stamped all over the outside of both pieces of card.

Make an open ended box with the first piece as shown.  You'll see I couldn't decide on colours so this box is Sahara Sand card with Night of Navy stamping.


The flap is then added to the back of the box sticking the longer end of the flap leaving it to go up the back of the sweet/candy container once they are put in the box and then the flap folds over the top at the score lines.

Before putting the sweets into the box I used some coordinating Come Sail Away designer series paper to disguise the sweet container.  I also stamped the anchor on both pieces before sticking to the sweet container.
Once you have your gift inside the box you can bring over the flap and secure it with bakers twine or ribbon.  I've also used the topper that I created to stop the flap from flipping out, but be sure not to stick it over the twine so that the twine can be slid up the box to open easily without damaging the packaging.


For the topper I used a diecut from the Smooth Sailing Dies in Night of Navy card stock, added a stamped compass to which I had added a copper foil needle from the same dies and a copper brad.  I also stamped and heat embossed in copper the simple thanks message.  These would make nice thank you treats for teachers, co-workers or neighbours.  You could adjust the measurements to suit whatever treats you buy.

The new catalogue will be going live on 4 June so if you don't have a Stampin' Up! demonstrator and would like to browse a paper copy of the catalogue please do email me at zoetant@live.co.uk to arrange for a copy to be sent to you.  In the meantime don't forget to visit the Stampin' Up! Shop to check out the retiring items before they are gone.

Now it's time to visit the other talented demonstrators around the globe and see what lovely box designs they have to share with you.  Next stop is Annette in The Netherlands.


Blog List
  1. Shannean Moncrieff
  2. Tanja Kolar
  3. Zoë Tant - You're here
  4. Annette Elias
  5. Dena Rekow
  6. Beate Wacker
  7. Aude Barbara
  8. Barb Stewart
  9. Fiona Carson