My STAMPING PAPERCRAFT blog - Stamping Scene

Hello and welcome to my blog. I'm a paper craft addict and love sharing my passion for paper crafting . I run online and face to face card making, memory keeping and all sorts of 3D projects. I also sell many of the products I use. If you'd like more information do drop me an email. Thank you for visiting I hope to see you again soon. Zoe x
Showing posts with label zoe tant. Show all posts

Saturday, 6 November 2021

Stampin' for Christmas Blog hop


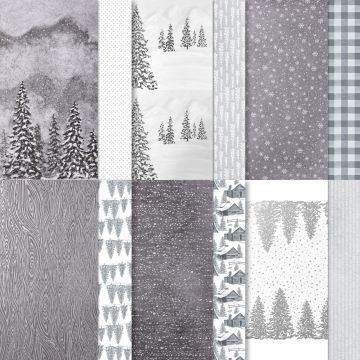
Peaceful place dsp for christmas card making with holly stamp

Welcome to the 
 

You might have just left Nina's blog. Isn't her share great!  It is now allowed to say Christmas I think now we've past Bonfire Night and so time to start making your cards and other festive paper craft items if you haven't like me been doing them all year.  

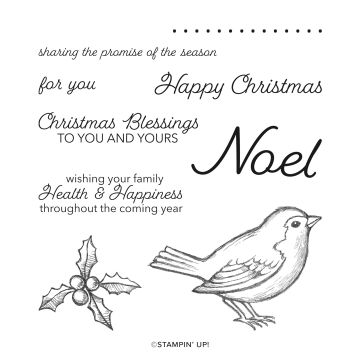
Today I'm sharing a card using the very popular Peaceful Place DSP (patterned paper) and a simple addition of a sentiment, ribbon and partially fussy cut holly sprig from the Happy Holly-days stamp set.

holly stamp from Happy Holly-days stamp set christmas card


I used a Real Red card for a square card base and added a matt layer of black card before adding my DSP layer with the ribbon fastened behind this layer.  
I stamped the sentiment and holly sprig on the same piece of white card and then used my Stampin' trimmer to remove excess white around the sentiment and keep the holly attached to the sentiment.  I used that good old punch/die called scissors to remove most of the white around the holly, but left it attached to the sentiment. 
Below I've  adapted the ribbon usage by just looping it across the back of my sentiment, used a banner punch to decorate one end and added a few rhinestones to coordinate with the silver embossed background DSP.  This paper is so beautiful and one sheet makes 4 good sized square cards, you just have to cut it which I know for some is very challenging as you prefer to stroke it, but at least this way just about the whole sheet is used and minimal wastage.  Even the thin strips cut off can be used for another card or too as borders.  

christmas card with peaceful place papers dsp and ribbon


You're off now to visit lovely Gina in Northern Ireland . 
stampin for christmas blog hop with zoe tant

join stampin up with zoe tant november 2021 only £75
Join Stampin' Up! in November 2021
Choose £130 of stampin' kit with free shipping for just £75


peaceful place patterned paper stampin up uk zoe tant


happy holly-days stamp set stampin up


Sunday, 28 March 2021

Ice cream Tree for Christmas - What do you think?


christmas tree card made with ice cream paper punch

Hello Christmas Card Club fans and the team.  Our challenge this Sunday is to share cards with Christmas trees on them and I've gone for a fun, cheery punch art card and believe it or not I've used an ice cream punch to create most of the tree and the decoration. 

ice cream cone builder punch
I used the cone for the tree itself and the bottom of the ice cream part to create a garland which I've decorated with glue dots and gilded leafing.  I used both sides of my subtle dsp paper stack to create some more interest and added a simply white embossed sentiment from Itty Bitty Christmas stamp set along with a couple of bakers twine bows. It's simple and fun and a great one for children to receive or make. 

This weekend we're in the garden while it is nice and doing chores indoors.  Hubby is vaccinating doing his bit today I'm so proud of him and Charlie. C will volunteer again once his exams are over.  


Enjoy your Sunday and see you again soon. 

Hugs Zoe x


Tuesday, 1 September 2020

Create a scene for the MAWTT September Challenge


It's been a long time since I've been able to join in as part of the design team at Moving Along with the Times.  Life and health have got in the way, but I'm just about on time this month YAY! as they launch the challenge of 'Create a scene'.  

For my scene I've used the popular stamp and die set, Sailing Home with Smooth Sailing dies.  I've created a neutral colour combo giving it a sort of sepia look.  I stamped the lighthouse using Soft Suede ink and then used one of my new paint pens, the smallest nib, to move the colour from the stamped image across it to effectively colour it in.  I did the same with the sailing boat, but used Early Espresso to give a darker shade and hopefully create some distance between the two and hit the challenge theme of a scene.  To create the sea I took a tip from my team member Dawn Howard and used the Birch background stamp to create waves.  

I've added some simple die cut details and sentiment all from the stamp set or dies.  

You can join in our MAWTT challenge here.


Have a good month and Welcome September, it's sunny with us today but cool so we are also doing some gardening while we can.  

Happy crafting and be safe.  

Zoe x


stampin up smooth sailing dies


Smooth Sailing Dies


stampin up sailing home stamp set with zoe tant uk demonstrator

Sailing Home stamp set

Friday, 29 May 2020

Learn some watercolouring ink techniques with Totally Techniques Blog Hop


Birthday card using the new Stampin' Up! Forever Fern stamp set 152559


Well hello everyone. I hope you are all well as lockdown continues but is starting to be eased.  We've been busy enjoying the sunshine and our new puppy whilst hubby has continued to work. I have been crafting but preparing a batch of classes by post and also running my monthly, but now fortnightly card clubs.  It's been great connecting on Zoom and we've all gone from novice to competent intermediates and have enjoyed the connection and chat with other human beings outside our own households.

Now I"m back, finally, to share our next Totally Techniques Blog Hop showcasing watercoloring  which was chosen by  Lynsay over in Canada.

I've used watercoloring in its simplest form creating circles of watercolour wash in shades of green which I then stamped on with various colours using the new stamp set Forever Fern which will be on sale from 3 June.


I first used one of my layering circle dies to cut an aperture in some very thin acetate, but you could use vellum card.  I cut the circle in the middle of a piece the same size as a piece of watercolour card  which was 5" square, hence the sharpie lines to mark the centre to help me get the circle in the middle.  I then watercolour washed the first circle in the centre by placing the acetate over the watercolour paper.  The rest of the circles I judged by eye having got the first in the middle.  

To do the wash I used one clean aqua painter to add water to the bare circle of watercolour card.  I added more water to the centre than the edges to avoid seepage under the acetate.  The circles aren't perfect, but close enough and it adds to the rustic style of the card.  I then used another aqua painter to lift ink from the inside lid of each shade of green cleaning it on kitchen paper between each colour.    I used my heat gun to make sure the circles were dry before then creating a paper stencil to stamp different leaf images onto each circle.   I did the stamping using my Stamparatus (stamp positioning tool) so that I could add more ink if necessary to each image as stamping onto watercolour paper can be a little temperamental.  

 I added some marker pen splatters with some of the colours. If you haven't done this before you place the nib of the marker into the marker lid and flick the nib off the edge of the lid.  For more intense splatters you need to have your pen nearer to the project.  I also added some using a wet, but not dripping aqua painter brush.  Pick up some ink with the brush and then tap the brush over your project. Have kitchen paper on hand just incase the water splatter is more than you intended.  To finish the card I added a Merry Merlot matt layer followed by a layer of brass foil card.  From the foil card I cut a square using my trimmer to use on another project, waste not want not......  


Green shades used for the circle washes were Soft Sea Foam, Mint Macaron and Pear Pizzazz.  Colours used for the image stamping included Early Espresso, Merry Merlot, Mossy Meadown, Pear Pizzazz and Mint Macaron.

I added happy birthday using the soon to retire (sadly as I love it) Label Me Bold set and used scissors to snip it out.  I then used the Merry Merlot marker to colour the cut edges of the sentiment to make sure just the merlot shade showed and it helps define the edge.

You can see all the inks and sentiments in my shop now and the Forever Fern stamp set and brass foil card will be there from 3 June.

You can get some more watercoloring tips around the globe with my fellow hop demonstrators below.


Need a copy of the catalogue to browse and stroke.... and don't have a demonstrator please do contact me at
zoetant@live.co.uk

You can also SHOP NOW and perhaps find a bargain from our Last Chance List.


Thanks for stopping by

Keep safe and well and #KEEPSTAMPING

Hugs Zoe x


You are invited to the Inlinkz link party!

Click here to enter

Thursday, 7 November 2019

Moving Along with the Times Snowflake Challenge


Today I'm back with the Design Team at Moving Along with the Times where we are sharing inspiration for cards with a snowflake theme.  You can join in our challenge with your makes here.  

For my card I masked off a piece of white card with low tack tape and then used sponges along with Coastal Cabana, Pacific Point and Night of Navy inks to sponge from light to dark creating a night sky.  

Before removing the tape mask I used an aqua painter to flick droplets of water across the sky and let them sit briefly before moping with a piece of kitchen towel.  This removes some of the ink and give the effect of snow falling.  I made sure the sky was dry before stamping on trees using a stamp from Stampin' Up! 's Most Wonderful Time product medley.  I stamped these in Shaded Spruce and some were 2nd generation ink to give the appearance of more trees in the background.  Again I made sure the ink was dry before stamping snowflakes using the little stamp from Christmas Countdown which can be bought to use with Stampin' Up!'s advent calendar kit, but is overlooked as a super stamp set for coordinating with all other Christmas sets for collage stamping and more.  These snowflakes were stamped with Versamark ink and heat embossed with white embossing powder.   I also used the chalk marker to add some snow to the tree branches and with wet glue I added some snowflake sequins.  Be careful when you add wet glue to heavily inked card as too much glue can make your ink run and bleed.  


The sentiment is silver heat embossed and die cut using the Stitched Rectangle dies.  I've added a strip of silver foil card to add a little more shine! 


Don't forget to join our challenge at MAWTT and do take a look at the Most Wonderful Time Product Medley which includes all these wonderful goodies. 
See more details of Most Wonderful Time 


Thanks for popping by

Zoe x


Monday, 11 March 2019

Stampin' Up! Painted Seasons Mixed Media Style


Stampin' Up! Painted Seasons - Mixed Media style

Today I'm sharing something a little different from the usual clean cut Stampin' Up! design and yet I'm still using Stampin' Up! products.  I've taken the Painted Seasons stamp set in another route to create a different look and I really enjoyed tinkering with inks, sponges and watercolour.  I'm also participating in a mini blog hop with my lovely friend and fellow Stampin' Up! demonstrator, Shannean Moncrieff in Australia.  She has some Home to Roost stamp set ideas to share with you to give you some inspiration for  two sets which  are part of the  super FREE gifts available this month from Stampin' Up! with a qualifying order. 

A different look for Painted Seasons

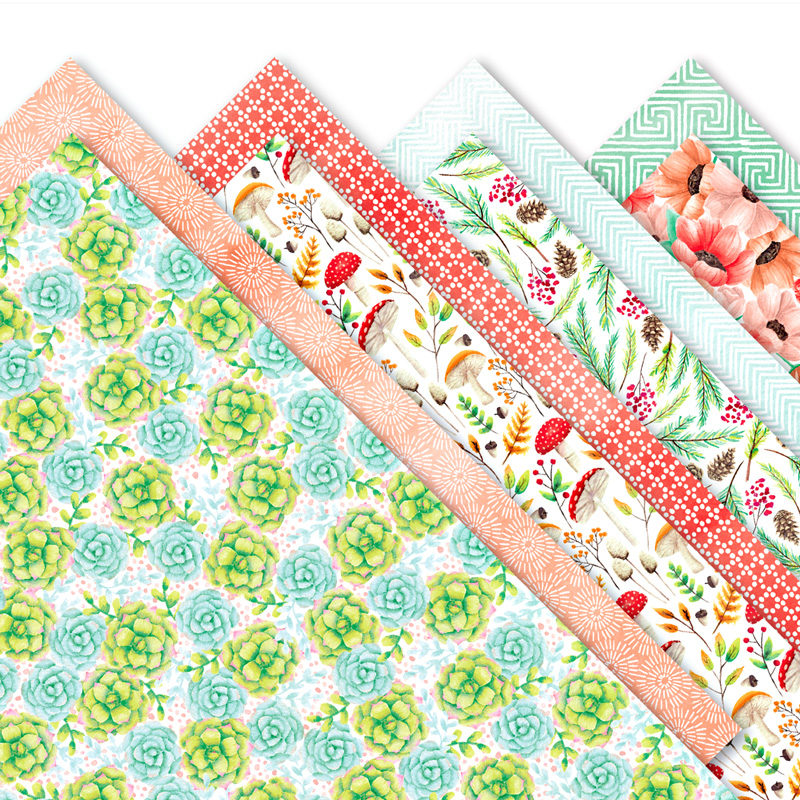
I started by stamping the images onto a piece of watercolour paper and then spritz gently with water to get the ink to run and blend.  I quickly dabbed off excess water with kitchen towel and heat set it all with my heat tool. I stamped the mini stars over the top and also added some gold embossed stars. With sponges I added extra colour to fill in the white space and also to define the edges of the watercolour paper.  I used Melon Mambo, Coastal Cabana and Granny Apple Green inks and lightly, free hand stamped the flowers again to add some detail back to them.  Torn edges of scraps sponged to deepen the tones create interest at the bottom of the card and allow for a touch of sponged Botanical Butterfly Designer Series Paper to be added along with a torn extract nearer to the top.

My matting layer is a piece of whisper white card which I sponged to get a 'softer' shade of Melon Mambo and having defined the edge of the watercolour paper with sponging I also flicked my Versamark ink pad along the edges to add random smudges of gold embossing to define it further before adding to the matt layer.  


The sentiment is partly die cut in gold foil card and the remainder stamped with Versamark and heat set with white embossing powder on black card stock.  The sentiment is from the awesome Stampin' Up! bundle Well Said which is so worth the investment!

I've entered my card into the Craft Stamper Magazine Take it Make it Challenge also. You can join the challenge HERE
The second half of the bundle is a pack of beautifully hand painted then printed designer series papers.  You can see the whole bundle in my Stampin' Up! Online Shop

Now check out Shannean's design for another take on this gorgeous stamp set bundle.  

Thanks for visiting Zoe x


You are invited to the Inlinkz link party!
Click here to enter

Friday, 15 February 2019

Paper Adventures Guest Designer


Welcome to my blog today especially if you haven't been here before but are part of the Paper Adventures Team Blog Hop. I'm honoured to be a guest designer for their February hop and I hope you'll go around the lovely blogs of these talented ladies who are all in the South Pacific. Thanks to Kelly for inviting me to join them today.


We're following this sketch in any way each designer chooses and so I decided I just had to share these beautiful designer series papers and stamp set that are now available as a free bundle, yes you read that right, FREE.  Check off some items on your wish list and you could be in for a bundle which is called Painted Seasons.  It includes the Painted Seasons stamp set and coordinating papers.  There are 4 designs and you get 3 sheets of each double sided design.  As the name suggests there is a design for each season and they are just gorgeous.

I used marker pens to colour the flower and leaves and then used yet another surprise as set of matching dies that you can purchase in March, but you'll need to be quick as this mini suite of products is going to be oh so popular.  I've layered the flower and foliage to create the different 'circles' of the sketch and I've added a little touch of petal pink/whisper white variegated ribbon which I folded in half over a strip of tear and tape to narrow down the ribbon.  There's a touch of gold thread to draw on the gold foil 'happy' which is a die from the Well Said bundle which also has the stamps to give you Mother's Day which is stamped in early espresso.  I love the metallic pearls we have in the annual catalogue as they too bring some subtle, elegant richness to your projects and you need that for sure when making a card for your Mum.  To make the sentiment and die cut pieces pop I layered them onto my main stitched shape circle in whisper white.

Stampin' Up! have got a winner with this beautiful bundle and you're on to a winner today with this blog hop.  Remember to see them all as the sketch is the only constant thing so there's lots of inspiration to be had.  I've always stuck to sketches in the past, that is to say the exact sketch, so go see if the others stick to it or go with a twist like me.

Remember that free gifts are available for qualifying spends during Saleabration which runs through to 31 March with new additions from today.  Some have been so popular they have already sold out so don't be disappointed and get your first choice early.

Enjoy the hop and thank you for stopping by my little Stampin' Up! blog today.


You're now off to the very talented Kelly Kent's blog.


You can see the beautiful Painted Seasons bundle HERE

and you can shop and see all the Saleabration products in my online SHOP

Don't forget to visit everyone on the hop and enjoy all the gorgeous projects. 


Wednesday, 26 September 2018

No Line Watercolouring with a twist

Stampin' Up! shared a no line watercoloring technique in our latest member magazine.  I've not done of lot of it so thought I'd have a go with this stunning ornament stamp from the Beautiful Baubles stamp set.  I'm really pleased with how it turned out for a first serious attempt.

I stamped the bauble on watercolour paper using Smokey Slate ink.  I slowly then added colour to each detail using a couple of aqua painters, one for painting with water first and the second for adding colour to each section.  I cleaned the second between  colours using kitchen towel.

The colours I used included Balmy Blue, Pear Pizzazz and Highland Heather. It takes some time as you need to let each section dry before you revisit it to add deeper shades and get some of the finer details.  Once complete I added some highlights with a white gel pen and some Wink of Stella for the inevitable sparkle that I believe an bauble needs.

Beautiful Baubles includes a 'string' stamp for the hanging of the bauble and a pretty bow stamp.  I embossed these in silver and added basic rhinestones.  The ornament itself I fussy cut and then went around the edge with a Balmy Blue marker pen to just highlight the edge and make it pop from the card base.

The sentiment is from the same Stampin' Up! stamp set and stamped simply in Highland Heather directly onto the card base.

Are you a fan of non traditional Christmas card colour combos?

Zoe x

You can buy all the materials used in on this card from my online shop

SHOP
If you find too many things to buy, you might like to join my team and become a discount shopper and enjoy at least 20% discount.
For more information look on my
JOIN STAMPIN UP page

You can shop with me or join my team if you live in the UK, France, Germany, Austria or in The Netherlands


Friday, 14 September 2018

Stampin' Up! Botanical Bliss Birthday Cards


September is a busy month for birthdays in my calendar and so I made a selection of girly birthday cards using Stampin Up Botanical Bliss set.  It's one of those sets with an eclectic mix of stamps, but they blend together really well and the sentiments are in a fabulous font.  The design team at Stampin Up are really talented and often their own hand writing has been used to create some of the scripted fonts.  It could be the case partially with this set.


I used the vine stamp as a starting point with all these cards stamping it twice overlapping it in Mint Macaron and Soft Sea Foam.  If you are not a 'green' fan then you might be persuaded to like it more with these two subtle shades.  I also used Blushing Bride, So Saffron and Calypso Coral to add elements from the stamp set.  In the top image I used the no line watercoloring technique to colour the focal flower on watercolour paper.  I stamped the flower in Smokey Slate to add an outline which hasn't disappeared completely with my watercoloring, but I think is faded enough not to overpower the delicate flower.  I've added different embellishments of pearls, ribbon or self adhesive sequins and also 'flicked' ink using the marker pen lid to take up some of the 'white space' that you may find difficult to leave and these spatters just soften it for you.  

On this final image I modified the sentiment by using washi tape to mask the happy on the stamp from the set and then added in a Happy from the winter catalogue set Merry Christmas to All.  Using masking and marker pens you can adapt sentiments to suit your needs.  Also a left over piece of ribbon too short for a bow or knot can just add a little sparkle and detail to a flower by folding it in half and adhering it behind the flower.  It helps to draw the eye across  the card and with the iridescent sequins there is just enough bling!

My card base is Blushing Bride and I've used just a layer of whisper white for my stamping and punched embellishments.  

Happy birthday to you if you are a September baby. 

Hugs Zoe x


Sunday, 2 September 2018

Christmas Card Club - Festive Foliage with Winter Woods


Stampin Up Winter Woods stamp set and In the Woods Framelits perfect for Christmas Cards

I've had fun experimenting with ink, sponges and masking to make this card and have enjoyed being able to take the photo outside whilst the weather continues to be pleasant. Although it does seem odd taking photos of Christmas cards in the warm sunshine.  

This one is for our fortnightly Christmas Card Club Challenge and it was my turn to choose the theme. I opted for Foliage and as soon as I saw this new Winter Woods Stampin Up set I knew I'd finally picked a sensible theme rather than those I've selected in the past and struggled to create with. I love this single tree stamp which is perfect for using the masking technique. I stamped it on scratch paper and then cut it out, a little laboriously with scissors, but also very therapeutic.  I stamped the first tree on the left onto Crumb Cake card and used Old Olive and Garden Green inks. The stamp itself is so clever as it's made to give depth to the tree, but if you ink with one colour and then add some darker shade with a dauber it looks even better.  I moved to the right using the mask to cover the previous tree and if there was a gap after stamping I just moved the mask and stamped again. Now how did you do that Zoe to get it in the same place I hear you say! Well I used my stampartus positioning tool to get it where I wanted it.  I'm so glad Stampin' Up! created their version of this tool and that they asked lots of demos for their comments and suggestions it's just perfect for perfect stamp placement.  

Now you may not be a fussy cutter, but I like it and hence the trees were all cut out with scissors just like the  mask.  Then to disguise some of the tricky bits which are tiny I used a dauber to add a gentle covering of Old Olive ink to bits I just couldn't quite fussy cut well.  I sponged it over the whole piece too to just lightly shade the bits of crumb cake showing through.  
My background is with the Stampin Up Buffalo Check Background stamp available to order from Tuesday. Again this is great when used freehand or to build up deeper shades on the stampartus where you can ink the same design multiple times.   I've added some new Suitre Specialty washi tape strips and some striped burlap, I love this as it adds more texture and has more colour to it. 
The sentiment is from the same Stampin Up Winter Woods set and it is heat embossed in black onto some Wood Textures designer paper.  I've stamped and sponged some extra pine pieces to add a little detail. These were die cut with coordinating In the Woods framelits.  Stampin Up have acknowledged that sometimes with itty bitty dies it could take you a lifetime to cut all the pieces you need and so they have tripled and doubled up on some of these small dies in the set so you can cut several at one time. How sensible is that! 

Learn to make Christmas cards with Zoe Tant

I like the vintage feel of this card with all it's smudging and it reminds me of log cabins and ski trips. Not for me this year as fingers crossed my snapped achilles will be repaired very soon, but skiing will be out this winter.  

As you know there are several ladies in our Christmas Card Club so do visit them via the CC Club tab at the top of this page and see their fabulous designs too for more inspiration.  

Here's to a great week ahead. 

Hugs all Zx


This book full of seasonal loveliness is live on Tuesday 5 September.
If you don't have a demonstrator and would like a copy please email me at zoetant@live.co.uk


Friday, 31 August 2018

Faux Linen Technique for Totally Techniques Blog Hop


Welcome to August's Totally Techniques Blog Hop.  Hello if you've arrived from Kelly Acheson in the USA.  Welcome to the UK.  

We are a small group of Stampin' Up! demos this month as some lucky folk are still on holiday.  Lovely Lynsay Mahon in Canada chose our theme this time and we are showcasing the Faux Linen technique. One I hadn't done before and one that I think you'll find as you visit the other fab blogs that can be done in different ways.  

For my version I chose to use the So Santa Stampin Up set which will be available from 5 September as one of many fun sets in the Stampin Up autumn winter catalogue.  This one is cute and has some fun sentiments to accompany some very cute outline images which are fab if you like colouring.   

The colours I used for the card above include Granny Apple Green, Shaded Spruce, Poppy Parade, Black, Crushed Curry, Daffodil Delight, Basic Grey, Crumb Cake, Pacific Point, Pumpkin Pie and Melon Mambo.  I've added a matting layer cut with the Layered Squares dies in Granny Apple Green and the sentiment is white embossed onto Poppy Parade Ink.  You will also love the red rhinestones that are just perfect for Festive Projects and any unused will be great for Valentines. 

Here's a link to my video of this fun technique. Faux Linen Technique


This is the card I created in the video.  The colours used are Poppy Parade, Garden Green, Crumb Cake, Basic Grey, Black, Sahara Sand, Daffodil Delight, Smokey slate, Blushing Bride. 
I used the Layering Square and Stitched Shape dies for the image and matting layer.  The square for the santa 5.5cm square (21/8 ") and the scalloped edge square is 6.3cm square (21/2").  The sentiment banner is 1.5cm x 7cm (5/8" x 23/4").  The sentiment is heat embossed with white embossing powder.   

Pop to my previous post to see another version of this card using the Beautiful Day stamp set, in  particular the butterfly, along with the incoming Buffalo Check background stamp which you have to have as it will change every time you use a different colour. 

From here you are off on a trip down under to see what Shannean has done with this technique. It will be amazing so you're in for a treat. 


Thanks for dropping by and remember if you haven't got a copy of our Autumn/Winter catalogue and you're in the UK, France, Germany, Austria or the The Netherlands then please contact me by email on zoetant@live.co.uk to ask for a complimentary copy. 

More soon Zoe x


Here's the list too of everyone in the hop
1. Lynsay Mahon - Canada
2. Nadine Weiner - Germany
3. Kelly Acheson - USA
4. Zoe Tant - UK You're here
5. Shannean Moncrieff -Australia
6. Barbara Meyer - Austria