My STAMPING PAPERCRAFT blog - Stamping Scene

Hello and welcome to my blog. I'm a paper craft addict and love sharing my passion for paper crafting . I run online and face to face card making, memory keeping and all sorts of 3D projects. I also sell many of the products I use. If you'd like more information do drop me an email. Thank you for visiting I hope to see you again soon. Zoe x
Showing posts with label moving along with the times. Show all posts

Sunday, 3 October 2021

Stars are Shining Bundle for October Challenge

christmas card idea using stars shining bundle stampin up

 Welcome and Happy Sunday. It's a new month and the MAWTT team are sharing a challenge with lots of options today.  It's a noughts and crosses/tic tac toe/bingo grid and you choose a row or column that suits you to make your card.  
I stamped the large star stamp from the Stars Are Shining stamp set , tone on tone to the base card of Night of Navy and then added an EMBOSSED layer of Just Jade using the pine folder from the 3D Wintry pack of two folders.  Onto this I've added a piece of white card with a Mango Melody stamped image from the recently retired SAB set Textures and Frames to create a colour wash for the bauble (IMAGE) which is stamped onto vellum using Memento Tuxedo Black ink with some minimal Night of Navy colouring using an alcohol marker/ stampin' blend.  

To adhere the vellum without the adhesive showing I've added a real red die cut label and added a gold bow ie my RIBBON.  

It's another example of the less traditional colours of Christmas cards we used recently for my challenge at Christmas Card Club. You can see my challenge card for that on my earlier Stampingscene post. 

Don't forget you can join in the challenge at MAWTT any time during the month right up to the end of the month.  Take a look at the DT cards and join in here. 

Thanks for stopping by and I look forward to seeing which bingo line you create. 

Keep safe and keep stamping. 

Zoe x

stars are shining stampin up bundle shop with zoe tant uk

Stars Are Shining Bundle


gold silver thread for craft card making

Simply Elegant Trim


SHOP ALL PRODUCTS

Thursday, 1 April 2021

Join our April challenge.

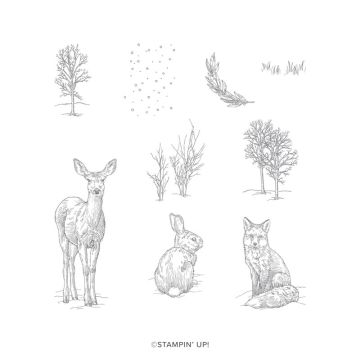
nature hand made card with rabbit from Nature's Beauty stampin up with zoe tant

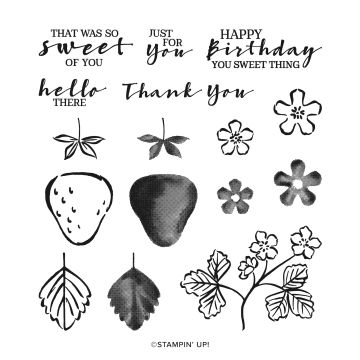
 Over at MAWTT this month we are sharing cards with birds and or animals on them.  I couldn't resist using this sweet rabbit from the Nature's Beauty stamp set along with some pretty flowers from Sweet Strawberry stamp set.  It seemed appropriate with the challenge starting as the Easter weekend is upon us. Happy Easter all let's hope the weather is kind.  

I stamped the rabbit in Grey Granite ink onto a die cut stitched circle and then stamped again on an off cut of card so that I could fussy cut out the body to then decoupage it onto the one stamped on the circle to add some depth.  I've added flowers and leaves stamped with Pear Pizzazz, Soft Sea Foam, Grey Granite and Blushing Bride.  The Sweet Strawberry is a two step stamp set which makes it easy to have a bolder outline of an image and then stamp the fill in colour.  

I added some score lines for detail scoring on the reverse of the design layer and some marker pen spots.  

A simple card for Spring.  We've got lots of seeds planted in trays and are hopeful for a good crop from our garden this year.  It's great to get the whole family involved and we loved it last year. 

Please do join in the challenge over at Moving Along with the Times. You can find it HERE. 

Keep safe and enjoy the long weekend 

Hugs Zoe x


Nature's Beauty Stamp Set

Nature's Beauty


sweet strawberry stamp set stampin up with zoe tant demo uk

Sweet Strawberry 


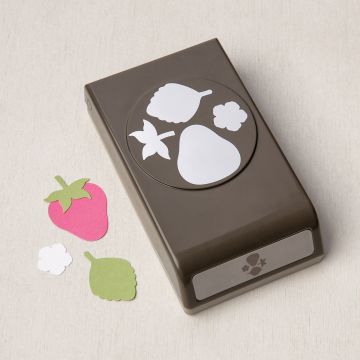
strawberry builder punch for paper craft

Strawberry Builder Punch


SHOP ALL PRODUCTS

Friday, 1 May 2020

Mixed Media Flowers

Hi all how are you holding up?  We continue to be busy with our new and slightly older puppies and are made to laugh by the two of them constantly.  At the moment it is fun to steal each other's beds.   My card today has a message for everyone.  You are all wonderful and even when the chips are down you can do it!  Hang in there everyone hopefully we are heading to brighter days and a little more freedom.

My card is for the Moving Along with the Times  and Craft Stamper monthly challenges.   I've gone for something a little off the wall having decided to experiment with Stampin' Up! pigment sprinkles and shaving foam.  This process didn't work out quite how I expected, but it did create a very bold background paper which I then played about with.  I also got some less bold papers created with the same pot of foam and used it to stamp and create my 3D flower using the Painted Poppies stamp set from the Spring mini.  I stamped several flowers and fussy cut them out including cutting to the centre of the flower to create individual petals. I used a bone folder to curl these petals.  I've layered different pieces of the main flower and also added two smaller flowers in the background.   I also used some masks to create stencilled patterns onto the background and some embossing paste for texture.  I used another mask to add ink to my matt layer also blending Bermuda Bay and Crushed Curry ink.


I've added some deconstructed white bakers twine and some Noble Peacock rhinestones along with an embossed sentiment from Rooted in Nature which I also fussy cut around and stuck on with black dimensionals which are just great when you are adding a dark colour and don't want your sticky pads to show.

Don't forget to check out the Last Chance to buy list on the Stampin' Up! website and you might find a bargain or certainly get your favourite stamp sets before they retire at the end of the month.   I send out thank you treats to all who order in my online shop and complimentary catalogues if you've spent at least £25 with me in the past 6 months.  Please get in touch if you don't have a Stampin' Up! Demonstrator and would like details of catalogues and products.  I'm at zoetant@live.co.uk or you can find me on Facebook and Instagram. 

Hope to see you following soon and also joining in our challenge at MAWTT or Take it Make it at CRAFT STAMPER.

Thanks for checking in here with me and keep safe and stay well.

Hugs Zoe x

Wednesday, 1 April 2020

Have you heard the BUZZ?


The buzz is new month, new challenge and a new card for the Moving Along With The Times monthly challenge.  Diamante is the theme and I love a bit of bling so I've added Noble Peacock rhinestones to my mixed media Honey Bee card.  

I started with watercolour paper and added different colours in a wash to create a background.  On top of this I sponged clouds using a mask and created my own mask with die cut vellum using the honeycomb die from the Detailed Bee dies which coordinate with the Stampin' Up! Honey Bee stamp set.

I added a gesso circle layer then also used the same home made stencil to add embossing paste and the leftover colour on the stencil/mask blended with the paste to give a shimmer of colour.

Using Stampin' markers I added flowers and ink splatter to the piece.  I white heat embossed the beehive onto watercolour paper then colour washed it to blend it with the background but deepened the colour to the edge to make it stand out too!  The bee is heated embossed with silver and then I carefully added colour with an alcohol marker.

I also added some clear Wink of Stella to the clouds, because every cloud has a silver lining, even though it's not so easy to see on my card or in real life right now.

Simple white embossing on black card for just as simple a sentiment.


Come and join us with the MAWTT challenge .  It's on all month so you have time to make a Diamante card.  You can also check out the new Ornate Garden Suite on the new Stampin' Up! UK website.  This suite includes it's own bling in the form of foiled papers and gilded gems. 

Thanks for stopping by. Zoe x


Saturday, 1 February 2020

Honey Bee Beauty


Things have changed at Moving Along With The Times for 2020.  We're now having one big design team and are having one challenge a month so it's even easier to join in.

Our challenge this month is to not use any images.  Mine is possibly a little bit of a contradiction as it has die cuts, but arguably they are not stamped images and sentiments don't count I believe!!!

Once again I've used the fabulous Detailed Bee Dies from the Stampin' Up! Spring mini catalogue.  They are amazing.  I love them and you can see more of my designs using them in Craft Stamper magazine from early March in what will be the April issue.

I've used some of the extremely strokable Golden Honey free Saleabration papers. Yes a free gift when you spend £45 on Stampin' Up! product until the end of March while supplies last.  I cut a piece to cover my card base and then used my Stamparatus to position the die cut bees and stamp the sentiments in line.  Colours used are Granny Apple Green, Bermuda Bay and Daffodil Delight for the bee die cuts.  I used some double sided adhesive sheet on the card before passing it through my die cutting machine to make the actual sticking much easier.

I stamped the sentiments in Tuxedo Black Memento ink and they are taken from Well Said and Colourful Seasons.  The beautiful was part of a larger sentiment and so I used washi tape to mask off the parts of the stamp I didn't want, added ink and then removed the washi tape before actually stamping.

I'm a fan of a bit of bling so the rhinestones sort that out as well as the mini smudge under one of them.  Hey every cloud and all that.


The detailed Bee dies coordinate with a stamp set called Honey Bee and you can see that in action on my previous Stampin Up Honey Bee post and if you buy them together you save 10% on the bundle price.  Add a pack of rhinestones and card and you'll get to choose either the Golden Honey papers or another free gift from a fabulous selection.

Come join us at MAWTT for our February challenge.

Happy crafting
Zoe x


Thursday, 5 December 2019

Moving Along With The Times - my challenge

Today it's time for my challenge on the Moving Along with the Times blog.  I'm asking everyone to create a card with either Santa or his elves or both on.  I've used the ever so cute #Elfie stamp set to create a simple, but effective card. 

I stamped this happy little fellow in black Memento ink on to a piece of whisper white card and then used my Stampin' Blends aka alcohol markers to colour him in.  Colours used included Poppy Parade, Granny Apple Green and Crumb Cake all in light and dark shades as well as Soft Suede dark.  

Regular visitors will know that I love bling and so I gave him rhinestone bells on his cute shoes and glitter enamel dots for detail and if I'm honest to cover the finger smudge!!! Yes we all have them.  

With a black journalling pen I added some freehand doodles around the edge of my design to act as a frame and then matted this layer onto a card base. 

My sentiment is from Itty Bitty Christmas which I received free as a gift for achieving enough points as a Stampin' Up! Demonstrator last year to attend the incentive trip.  If you'd like to know more about joining Stampin' Up! and my team so that you too can enjoy discounts and the opportunity to earn rewards please do contact me at zoetant@live.co.uk for more information.  Start the new year with a new hobby or business. 

Thanks for dropping by.

Zoe x


Thursday, 23 May 2019

Monochrome Colour for Moving Along with the Times Challenge Blog


Stampin' Up! 2018 - 2019 catalogue will soon retire so don't miss out on those goodies you've had your eye on.  However I'm sharing a little sneak peek today as my design team card for Team A's challenge set by Penny over at Moving Along with the Times. She's challenged us and you to share cards that are monochrome  - colour ie all in shades of one colour.  I've got mainly green and only used white for my sentiment and a touch of bakers twine.  You can join us for the challenge over at MAWTT. 


I've used a new stamp set called Daisy Lane which coordinates with the ever popular Daisy Delight stamp set and matching punch.  This new set will have a matching punch and clearly more images as there isn't a Daisy in sight on my card today. Instead I've used this fab fern leaf stamp and a small dotty stamp from Stampin' Up! set Painted Harvest to fill in the gaps between the leaves.  I've used shades of green with specific colours being Garden Green and Soft Sea Foam.  To create a darker tone as my matting layer I swiped my Versamark pad across the edges of the Garden Green layer and added clear embossing powder which I melted with my heat tool, to give a little more detail.

I've also used a new set of layering dies simply called Stitched Nested Labels to cut a hexagon from the top layer to reveal the darker green below.  I also used my Stamparatus to make sure I stamped the 'smile' in the right place.  The stamp positioning tool makes it easy to position the card stock, lay on the stamp in the place you want it face down, then pick it up with the Stamparatus plate so that the top layer of card can be removed and the Garden Green piece remain in place for stamping.  You'll notice I also used my Versamark pad to stamp some subtle design around the sentiment to carry on the design in the aperture.   The rest of the design was stamped and white heat embossed before being punched out with the Classic Label punch.  I've added a handful of the Soft Sea Foam Basic Adhesive Backed sequins to give that bit of bling you know I love.

The card is for my daughter who has just started working in London this week.  It's been a big adventure and I'm so proud of her.  She's there for 6 months before she returns to her Uni for more lectures before starting another internship next year.

Do come and join us at MAWTT and look at the other design team cards for inspiration.  Also if you don't have a Stampin' Up! demonstrator and are in the UK, The Netherlands, Germany, France or Austria and would like to see more of our new products please mail me your details for a copy of the catalogue.

Happy day

Zoe x

Thursday, 28 March 2019

Cards for Men at Moving Along with the Times

Stampin' Up! like many stamp companies does have a selection of male orientated stamps, but we all seem to struggle with this type of card.  Today though I'm sharing a card I made a little while ago and saved for my theme at Moving Along with the Times.  We would love you to join in and share your masculine cards. The Design Team have a fabulous selection to inspire you so do pop over to MAWTT and have a look as well as joining in our challenge. Share your card and some of the DT will come take a look at it and leave you a comment.

For my card I've used sponges and ink and the eclectic Stampin' Up! stamp set Enjoy Life. It's a real mix bag of images but it includes a cyclist, the butterflies, foliage and grass and I've added a sun by using a circle punch to create my own thin paper stencil and sponged the sun through it.

I created a mask for the hill by just ripping a piece of paper and using one half to mask the sky and the other to mask the hill.  Once I had sponged the hill I added just the tops of the grass stamp using the mask to limit the amount of image stamped on the cards and where it went.  I've also added the flowers using Stampin' markers to colour the stamp prior to stamping.


You can create a faux watercolour look doing this techniques and add in whatever images you wish.  The cyclist I stamped on a piece of scratch card prior to fussy cutting and adding with just glue dots to raise it only very slightly.

I like this stamp set and enjoyed the smudging and texturing with just ink.  Why not have a go too!

Hugs Zoe x


COMING SOON 
How exciting!!!


Thursday, 27 September 2018

Autumn Masculine Card for MAWTT

Rooted in Nature hand made card perfect for those masuline cards
Join our Moving Along with the Times challenge this week to share your autumn themed cards. Jodie chose the theme and I have create a mixed media card all with Stampin' Up! products.  There's a little faux torn edge in there along with actual torn edges and I've used daubers to add ink to my tree stamp from Rooted in Nature stamp set to get those autumnal shades in there. I've used linen thread and a brad as well as Wood Textures designer series paper.

I used to Postscript background stamp to add a stamp faux torn edge on the paper then tore the edges to suit and sponged ink on the torn edge to join the colours together. I've also used the torn edge to sponge further faux tears and second and third generation stamping of the postscript to give a faded look.

My sentiment is a combo of Merry Christmas To All and Tabs for Everything on a stitched circle die cut where again I've used smudging with sponges and second generation ink stamping to soften the edges of the circle and tone in with the sentiment and embellishments.

A busy card, but fun to make even though I had very inky fingers at the end.  I used Old Olive, Cajun Craze, Early Espresso, Crumb Cake and Soft Suede inks.

I just love the papers which backdropped my stamping so perfectly.

Don't forget to join in the challenge at MAWTT and see all the other Design Team inspiration and other entries.

Hugs Zoe x

Thursday, 15 March 2018

Easter - Join us at Moving Along with the Times Challenge

Easter Basket with Stampin Up Delightful Daisy Designer Series papers and a 'CHICK'

Easter is our challenge theme at Moving Along with the Times this fortnight.  You can see mine and the other DT designs here.  We'd love you to join in our challenge which is almost as easy as Anything Goes, just needs to have an Easter theme running through it.

I made this basket following on from a youtube tutorial I shared a couple of weeks back.  You can click   Easter Basket tutorial to see the video and other ideas for decorating it.

To make this one I used the Delightful Daisy papers from the Stampin Up annual catalogue which are really popular along with the stamp set Daisy Delight.  Night of navy gingham ribbon is tied in 'bunny ear' bows and attached to the handle with glue dots. You can also add a tag and slot it in the side panel on the basket.  In the dimensions in my video tutorial you end up with a basket that is 3 inches wide and deep.  It's just the right size for mini eggs or a larger single egg.

If you would like it slightly smaller then you can used a piece of A4 card cut to 21cm x 28cm and then score at every 7cm on each side before following the instructions in the video.

Here's a trio of cards with the matching Stampin Up set Daisy Delight and the daisy punch.


Don't forget to join in the challenge and share your Easter projects over Moving Along with the Times.


Thanks for visiting today 
Hugs Zoe x