My STAMPING PAPERCRAFT blog - Stamping Scene

Hello and welcome to my blog. I'm a paper craft addict and love sharing my passion for paper crafting . I run online and face to face card making, memory keeping and all sorts of 3D projects. I also sell many of the products I use. If you'd like more information do drop me an email. Thank you for visiting I hope to see you again soon. Zoe x
Showing posts with label mirror stamping. Show all posts

Friday, 26 April 2024

How to do mirror stamping - Totally Techniques Blog Hop


friendship handmade card with Trucking Along Stampin Up stamp set

 
totally techniques blog hop sign

Welcome crafty friends have you ever wanted to reverse an image or mirror it to create one image looking at the same but in reverse?  Here is one way and you'll find others on our global Stampin' Up! demonstrator blog hop. 

I've used the online exclusive stamp set Trucking Along with some of our new In Colors which are launching on 1 May.  

All you need is a silicon mat, black ink, white card and an outline stamp to get started.  The video will show you how to create simple cards like mine with the same image reversed or mirrored.  I've added detailing to the above and below cards by using the scoring tool on my trimmer or you could use a scoring board. Flip your design face down so that you score on the reverse to 'push' the card up or emboss it on the front.  

For more detailing you can add mini pennants with offcuts of your papers and coordinating embellishments.  With Stampin' Up!'s colour coordination through ink, paper, card and gems it is easy to create a coordinating design.  I love the new In Color resin dots perfect for simple additions on handmade cards like this. 

I also used Stampin' Blends, alcohol markers in coordinating colours to colour my images.  I chose not to mirror the truck contents because getting them stamped into exactly the right spot would make it tricky , but of course you could fussy cut to add them once you have done the mirror technique in my video. 
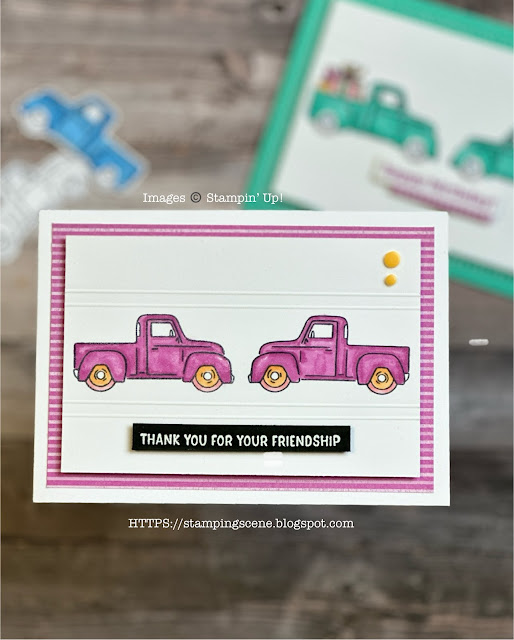


handmade card using the mirror stamping technique

Thanks for stopping by and below are the supplies I used and the links to the other wonderful stampers in the Totally Techniques Blog Hop Team. 
Hugs all Zoe x

You are invited to the Inlinkz link party!

Click here to enter


Supply List


Friday, 26 November 2021

Mirror Stamping with the Totally Techniques Design Team

stampin up sneak peek of awesome otters mirror stamping technique

 I just had to use this cute Otter stamp for my offering for the Mirror Stamping technique that the Stampin' Up! Totally Techniques Design Team are sharing this month.  How cute are they and perfect for showing this simple technique.  


This is an early sneak peek of something coming in the new year with a fresh bright start from the Awesome Otters stamp set and if you love cute you will adore this set.  For my card I first created a watery background with smooshing ink onto shimmery white card.  I made sure it was dry before adding some very subtle stamping using another stamp from the set adding ink to the watery lines using a Stampin' Write Marker to give the impression of movement in the water.  Once completely dry I added a matt layer with just a narrow border.


I then stamped one otter onto thick white card and coloured it with alcohol markers/ Stampin' Blends and fussy cut it out.  I restamped it onto the watery background to replace  some of the furry fluff that was cut off in the fussy cutting.   I adhered this otter with her pink fish onto the water layer. 

To reverse or rather mirror the second otter I did the following simple process. 

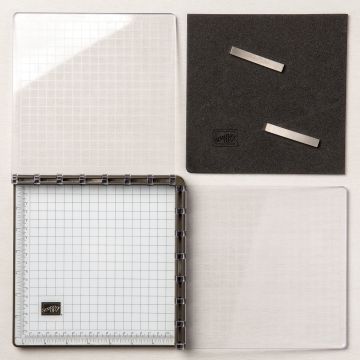
Pop the otter stamp onto your positioning tool (Stamparatus) and add a foam pad with a silicon mat on top of it. Ink the stamp.  I used Tuxedo Black Memento ink as I coloured with the alcohol markers. 
Stamp the otter onto the silicone matt.  Do this two or three times to make sure there is lots of ink on the mat.
Carefully place a piece of white card onto the image which I used my magnets on to prevent it from moving they just aren't in the picture.  Carefully put pressure on the card to make sure the whole image is picked up by the card.  

You then have a reverse image of the original otter and can do the same process of colouring him in and fussy cutting.  I added his furry bits back with a marker pen to make sure I didn't mess up my water background.  

Of course life never runs smoothly in the world of rubber stamping and so having made a mess of my sentiment stamped simply in the water I made some more watery background and stamped and die cut the circle to hide my inky smudge.  I wanted tiny hearts to act as bubbles so used up some embellishments from the last spring catalogue which I think are just perfect.  This of course would be a perfect valentine, wedding, engagement or anniversary card.  

Enjoy our hop sharing mirror stamping ideas and tips. 

Keep safe and keep stamping

Hugs Zoe x


You are invited to the Inlinkz link party!

Click here to enter
/>
stampin up Stamparatus stamp positioning placement tool for craft


shimmery white card for card making and craft


Tuxedo Black Memento Ink Pad for card making stamping