My STAMPING PAPERCRAFT blog - Stamping Scene

Hello and welcome to my blog. I'm a paper craft addict and love sharing my passion for paper crafting . I run online and face to face card making, memory keeping and all sorts of 3D projects. I also sell many of the products I use. If you'd like more information do drop me an email. Thank you for visiting I hope to see you again soon. Zoe x
Showing posts with label stampin' blends. Show all posts

Friday, 26 March 2021

Ideas for using alcohol markers AKA Stampin' Up! Blends


using alcohol markers stampin blends and rubbing alcohol on vellum to create background

I love this creation if I say so myself.  It really appeals to me because I love playing with ink and slightly off the wall looks.  It is also pleasing to me as it was an experiment that went wrong at the point of adding leaves in gold leaf that as you can see went very wrong as you can't see the leaves and my daughter said she thought it looked great with 'sponges' rather than neat gold leafed leaves.  A happy accident success and if you like it too even better!


It is now my card for the Totally Techniques Blog Hop today when this group of international Stampin' Up! demos are sharing ideas for things to do with your Stampin' Blends, our form of alcohol markers. 

This technique requires
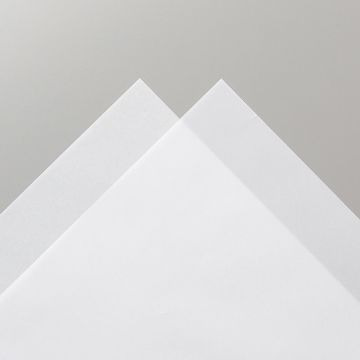
Vellum
Stampin' Blends /Alcohol markers
Isopropyl Alcohol/Rubbing Alcohol
Versamark Ink
Heat and Stick Powder
Gilded Foiling Embellishment

You start by colouring the vellum randomly with your Stampin' Blends.  Darker colours work best to maintain enough colour to actually show. I used Magenta Madness, Rich Razzleberry and Misty Moonlight.  

Ideally you then want a small paint brush or pipette to put drops of the rubbing alcohol onto the ink and watch it do the magic.  You can move the vellum about to make the drops roll and blend the colours.  Allow it to dry and then if you want to move the ink about more add more drops.  Remember less is more with a technique like this and so build it slowly.  

Once it is completely dry you could stamp in Versamark and use heat and stick powder add a gold leaf effect or just smear the Versamark pad in random places on the design.  Sprinkle heat and stick powder over the Versamark and heat very gently until it just melts and then add some Gilded Leafing embellishment and use a sponge or dry paint brush to remove any excess. 

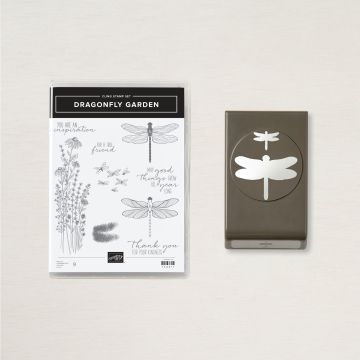
To finish the design I added a frame die cut using the Stitched Rectangle dies from a piece of white card that was embossed using the Subtle embossing folder.  I also added a gold heat embossed dragonfly on Magenta Madness card. 
I had spare from the original vellum piece so created a second card using the inside piece of the white card frame and then cut a stitched square from the last piece of vellum.  I made a gilded stripe using tear and tape and added the Gilded Leafing to it.

I mounted my design onto layers of Misty Moonlight embossed card and a piece of the new soon to arrive in color designer series paper stack.   The flowers stamped also in Misty Moonlight are from the Basket of Blooms stamp set and I used kit glue dots to create the gold leafed flower centres. A lush card that appeals to the bling girl in me.  I can add a sentiment to either card as and when I want or just send as an artwork card.  

Here the hope of more sunshine and warmer days still grows and that soon freedom will be ours once again.  I hope dear readers you are keeping safe and well and not too stir crazy. 

Hugs 
Zoe x

vellum card stock shop zoetant.stampinup.net
Vellum Cardstock


You are invited to the Inlinkz link party!

Click here to enter

Friday, 17 January 2020

Ladybirds or Ladybugs?


Stampin' Up! host special for Saleabration is super cute and is called Little Ladybugs, but here in the UK of course we generally call them Ladybirds.  Either way you won't be able to resist smiling when you see these cute little insects!! 

I couldn't resist buying this set when demonstrators had the chance back in December.  I shared it with my card club ladies this week and they loved this cute Stampin' set and the chance to do some relaxing colouring.  

We used a sponge dauber to create the background spots and then stamped this little bug and the flower in Tuxedo Black Memento ink prior to colouring with the Stampin' Up! alcohol markers called  Blends.  In the blends you can choose to buy a light or dark of each colour available or both.  If you have both then you'll enjoy more flexibility to create shading in your colouring.  They are double ended in that each pen has a bullet end and a brush end making them great for large or small areas of colouring and anything in between.  

We also used the Decorative Ribbon border punch to add a frill to one side of the design in Pineapple Punch card.  A simple card but it packs a punch.  

The best part about this Stampin' Up! stamp set is that you can earn it for free with qualifying shopping at a party/class you can host or with a qualifying order.  You could of course also collect some orders from friends and earn it that way too without a party or class.  Any way you might choose to do it please contact me for more details at zoetant@live.co.uk  


You can shop Stampin' Up! products now in my online shop 


Thanks for stopping by and checking out my first post of 2020.  A bit slow off the mark due to some health issues, but feeling quite a lot better at the moment.  

Happy crafting

Zoe x

Thursday, 31 October 2019

Monster Party

I got to play with this fun set briefly as I designed a project for the local Brownie unit.  They made tags for their Halloween Treats from Brown Owl.  Whilst prepping I couldn't resist using BOO TO YOU! to make a card for my nephew. 

First I clear embossed the balloon from stamp set Celebrate with Cake  onto black card just to give some background detail.  I added some torn and snipped card behind the black layer for interest and then proceed to stamp the monsters in black memento ink before colouring them with Stampin' Blends.  I fussy cut them out to add them to the party scene. 

The sentiment is also from Stampin' Up! set Celebrate with Cake which was white heat embossed and fussy cut also.  This stamp set is featured in our Experience Creativity catalogue which has some simple stamping sets for quick and easy cards and is also great for beginner crafters. 

You can see this mini catalogue  here

I've added some googly eyes to one monster and some glitter enamel dots for more texture.  It's a fun card for a boy who is cheeky and full of mischief.  Of course the colouring is relaxing before the storm and chaos of the party coming. 

Happy Halloween All. Thanks for stopping by

Zoe x