My STAMPING PAPERCRAFT blog - Stamping Scene

Hello and welcome to my blog. I'm a paper craft addict and love sharing my passion for paper crafting . I run online and face to face card making, memory keeping and all sorts of 3D projects. I also sell many of the products I use. If you'd like more information do drop me an email. Thank you for visiting I hope to see you again soon. Zoe x
Showing posts with label 6 x 6 OSW. Show all posts

Friday, 9 June 2023

One Sheet Wonder with 6" x6" Designer Series paper


one sheet wonder cards and gift envelope using Masterfully Made Designer series Paper

Welcome to my blog on a sunny Friday in June in Lincolnshire, UK. I'm sharing a One Sheet Wonder idea that is really simple for any card maker and you could upscale from a 6" x 6" cutting plan to a 12" x 12" sheet of paper and use for scrapbooking layouts.  Below is the cutting plan for a piece of 6" x 6" designer series paper, DSP.  

OSW one sheet wonder 6" x 6" cutting plan

If you cut all the pieces you can make the six cards shown and of course with most Stampin' Up! DSP packs you have double sided papers so can make 3 with one side of the paper and 3 with the other.  
With an additional 12"x 12" piece of DSP from the same pack I have created a gift pack that will comfortably fit 3 cards and envelopes inside to make a fun teacher gift or a thank you for someone who has helped you or just a treat for a neighbour.  

cards and envelope made with OSW paper from Stampin' Up! with zoe tant uk demo

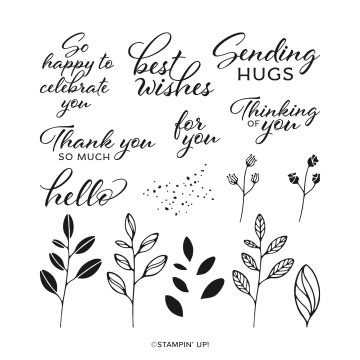
Some folk say you should never send a naked envelope so you can see that I've stamped the envelope flaps using the Layering Leaves stamp set from the new Stampin' Up! annual catalogue and I've used it and the coordinating punch to create a topper for the envelope which is attached with stampin' dimensional and allows you to tuck the flap of the packaging neatly underneath the topper without then having to tear the package to open it. 

I've kept the stamping very simple using just one ink, Fresh Freesia and have also added some sparkle with the Tinsel Gems Three Pack. 

On the bottom trio I have also used a score board to add some detailing behind the DSP squares. All of the sentiments and stamping are from the Layering Leaves stamp set.  

I hope you'll have a try at a OSW soon and to make it easier to decide don't forget that in June many of Stampin' Up!'s DSP packs are on sale with a 15% discount.  Buy any 4 packs of DSP on sale,  from me in June using host/demo code T9D47SFB to receive a free pack of Stampin' Dimensionals. Please note these will be posted to you separately by me and this offer is only available from me and is not offered by Stampin' Up!.  SHOP DSP

In the meantime enjoy the sunshine and happy stamping. 

Zoe x

Join Stampin Up with Zoe Tant UK demo
In June you can save on your shopping by joining Stampin' Up!
Choose £154 worth of products and pay £99 + free shipping
 

Supplies Used
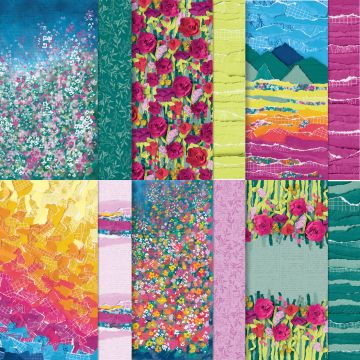
Masterfully Made Designer Series Paper DSP


Tinsel Gems Three Pack


Fresh Freesia yardstick


layering leaves photopolymer stamp set for stamping


Friday, 26 June 2020

Start simple with a One Sheet Wonder 6 x 6


I don't know about you, but in lockdown I seem to have been busier than ever. I've enjoyed having the children at home and with some very nice weather we've enjoyed the time in the garden and finally bringing the right kind of floral life and fruit and veg back into it.  When I snapped my Achilles tendon two years ago I couldn't do a thing and as the lead on things gardening it all went to pot.  However this year we will be feasting on tomatoes, beans, courgettes, red and black currants, pumpkins, squash to name but a few.  Not forgetting my hanging baskets and pots which if I say so myself are looking rather beautiful.  

This has however distracted me from crafting, but today I'm joining my fellow international Stampin' Up! demonstrators to bring you our versions of the One Sheet Wonder.  I've never actually done one before so started small with a piece of 6" x 6"  designer series patterned paper and started cutting.  My cut plan is below and you could use any papers you have in your stash or indeed you can stamp your own using any stamps and colours. 


 It's easy to do and is a great way to use up those papers that we all have lurking in the craft box and it's a quick way to make cards once you have a layout to follow.  It's even simpler if you stick with just a couple of colours and simple sentiment stamps.

 Here's the plan I made of my cutting.  You can see just two tiny strips weren't used but look at my Bee Happy post you can see that even those bits can be put to good use.  You can then matt your cut pieces like I have with coordinating card stock, add embossed layers and punched shapes or could even do more stamping beyond the simple sentiments I've added, but this gives you a great starting point and you can take it where you want.

Simple stamping for the sentiments and a little embossing on a couple adds some differences.You could step it more with twine, ribbon or embellishments.  

I used sentiments from Stampin' Up! sets Well Said, Lovely You Bundle and Rooted in Nature,  the Tin Tile embossing folders, Stitched Shape dies and my trusty trimmer.   The paper is part of the In Good Taste pack where each design is a photographic image depicting visual textures, great for various types of projects.  

Don't forget there are just a few days left on the current promotion to join us as a discount shopper with Stampin' Up!. 


Click on the photo to find out more or contact me at zoetant@live.co.uk for more information.  I'd love to tell you about this fantastic offer. 

Thanks for stopping by and keep safe and KEEP STAMPING!!

Zoe x


Continue with the blog hop below.  


You are invited to the Inlinkz link party!

Click here to enter