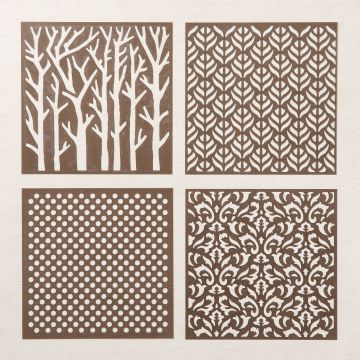
Welcome to our November Totally Technique Blog Hop. This month we are sharing ideas and tips for using stencils/masks. I love getting inky and so went with the Basic Pattern Masks in the annual catalogue and first of all used my new blending brushes, which will be available to order in January from the Spring Mini, to add colour from lightest to darkest through the stencil for the card below and then I used embossing paste over the inky stencil/mask to create the detail on the card above.
Most difficult part was trying to get a half decent photo on a dull day even with lighting these just did not want to play. As my daughter, Liv said 'They look so amazing in real life!' You'll just have to take her word on it.
So for the card below I used one blending brush and first of all added Balmy Blue ink directly from the ink pad onto my old Stamp a ma jig plastic sheet. I held the stencil in place on my cardstock, but you might err on the side of caution more than me and so you may want to add some tape around the card to hold it in place onto your work surface. I would also colour a larger piece of card that you can then use dies to cut the shape you want.
Before adding any ink to the card you need to make sure that you prime the brush before adding to your card stock. Don't just swipe the brush over the ink pad really get it inky. Then blend it into to the brush on a piece of plastic like a stamp positioner sheet. When you are ready to add to the card start off the card to avoid any heavy ink marks. The stencil will get inky too which is fine, but don't wipe it off if you want to use for a second card like the one above.
As you add the darker inks then you can choose where you add different shades. As I said I used the same brush and worked through the different blues including Coastal Cabana and Pacific Point.
Once I was done with the inking I moved the stencil carefully to one side. I then made sure the pattern was dry before die cutting with the Stitched Rectangle dies. I layered it with white layers and added some die cuts from Stitched Stars and Painted Labels dies in silver foil card.
For the top card I die cut a stitched rectangle from vellum and placed it under the inky stencil ink side uppermost. I then carefully added a think layer of embossing paste and allowed the ink from the stencil to mix with the paste as I moved it over the stencil. Be sure to remove the stencil carefully while the paste is still wet and then allow it to dry. In the mean time wash the stencil and other paste tools. Do not allow the paste to dry on the stencil or it won't come off.
I've added simple sentiments to both cards from a new spring set called Art Gallery and let the stencilled patterns be the focal points.
Don't forget this is a blog hop so you can visit other international blogs to see their ideas for stencils and masks.
Keep safe and keep stamping
Zoe x


2 comments:
Oeoohhh I love your cards Zoe, so modern elegant and soft. I am sure they are even better in real but they already look gorgeous as I see them now! ( By the way, we have the same problem with the daylight at the moment... it is all so gray outside!)
These are both beautiful Zoe, love the stencils.
Hugs
Linda xxx
Post a Comment