My STAMPING PAPERCRAFT blog - Stamping Scene

Hello and welcome to my blog. I'm a paper craft addict and love sharing my passion for paper crafting . I run online and face to face card making, memory keeping and all sorts of 3D projects. I also sell many of the products I use. If you'd like more information do drop me an email. Thank you for visiting I hope to see you again soon. Zoe x
Showing posts with label designer series paper. Show all posts

Wednesday, 25 July 2018

How to use Stampin' Up! patterned papers

Do you worry about punching a circle, square or heart out of a whole piece of your 12" x 12" Stampin' papers? Me too or at least I used to and they I worked out if I bought one pack to stroke and adore and another to use then I got over that sadness of punching and then thinking 'Oh no I didn't mean to do that'.

Stampin' Up! is helping you this month with a very special offer. You can buy 3 of a selected list of 10 and get a 4th free.  Or you might want to choose three of one design and get a different fourth choice.  Either way you can save £10.25.

Now the next issue is when do you use your patterned papers?  Here's one simple idea that I found worked well and all you need to do is cut your sheets in to smaller squares.


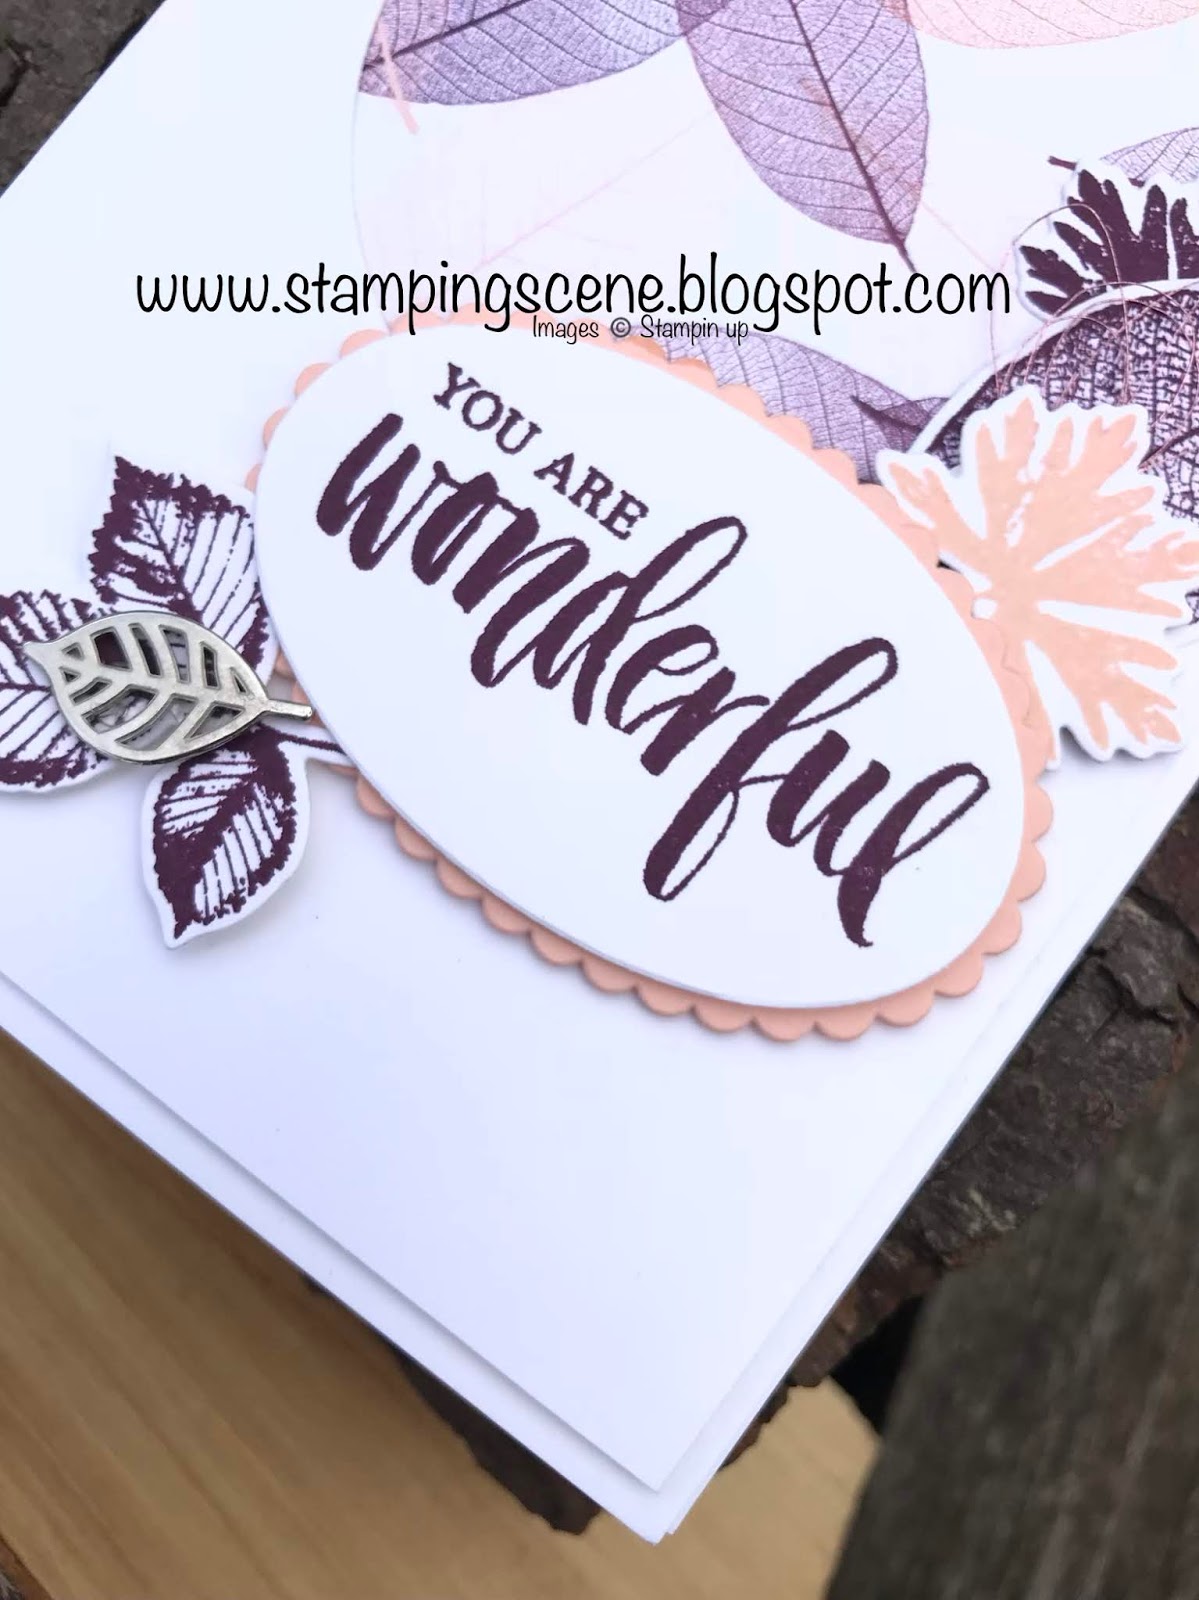
I took a base card and a matting layer in whisper white.  From the matting layer I used my layering circle dies to cut an aperture, but you could use a large circle punch too.  If you then place the matting layer on the base card where you want it and use a pencil just to make a mark or two so that you can make sure when you stick a square of paper on the base card it is in the right place under the aperture.  Add some stamped images, mine are stamped and die cut using Rooted in Nature and a sentiment which is layered over a scalloped oval.  I've also added a leaf embellishment with glue dots.  You can just about see in the picture that I've also added some new rose metallic thread that coordinates with the Blackberry Bliss, Petal Pink stamped images.

You can cut any shape for your aperture and use any colours or designs to add a little more.  To keep it even simpler just add the patterned paper and a sentiment.  Have fun using your papers. The more you use them the more confident you'll be with them.  
You can see and buy them here 
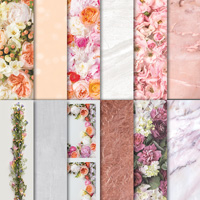
but here are a few to give you some ideas. 


Thanks for stopping by and enjoy browsing my shop. 


More soon Zoe x

Thursday, 23 February 2012

Cupcake creations care of Stampin' Up!

Thought that having taken the children for milkshake and cake in one of our local lovely cafes it was appropriate to share with you a 'cupcake'.  Yes Stampin' Up! can offer you cupcakes in the form of a super stamp set (create a cupcake 121915 wood 121982 clear mount) along with a coordinating cupcake builder punch (121807 £15.50). 
The stamp set offers the usual versatility of Stampin' Up! sets and the punch too gives you lots of options and if you're not a stamper you can create cupcakes and more with all our lovely papers and punch to hearts content. 
Seems a bit naughty to offer the children cakes when they said they'd give up chocolate for Lent only on Tuesday!!! Ha don't you just to tease as a parent.  Simple pleasures.............

Back soon
Zx

Supplies
cardstock - whisper white, early espresso, pretty in pink, subtles paper stack
ink - early espresso, pretty in pink, versamark
punch - cupcake builder
accessories - heat 'n' stick powder, dazzling diamonds glitter, subtles brads, early espresso taffeta ribbon, designer frames embossing folder

Friday, 3 February 2012

Sale-a-bration - Elementary Elegance


There's a new piece of kit in the Stampin' Up! USA that I really hope comes over here.  You can create fancy 'bottoms' to your cards and projects and I really like the effects I've seen.  So much so that I decided I'd have a go with the tools I already have and so with the top note die and a circle punch I created the bottom of this card.  It allows you to link your dsp to the inside of the card.  It's not difficult and and just adds a little something different.  Why don't you try doing something different with the Stampin' Up! UK tools you have available!

More soon Zx
Supplies
cardstock - melon mambo, whisper white and indigo island DSP
stamps - elementary elegance, SAB set
tools - big shot, top note die, curly label punch, itty bitty shapes punch pack, circle punch
accessories - rhinestones, sticky strip, stampin' dimensionals, marker pen

Thursday, 19 May 2011

More from Stampin' Up! Manhattan Flowers

zoe tant stampin' up! demonstrator

I told myself I wasn't going to buy this beautiful embossing folder as I thought I'd seen lots of cards made using it and it wouldn't appeal to anyone, but I then saw examples of it used at Stampin' Up! training events and by other demonstrators in real life and decided that I couldn't really live without it.  It was good decision to need it as I've really enjoyed using it, not least in this example where I've used it on shimmery white cardstock and really it needs very little else as it is just so striking, elegant and beautiful.  I have however matted it onto designer series paper from the brights stack (real red) only 39p per double sided sheet, and basic black cardstock.  I cut the flower down slightly and then used the offcuts for my sentiment which is from Thank You Kindly.  I've also used a stamp from Strength and Hope to enhance the real red backdrop and you can see it more clearly on the image below which is the inside of the card.  Rhinestones, real red satin ribbon and crochet thread from my stash have just added the final touches for one of the many thank yous I need to send for all the gorgeous birthday presents I received at the weekend.  
Of course I had money for my birthday too and so can indulge my 'NEEDS' further.  The only difficulty is choosing what to have next! You probably have this problem with Stampin' Up! products too! Make a wishlist and dream and soon it will be yours.  Of course you could have it sooner if you think about being a demonstrator and then you get it much cheaper, with early access to new products and training to show you how best to use it! You  can tailor it all to suit your lifestyle and your needs.  Contact me to find out how I can help you to get the most out of being a demonstrator.  Let the fun begin......................
Looking forward to hearing from you.
Back soon
Hugs Zx

Saturday, 4 December 2010

Oops I missed it!

Hi everyone.  Hoping you are continuing to keep warm and safe! I made this card last weekend with the intent of  putting it in a sketch challenge, but the weather and being busy with the children I forgot to submit it, but thought I'd share it with you all anyway.  It's a great one for showing off the Jolly Holiday DSP patterns and everyone seems to love the new colour cherry cobbler with old olive and very vanilla.  Then old kraft now crumb cake cardstock is as popular as ever and provides a useful base for any project. 
Serene Snowflakes stamp set is one of my favourites this season and embossing it in gold shows it off a treat.  I've also used versamark ink followed by cherry cobbler to emboss it in colour on the crumb cake.  This gives a subtle shade of the colour that you use, but gives you the chance to emboss with colour using clear emboss powder.  Pearls add to the opulance for Christmas, some of which are from our retired Pretties kit threaded onto gold elastic cord and some from the new self adhesive basic pearls packs.  Tiny Tags stamp set is as useful as ever with the medium jewellery tag punch and adds just enough sentiment. 
Finally I've 'smudged' some of the edges of the centre section to soften the design.  I believe the technical term is distress, but in my opinion smudged says it all!  You do your smudging with daubers by the way!
Once again be happy and safe.
Hugs Zx
independent stampin' up! demonstrator Zoë Tant

Tuesday, 29 December 2009

Special Gifts!


Wow where did December go!!! Life has been so busy with preparing for workshops, craft classes for children, doing all those fab parent things like nativity plays and carol concerts and of course the general prep that is required for Christmas!!! It's been so busy in this crazy household not least because of the car accident I had a the end of November and we still don't have our car back, then someone kindly put a bb gun out of their car window whilst I was driving behind them and it's been a little more than frantic helping Santa with the ever changing lists of my children, but all in all we've had a super duper Chrimbo and sincerely hope you have too!

I've finally got some time to load some pics of the yummy notebooks that I gave to some special friends recently. I've used the SU on board journals and decorated them front and back with designer series papers, ribbons, onboard letters and buttons to name but a few of the accessories.

They've gone down a storm and those who received them have daughters eyeing them up. I'm relieved I put initials on them for my friends otherwise I fear they would be borrowed on a permanent basis.

I've also received some fabulous gifts in the form of handmade cards from my lovely customers. Some of these will be making an appearance on The Stamping Hamster Blog so please do take a look. Thank you to everyone who sent cards of any sort. In particular the handmade ones have made me appreciate why I love being a Stampin' Up! demonstrator so much. It's a real joy to see what everyone has made. I love them all!

I hope that Christmas has been a special time for you all and that the New Year brings you joy and prosperity. I will be back soon, but in the meantime have fun.
Hugs Zx

Friday, 4 December 2009

Christmas Stars Sparkle Bright in Designer Series Paper

If you are in need of more Christmas decorations this year and are looking for inexpensive, but stunning displays then here's a star that is perfect for YOU!!!!! It's easy to make and very cost effective, but looks expensive. To make it first contact me to order some yummy Stampin'Up! Designer Series Double sided Papers. For just £7.75 you can make either 4 12'' or 2 6'' stars. How great is that!!!!!!!!!!!!
I made a small one here. You need to cut 6 squares of 6x6 inch dsp. Fold each piece diagonally and then cut 2 sets of 3 parallel lines from the fold making sure that the two sets don't meet in the middle. Now follow the pictures and hopefully it's as clear as these are beautiful!
Fold each piece diagonally


Cut 2 sets of 3 parallel lines from the fold on each piece making sure the two sets of cuts don't meet.

Open out each square and place it with a diamond shape face up. Take the two inner paper cuts and roll them together to make a tube. Secure with sticky strip/glue dots.


Turn the paper over and repeat the process with the next two cuts. Secure and turn over to repeat, turning over between each set of cuts and securing each time.

Each square should look like this.


Secure each piece to the next at the widest part with sticky strip/glue dots until you form a star

Punch a small hole (1/8th inch punch) in one of the points and thread through a piece of ribbon or here I've used elastic thread to hang your star.


You could of course add a centre piece, sparkle with dazzling diamonds or just let this easy, but impressive star sell its own beauty!
I hope you like it. I think it's fab in case you hadn't got that message already.
Let me know how you get on and if you've any variations that you'd like to share.
Hugs Zx

Thursday, 29 October 2009

Stamping on candles & gift boxes


During the summer Olivia went to drama summer school and had the most amazing time doing workshops in circus skills, music, Morris dancing, mime, stage management and lots more. To say thank you to the folk that organise the classes we made some handbags with notelets for the ladies, but it's always more difficult to cater for the chaps and so we decorated a candle put it in a gift box and made a book mark for David. I'd forgotten that I'd not posted these and thought you would like to see them. Box was just big enough but I needed a lid and so made an origami box from designer series choc chip paper and added some ribbon to gently pull it off. Jumbo eyelets allowed me to put a handle on the box and I hope David found the bookmark useful.
Next summer Charlie hopes to have got a space in the local Red Lion Theatre group so that he can go to summer school too! Secretly so does Mummy!!!!!!
Don't forget to check out my forthcoming classes and offers which can be found at the top of the page.
Hugs Zx


Wednesday, 23 September 2009

A new challenge for me!


Oh what a start to the day. Dropped the gremlins at school and returned home to do those cute little chores that motherhood brings........washing, ironing etc prior to doing one or two more exciting chores like stamping, sticking...... However the builder that left half a stanley blade on my drive obviously didn't have those plans in mind for me. I slid out of my car to hear Hiiiiissssssssssssssssssssssssssssss! Yes the blade was in one of my tyres. My car in now ensconced down at the tyre shop waiting for a new tyre. Thankfully to save the day one of the chaps kindly ran me home and I'll go back later to collect. Needless to say I couldn't contemplate those chores and so after a hot buttered crumpet and a cuppa I set to to make this card.
I decided to have a dabble at the challenge on Stamp Something this week. The challenge is to use either/or or both your favourite colours or designer paper. I guess I have done both. I used these colours regularly and the Ski Slope Designer Series Paper from Stampin'Up! has proved so popular it has sold out. I'm glad to say that in the new catalogue there are several new paper packs that will make your choice very difficult as they are all fabulous. Here I've layered the different designs within the pack and stamped such a beautful image from the Silent Night set. It's just stamped in Chocolate Chip on Very vanilla cardstock. I've added the lightest shades with my soft subtles watercolour wonder crayons and then added some 'Wow' with dazzling diamonds glitter. This will very soon become much easier for you to do to add sweet little finishing touches to your projects because we have two way glue pens also in the new catalogue. The allow you to pin point exactly where you want your glitter. So I've put it over the church roof and other places where the snow has fallen on my picture. A button from the Button Latte pot, some silver elasticated thread, silver brads and some silver tape from my stash add extra sparkle and I've added a sentiment using the wonder colour markers, oval punches and a stamp from the soon to be gone 'Best Yet' level one hostess set.
I hope the folk at Stamp Something like it too! Wish me luck!

Hugs Z x

Sunday, 6 September 2009

I'm down but not out!!

Oh boy, oh boy how sad am I!!!! No don't answer that!! I can't believe how old I feel this week having to try to use Olivia's laptop to try to get back up and running after our trusty, ( the one I knew how to use) computer bit the dust this week. We forget how we rely on these damn machines and I certainly am not designed for laptop use. Olivia looked at me and my pathetic venturing on her laptop and offered to do it all for me. She even fished out a mouse as I was struggling with the built in version. However I have perservered mainly because I have been very keen to show off my entry for the Stampin'Up! Summer Design Challenge.
I foolishly left it to the last minute to get it done even though I'd had the idea in my head for some time. As a consequence I finished it a 2am the last day that it could realistically be posted to be in the SU offices for the closing date. It was then typically a bad morning for taking photos so they are not as good as I would have liked and I was also so pleased with my efforts that I was torn about sending it in. Finally though here it is in all its glory and I hope you like as much as me. The list of stamp sets and pieces of kit is rather long so I wont download it all, but you can always shout if there's something you'd like to know about it.
I did follow the theme of My Summer 2009 quite closely and it really is my summer. As you know we spent our summer hols down on the Isle of Wight and I'm glad to say found some sunshine. I don't recall Martin in shorts quite like these, but he did make it into the sea which is more than can be said for me. No point in scaring the fish!!!!
I'd love to hear your feedback and whatever happens with the competition I really enjoyed making this, and apologise to my family for being so grumpy for the day after as I was so tired.


So did you have a go and enter? There were some great prizes on offer to customers of Stampin' Up!. If you didn't this time give it a go for the next challenge. It really is lots of fun.
I hope to be back soon.
Hugs until then!
Zoe


Sunday, 26 July 2009

Techniques Club

At techniques club this month my hostess wanted me to give her some inspiration for Christmas. I made lots of cards which I will photograph and share with you soon, but I also showed everyone how to make the cute bags that I made for my children's teachers. The girls loved these so much that they chose to make these instead except for Wendy who did make a gorgeous Chrimbo card, but she had to dash and so I missed photographing it. These are some of the others bags.

ANNETTE'S
ANGIE'S
CAROLE'S
It never ceases to amaze me how many different approaches have to their projects and the different effects that people make. These are all super and I've got lots of inspiration myself from them. I just love watching folk create and that's probably why I enjoy being a demonstrator so much. It's fun to teach others techniques and also to learn ideas from others. One day I wonder if all cards will be handmade. There is so much satisfaction to be gained from the making of them and from the responses you get from recipients. I'm sure all the people who receive these lovely bags will be thrilled.
Thanks ladies for another fun evening. Roll on the next.
Hugs
Zoë x