My STAMPING PAPERCRAFT blog - Stamping Scene

Hello and welcome to my blog. I'm a paper craft addict and love sharing my passion for paper crafting . I run online and face to face card making, memory keeping and all sorts of 3D projects. I also sell many of the products I use. If you'd like more information do drop me an email. Thank you for visiting I hope to see you again soon. Zoe x
Showing posts with label scrapbooking. Show all posts

Friday, 28 February 2025

How to create stamping kissing technique for card making


handmade card showing the inking technique called kissing stamps and ink

Hey crafty friends

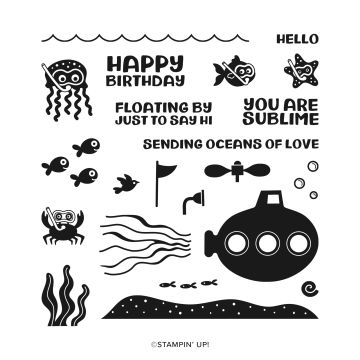
You ever had a go at the 'kissing technique' for papercrafting.  It basically means you ink a solid stamp and then kiss it with a clean image stamp to remove ink from the solid shape stamp and then when you stamp on card it reveals the shape with an image inside it.  You can spot the fish and snorkling crab in my blue circles.  It's fun and you can experiment with different colours to see which works best for you.  Also if you have a very inky ink pad you might like to try stamping off first before kissing your image onto the inked stamp to reduce the intensity of colour applied.  


Have fun on our monthly Totally Techniques Blog hop via the links below.  

Thanks for popping by

Hugs Zoe x

You are invited to the Inlinkz link party!

Click here to enter


Supply List

Kiss of Texture Stamp Set

Kiss of Texture stamp Set


submarine underwater stamp set

Submarine Life stamp set


submarine craft punch

Submarine Life Builder Punch


Tuesday, 13 November 2018

My Beautiful Girl with Needlepoint Nook Suite

I was invited some weeks back to be a presenter at the Stampin' Up! UK Onstage event at The Vox, in Birmingham.  I was given a suite of products from the Spring 2019 catalogue to share with over 500 UK demonstrators and a brief about other information to give including my tips for demonstrators for their business and using this suite.

Part of my presentation was to share a project that showed why I loved the Needlepoint Nook Suite of products and I decided that the best way was to share a scrapbook page or two of my amazing children.  This is the page I did for Olivia and you can see the page I created for Charlie on my #onstage2018 30th Stampin' Up! birthday post.

You can see in the bottom right hand corner the stitched image underlying the stamped and die cut flowers and this is a new exciting feature of the new Needlepoint Elements framelits dies.  It adds a stitched pattern.  You need to use it on the Bigshot and so to make this possible I cut the base of my page in half and then used tear and tape to adhere the pieces together on the back  leaving the backing tape in place.  On the front I covered the join with the designer series paper from the suite also called Needlepoint Nook just like the suite.

I've used the Stampin' Up! Celebrate You dies to add part of my journalling, the Make A Difference alphabet stamp set for the 'are' which is embossed with copper powder and also the Friendly Expressions set from the Stampin' Up! annual catalogue for the 'you make me proud'.  You might notice the pretty label punch on which this sentiment is stamped and adhered to has a stitched edge and this is another die in the suite which you can use to add a stitched border to the punched shape or to add a stitched frame on your project.

The Needle and Thread stamp set is a new photopolymer DistINKtive set that means that the actual strands of the embroidery are visible when stamped.  The set was designed by Stampin' Up! who teamed up with an expert embroiderer. Once the design was embroidered it was photographed and the image was recoloured to the Stampin' Up! colours and printed for the DSP.

I hope you like it.  It will be available to order from 3 January 2019.

I'll be sharing more of my projects using it very soon.

Thanks for stopping by.

Zoe x

Saturday, 4 December 2010

Oops I missed it!

Hi everyone.  Hoping you are continuing to keep warm and safe! I made this card last weekend with the intent of  putting it in a sketch challenge, but the weather and being busy with the children I forgot to submit it, but thought I'd share it with you all anyway.  It's a great one for showing off the Jolly Holiday DSP patterns and everyone seems to love the new colour cherry cobbler with old olive and very vanilla.  Then old kraft now crumb cake cardstock is as popular as ever and provides a useful base for any project. 
Serene Snowflakes stamp set is one of my favourites this season and embossing it in gold shows it off a treat.  I've also used versamark ink followed by cherry cobbler to emboss it in colour on the crumb cake.  This gives a subtle shade of the colour that you use, but gives you the chance to emboss with colour using clear emboss powder.  Pearls add to the opulance for Christmas, some of which are from our retired Pretties kit threaded onto gold elastic cord and some from the new self adhesive basic pearls packs.  Tiny Tags stamp set is as useful as ever with the medium jewellery tag punch and adds just enough sentiment. 
Finally I've 'smudged' some of the edges of the centre section to soften the design.  I believe the technical term is distress, but in my opinion smudged says it all!  You do your smudging with daubers by the way!
Once again be happy and safe.
Hugs Zx
independent stampin' up! demonstrator Zoë Tant

Thursday, 2 December 2010

My second version

Well with children off school for the third day, there isn't much time for my crafting although we've made Christmas cards for our friends today.  I'll share those with you when the light is better for a good picture.  Instead for now I thought I'd show you a card I made after one of my techniques clubs.  I demo'd the emboss resist technique with colour washing on watercolour paper and let folk just do their own thing then really so I was left with an image on a sheet and I decided not to let it go to waste.  I've made a larger card and used other stamps from the Just Believe set to add depth and texture to the various layers.  I also added some linen thread, newsprint dsp and early espresso taffeta ribbon along with a trio of neutrals flower brads.  Colours include not quite navy, more mustard, early espresso and old olive.  I'm loving this torn edge that is so popular at the moment and it's so easy to do!
Hope you're all keeping warm and safe.
Until next time
Zx
Independent Stampin' Up! demonstrator Zoë Tant

Thursday, 11 November 2010

Shelli showed us cardmaking with Stampin' Up! supplies

As the Queen of Stampin' Up! Shelli's projects at Convention are always fun and inspiring to watch.  She showed us how to make this cute little number and we all ooed and ahh'd and then she pointed out how much nicer things look in real life and reminded us that this is a card featured on page 64 of the Stampin' Up! Idea & Catalogue Book along with the stamp set Artistic Etchings.  And like she said ' who would have ever thought of using a key as the body of a butterfly', but as you can see it works really well. 
Everything is filmed at Convention, well most things and thankfully not quite so fully as last year when those of us with ample cleavages felt that one particular cameraman was rather over enthusiastic with his filming!!!
So Shelli was filmed making cards and was surprised to discover that the cameraman wasn't Chris whom she thought is was , but actually John.

She then discussed how much she loved all the european accents.


She also mentioned how much she loved the idea of everyone hugging and kissing to greet each other.  John picked up on this and tried his luck.................!!!!


Shelli didn't even flinch!!!!! Great hilarity for everyone else watching though.

The banner behind her was the theme for Convention
Share What You Love
and Shelli really did.
Come back soon to find out what made me smile!!!!

Monday, 18 May 2009

National Scrapbooking Month

May is National Scrapbooking Month and so in honour of it I thought I'd give it go!! I've not scrapped-scrapbooked, not sure what you say even, before and so my efforts may seem odd, primitive or whacky, but we all have to start somewhere and as one of the ladies in one of my techniques clubs is hostess this month and is a scrapbooker I thought it only fair to make this month's session one that she hopefully will enjoy and feel inspired to do lots on a special scrapbook she is putting together for her son.
So here are my initial attempts. Above is a 6x6 layout featuring our beloved pouch who sadly is no more! She was without doubt top dog in this house and very special. I've done a very simple layout using stamp set Petal Pizzazz from the mini with bashful blue to show off her colouring and blue eyes, only orange, real red, old olive and chocolate chip as my colour scheme. I've jazzed it up a little with brads including a rhinestone from the pretties kit. I'm quite pleased with it.
I later got the bit between my teeth and got a little more adventurous. This one could fit in with the Stamp with us colour challenge. I've used the Watercolour Joy standard wheel and white craft ink to emboss a border. I've matted my picture onto two colours and added flowers from Petal Pizzazz (113417 £28.95) once again. The colours are real red, brilliant blue, not quite navy, only orange, yo-yo yellow and green galore. I've added some Planter Box rub-ons (115308 £7.50) to the picture and one small flower to the text bar at the bottom.
I was thrilled with this one and went to show my daughter. 'It's great Mum' she said. 'But I wasn't one in 2006!' Don't ask me why, but I put 2006 instead of 2000. Hence the rather generous ink on the zeros. 'Why not just put a new piece of green card?' I hear you shout. This is where I learnt a lesson. Check everything is correct before you stick it down!
'Ho hum!' said Pooh.
Back soon with hopefully some of the techniques club ladies pages!
Hugs Zoë