My STAMPING PAPERCRAFT blog - Stamping Scene

Hello and welcome to my blog. I'm a paper craft addict and love sharing my passion for paper crafting . I run online and face to face card making, memory keeping and all sorts of 3D projects. I also sell many of the products I use. If you'd like more information do drop me an email. Thank you for visiting I hope to see you again soon. Zoe x
Showing posts with label lincolnshire stampin up demo uk. Show all posts

Wednesday, 16 March 2022

New at SU with Stampin' Up! Tulip Fields


new at Stampin Up SU blog hop banner


Hi and welcome to the New at SU, international Stampin' Up! demonstrator blog hop for March 2022.  You may have just come from Anke's blog where she has shared a fabulous card using the Flowing Flowers stamp set because this month we are CASEing annual catalogue (AC) designs, but using stamps and products featured in our Spring Mini catalogue for 2022.  

I'm CASEing a card from page 25 in the AC and have used the sentiment free stamp set Tulip Fields.  It is a super set for colourful spring cards and I don't know about you, but I love spring flowers in particular Tulips.   The colours are so amazing and plentiful.  


I also used the Flowering Fields DSP and the Gingham embossing folder.  Both are in the spring mini.  I stamped the scene using a paper mask I created with the windmill stamp. I die cut it using the Layering Circles dies.  To add some depth I stamped and fussy cut the building part of the windmill and raised it with Stampin' Up! dimensionals and I used Stampin' Blends to add some touches of colour to my black and white image.  
I used a piece of Petal Pink card for the background rectangle, but wanted it to tone in a little more with the tulips on the paper so I used a blending brush to gently add some Calypso Coral Ink. 

The fun sentiment is from a demonstrator stamp set called Stamping Your Way to The Top which you can buy when you join Stampin' Up!.  I fussy cut it and it creates a cheery card to send to a friend.  Let's face it we all prefer a card via snail mail than a bill or email if we are honest.  
stamping your way to the top sentiment set for stampin up demonstrators

Can you spot the card I case'd?

stampin up ac © images

Thanks for stopping by on your way around the hop and if you haven't done a blog hop before please follow the Next buttons to see some more inspiration.  

Keep safe and keep stamping

Zoe x

next button for new at su blog hop stampin up

BLOG HOP Roll call LIST
SHOPPING LIST FOR Tulip Fields card

Tulip Fields stamp set stampin up with zoe tant uk


tulip patterned papers from stampin up 2022


gingham embossing folder for papercraft


stitched so sweetly dies for papercraft


layering circle papercraft dies stampin up


Sunday, 10 October 2021

Cute Snowmen Handmade Christmas


handmade christmas cards using stampin up products

Time for another Christmas Card Club challenge today and my are the weeks flying by.......
We are empty nesters this weekend with Charlie now settled at Uni for over two weeks and Liv is away with friends so we've enjoyed the peace, but missed the chat.  Good to have a taster before it happens full time one day.  

Our challenge today is to feature snowmen or a single snowman on our creations and I've used this very old stamp set, but I love it and I've enjoyed just adding a little colour and adding the die cut image to a simple fancy fold card base. 
handmade snowman christmas card using retired and current stampin up products.

For the card base I use a piece of thick white card to create a standard tent fold and then folded back the card front half way to create the base. I've then used a narrow approx 3inch embossing folder to decorate the back layer of the card base but it leaves space for writing on without having to worry about the embossing.  

Simple addition of some patterned paper (DSP) and a matt layer to the die cut image and a white embossed sentiment.  

Such a lovely weekend here weather wise it seems crazy to be sharing snow images.  I hope the warmth and sunshine last a little longer.  

Have a great start to the week and thanks for popping by. 

Keep safe and keep stamping

Hugs Zoe x

 
christmas craft kit for tags scrapbooking and card making
Shop Christmas Kits

Friday, 26 February 2021

Ideas for using a sponge brayer in card making


 Welcome to the Totally Techniques February 2021 blog hop.  We have lots of ideas for using a sponge brayer to share with you this month.  

I have three simple examples.  

card made using sponge brayers to create ombre effect

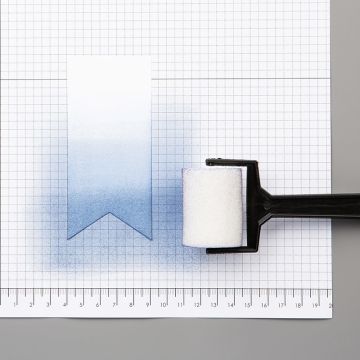
For this first example I used a sponge brayer. Starting with the the lightest colour, Balmy Blue, I added ink to some white background patterned paper.  Starting just off the paper I carefully brayer the ink across the paper moving up it adding more ink when needed.  I repeated the process with Highland Heather but a little above the blue to start with and then worked back down to blend the blue and lilac shades.  To finish I added a small amount of Gorgeous Grape to add more depth of colour to the top.  Of course once you try this you can always turn your paper around to have the darker shades at the bottom.  Your design you choose.  I've added a die cut frame and a stamped and punched dragonfly for a spotlight and a simple sentiment from Many Messages stamp and die set.  

tips for using stencils, masks and a sponge brayer for card making ink effects

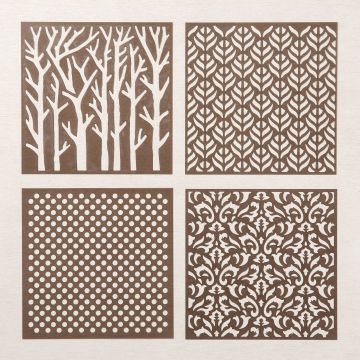
My second idea shows how you can add gently amounts of ink using a stencil/mask to create background details and also create a design piece that you can then die cut or punch shapes out of and add to your card.  I used the Basic Pattern Decorative masks to first design an ombre effect out of which I punched a circle for the backdrop to my butterfly and then added a subtle background to soften the 'white space' in the background.  

When using stencils it pays to use reposition able adhesive on the back of your matt layer and any pieces you choose to pattern to keep them in place whilst the stencil is on top.  I would also suggest using some old Washi tape to hold your mask in place. Remove it carefully once done and try to pull off at a 90degree angle to reduce the risk of it tearing your card if it happens to hold the card in place also.  

This beautiful butterfly was stamped in Versamark ink using Butterfly Gala stamp set. I added some heat and stick powder which I heated very very gently until it literally just melted and then used Stampin' Up!'s new Gilded Leafing to add the gold and gently brush away the excess once finished.  This stamp set has antennae that you can then stamp directly onto the background before positioning the butterfly with glue dots or dimensional.   Again I used the Ornate Style dies to create the stitched rectangle in a bold colour statement. 
ink on embossing folder technique using sponge brayers from stampin up

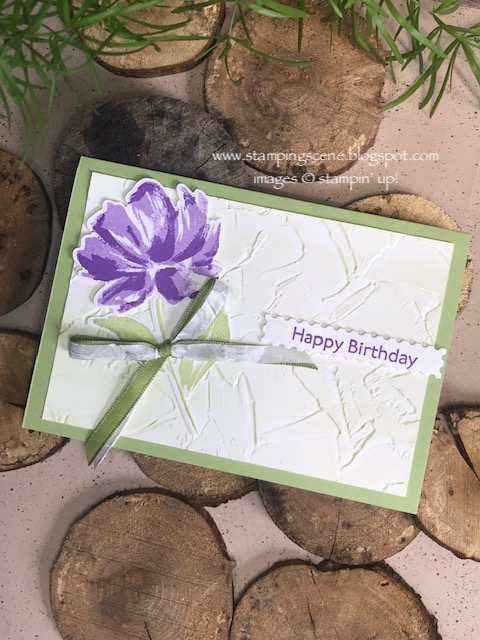
This final card is a technique I recently shared in a post about using ink on embossing folders.  For this I used the sponge brayer to add ink to the folder.  It is very subtle in this example as I used Soft Sea Foam ink on white card, but it creates a textured backdrop for the flower from Art Gallery stamp set which I think you'll agree speaks for itself.  The sentiment is from the same set and I love the postage stamp effect of the die from the coordinating dies, Floral Gallery, which I used to die cut it.   I also like the two tone bow which is simple to do using the green ribbon from the Ornate Garden Suite and some white crinkled seam binding ribbon. I recommend this ribbon to all my customers as it is versatile and flexible and very forgiving if you aren't great at bows. It is already crinkled so doesn't matter how many times you try to tie that bow it is going to look great even with your added crinkles!! 

Keep safe lovely readers, and keep stamping.  

Hugs Zoe x


Ornate Garden Dies for card making

Ornate Style Dies


sponge brayers for card making scrapbooking

Sponger Brayers


Basic Pattern Decorative Masks for craft

Basic Pattern Decorative Masks/stencils


You are invited to the Inlinkz link party!

Click here to enter

Tuesday, 13 November 2018

My Beautiful Girl with Needlepoint Nook Suite

I was invited some weeks back to be a presenter at the Stampin' Up! UK Onstage event at The Vox, in Birmingham.  I was given a suite of products from the Spring 2019 catalogue to share with over 500 UK demonstrators and a brief about other information to give including my tips for demonstrators for their business and using this suite.

Part of my presentation was to share a project that showed why I loved the Needlepoint Nook Suite of products and I decided that the best way was to share a scrapbook page or two of my amazing children.  This is the page I did for Olivia and you can see the page I created for Charlie on my #onstage2018 30th Stampin' Up! birthday post.

You can see in the bottom right hand corner the stitched image underlying the stamped and die cut flowers and this is a new exciting feature of the new Needlepoint Elements framelits dies.  It adds a stitched pattern.  You need to use it on the Bigshot and so to make this possible I cut the base of my page in half and then used tear and tape to adhere the pieces together on the back  leaving the backing tape in place.  On the front I covered the join with the designer series paper from the suite also called Needlepoint Nook just like the suite.

I've used the Stampin' Up! Celebrate You dies to add part of my journalling, the Make A Difference alphabet stamp set for the 'are' which is embossed with copper powder and also the Friendly Expressions set from the Stampin' Up! annual catalogue for the 'you make me proud'.  You might notice the pretty label punch on which this sentiment is stamped and adhered to has a stitched edge and this is another die in the suite which you can use to add a stitched border to the punched shape or to add a stitched frame on your project.

The Needle and Thread stamp set is a new photopolymer DistINKtive set that means that the actual strands of the embroidery are visible when stamped.  The set was designed by Stampin' Up! who teamed up with an expert embroiderer. Once the design was embroidered it was photographed and the image was recoloured to the Stampin' Up! colours and printed for the DSP.

I hope you like it.  It will be available to order from 3 January 2019.

I'll be sharing more of my projects using it very soon.

Thanks for stopping by.

Zoe x

Wednesday, 7 November 2018

Snow is Glistening very popular


It looks like lots of you are liking the Snowflake Showcase that Stampin' Up! has launched for this month of November.  The dies in particular are flying out of the warehouse as has the white velveteen paper which is at the moment SOLD OUT. There is a slight chance that more stock maybe available but I can't confirm this. I used the Snow is Glistening stamp set and the Snowfall dies to create the card above. It's really simple.  I think the black and white with just a touch of red works really well and my sentiment is heat embossed in silver.  You'll see there are two snowflakes that are embossed using our embossing mats with the dies and we're learning about that at my card club next week. If you're in Lincolnshire and would like to join us please do contact me.  

Alternatively I'm offering a class by post.  That means you can buy the stamps and dies and will receive a complimentary class tutorial in the post with pictures to help you and the materials to make 5 of these cards.  Don't forget if you don't have the embossing mats you'll need to add those to your order.  You can order all these products from my online shop.  

149692 £36


149742 £20

Big Shot Embossing Mats 146327 £14

Any questions please just email me at zoetant@live.co.uk

Keep warm and dry for the next few days as the weather is not too friendly in the UK. 

Hugs Zoe x

Read more about the Stampin' Up! Snowflake Showcase  


Friday, 24 November 2017

Totally Techniques - Stampin' Blends


Welcome to our November 2017 Totally Techniques blog hop.  We're sharing ideas for using the Stampin' Blends.  They are so much fun to use and give fabulous colours and allow shading which in turns adds depth to your images. I've used mine to colour this fun card that I made to say thank you to the fabulous Chef Rachel Green who is based in Lincolnshire.  She offers 'secret suppers' in the Lincolnshire Wolds and we went for the first time last week. It was awesome and great to catch up with old friends we hadn't seen in quite a while.  Her beautiful house is full of an eclectic mix of decor that works so well and that's why I"ve added such a mix of lanterns, shrubs and flowers outside this front door.  Look inside and you'll spy one of her cute dogs although he wasn't wearing a coat!

Using the Stampin' Blends has allowed me to mix colours by blending lighter and darker shades.  I've used the coordinating dies to cut out individual elements and of course allow an opening in the door to reveal the remainder of my thank you message.  You can add whatever you want behind the door from a creeping Santa to your Christmas tree or a picture on a wall in the back of the room.  There's always the chance it could be a step into another world like Narnia.  


You can see the others on the hop from the links below.  Have fun touring and check out the Stampin' Up! video I have shared to give you a beginner's guide to the fabulous Stampin' Blends. 

You can buy any of the blends individually, in pairs or the whole bundle from my online shop. Click here Zoe Tant Stampin Up Online Shop


1. Patrice Halliday-Larsen (New Zealand)  
2. Nadine Weiner (Germany) 
3. Marine Wiplier (France)
4. Shannean Moncrieff (Australia)  
5. Zoe Tant UK -   Lincolnshire (Lincoln)
6. Barbara Meyer (Austria) 
7. Annette Elias (Netherlands)  

Thanks for visiting 

Happy crafting 
Zoe x


Ends soon shop now in Zoe's Stampin Up Online Shop