My STAMPING PAPERCRAFT blog - Stamping Scene

Hello and welcome to my blog. I'm a paper craft addict and love sharing my passion for paper crafting . I run online and face to face card making, memory keeping and all sorts of 3D projects. I also sell many of the products I use. If you'd like more information do drop me an email. Thank you for visiting I hope to see you again soon. Zoe x
Showing posts with label shaker card tutorial. Show all posts

Friday, 28 November 2025

How to make a shaker card


Friendly Foliage shaker card

totally techniques blog hop logo


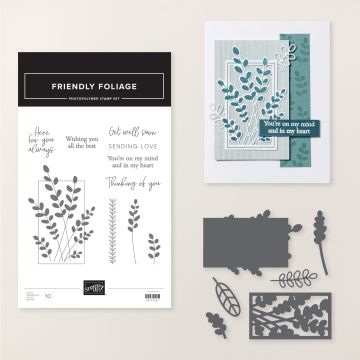
Welcome to November's Totally Techniques Blog Hop.  Shaker cards always play tricks on my brain and somehow it doesn't tell me the right order, but here I have it right and have I hope created a simple version of a shaker card for you to try.  I've used the Friendly Foliage stamp and die bundle from Stampin' Up! which will be available to purchase in January.  It's one of the new online exclusive products and is way more user friendly than you might at first think.  

For my card I've used the colours Pool Party, Garden Green and Granny Apple Green inks and Pool Party and white card. The lovely soft chevron ribbon is also a new product coming very soon.  Often shaker cards contain sequins or mini beads, but I decided to use the tiny bee trinkets for my  shaker. You'll see in the tutorial how I added them and kept them in the shake zone with foam adhesive strips and window sheet.  

Shaker Card Tutorial

You'll see I did some tone on tone stamping too, to extend the design across the card.  This works best usually with stronger colours, but here it worked well too as have the Traditional Sparkling Sequins to add a sparkly lift to the design.  Sending cards to friends and family still bring smiles and love to the recipients and when they are handmade they send a strong message of 'I'm thinking of you'

Enjoy our hop via the links below and do follow my youtube channel if you enjoy my tutorial. 

Thanks for visiting 

Happy stamping Zoe x

You are invited to the Inlinkz link party!

Click here to enter


Supplies Used

tiny bee trinkets

Tiny Bee Trinkets


window sheet

Window Sheet


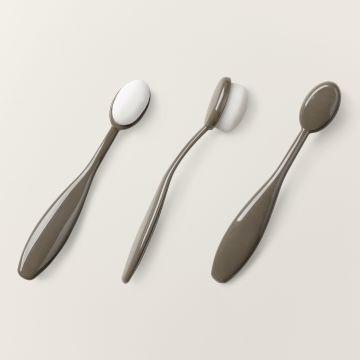
small blending brushes


small blending brushes


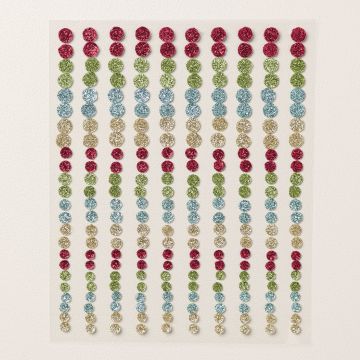
traditional sparkling sequins

Traditional Sparkling Sequins 


pool party - pale blue - card

Premium Pool Party cardstock 


Friendly Foliage Bundle


 Available January 2026


black friday stampin up sale 2025


Friday, 26 May 2023

Simple Shaker card tutorial for Totally Techniques blog hop

shaker card using dies and stamps from stampin up uk with zoe tant


totally techniques stampin up blog hop logo

Welcome to my make for the May Totally Techniques blog hop.  Lovely Lynsay Mahon in Canada chose our theme of Shaker Cards and I created this card for the 2023 Sales and Promotions Demonstrator Council new product spotlights for our global facebook group for demonstrators and it also happens to be a simple shaker card to make. 

You'll need the following
  • A tent fold base card mine is Bubble Bath a new Stampin' Up! colour. 
  • A matt layer 0.5cm/0.25" narrower and shorter than the base card. Same or coordinating as base 
  • circle die - Stylish Shapes
  • Gorgeous Garden dies - yes they are in the annual catalogue page 164
  • Wanted to Say dies - page 167 for the flowers
  • Sending Smiles stamp set for the sentiment
  • Shaker sparkle of your choice
  • Irrisdescent Pearls
  • window sheet
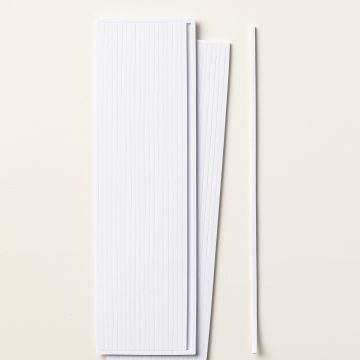
  • foam adhesive strips
Start by cutting an aperture in the matt layer.  To the reverse of this adhere a piece of the leaf dies from the Gorgeous Garden dies that is big enough to more than cover the aperture.  On top of this layer on the reverse add a rectangle of window sheet again large enough to cover beyond the circle aperture.  You can add glue dots to the back of the leaves once the window sheet is in place from the front of the card by lifting them carefully with a pokey tool to save getting wet glue everywhere.

Add some foam adhesive strips in a square bigger than the circle again on the reverse side making sure there are no gaps at the corners or along the side so that your shaker sparkle doesn't leak out.   Also add foam adhesive across the top and bottom of the matt layer reverse so that when you come to stick this onto the card base this whole layer is supported. 

Add your shaker sparkle to the front of the closed card roughly where your circle aperture will be over it and then remove the backing paper from the matt layer and stick onto the front of the card.  

Now to the front of the card you can add the sweet die cut flowers with iridescent pearls and also a flower in the bottom right corner of the card front.  If you use the flower from the Wanted To Say dies I carefully stuck three layers on top of each other and kept the pink centres from the other flowers used to add a coordinating centre to the white flower again sticking them together carefully first. 

Heat emboss a sentiment in white onto black for a finishing touch. 

A simple but wow card to impress your friends.  Have fun making one yourself. 

Thanks for stopping by, enjoy the rest of the hop 

Happy stamping
Zoe x

You are invited to the Inlinkz link party!

Click here to enter


Supplies

Gorgeous Garden dies stampin up


Wanted To Say dies for card making


bubble bath card stock


foam adhesive strips for shaker handmade cards


designer series paper DSP sale in june 2023


Friday, 27 March 2020

Shaker Card Tutorial with Stampin Up Layered with Kindness


Wow what a month we've had so far!! I hope everyone is safe and keeping well.  We're keeping busy at Totally Techniques and have lots of ideas for making shaker cards for this month's hop.

I've used Stampin' Up! set Layered with Kindness and one of the punches that coordinates with the set, the Label Me Fancy punch.

I started with a base card of Soft Sea Foam card and stamped the large leaf image all around the edge of the card using second generation stamping in Pretty Peacock ink.  I cut a square of window sheet slightly narrower than a matting layer also in Soft Sea Foam.  I used an embossing buddy to remove static from the window sheet then  roughly the  centre of it I stamped with white craft ink the large sentiment stamp.  I added white embossing powder and then used my heat tool to carefully melt it.
Be sure to make sure your heat tool is hot before you start to melt the powder to avoid melting the window sheet or causing it to curl.  Don't let the heat stay in one place too long.

I used the Label Me Fancy punch to create an aperture in my matting layer.  I sponged some Rococo Rose and Soft Sea Foam ink gently onto this layer and then stamped images from the Layered with Kindness set.  I also stamped some of the flowers on white card and fussy cut them out.  I used a sponge to add a little more ink to the flowers and edges.   Having inked some white crinkle seam binding with Rococo Rose ink I used the aperture to wrap it around the side border and tie a bow.

I added double sided tape to the edges on the sentiment side of the window sheet then having removed the backing paper carefully lined it up and stuck it to the back of the matt layer so that I could see the sentiment through the aperture.  If you end up with an overhang of window sheet you can cut this now.

Using foam adhesive strips on the reverse of the matting layer I created a square that went around the aperture and also added them around the whole matt layer just in from the edges.  I took away static again on the reverse of the window sheet and the card base before adding some Woven Threads Sequins to the card base where the window would cover them.  Carefully removing the backing paper from all the foam strips I then positioned the matt layer onto the card base.

Finally I added the fussy cut flowers and each had a pearl added that I had coloured with the Rococo Rose alcohol blends which are a free gift with purchase until the end of the month as part of Saleabration.

Ordering the stamp set, punch, window sheet and foam adhesive strips to an order will earn you the alcohol blends free or another lovely gift from the Saleabration collection.

You can shop online for a gift with purchase until the end of March in my Stampin' Up! shop.

Or shop in the new Stampin' Up! beta store and have 20% discount on your shop until 31 March, but no gifts.  Shop HERE and it would be lovely if you nominated me as your demonstrator if you don't have one already.

Thanks for visiting and please enjoy the rest of the blog hop by clicking through the images.

Happy weekend
Zoe x


You are invited to the Inlinkz link party!
Click here to enter

Friday, 29 March 2019

Shaker Card Tutorials from the Totally Techniques Demonstrator Blog Hop Team


Our Totally Techniques Team are sharing shaker cards this month. The choice was  from Lynsay in Canada.  I've made mine in readiness for my lovely little neice's birthday. She's a girlie girl and loves pink and purple.

I was inspired by my lovely friend SJ who created a shaker card and used vellum to cover the 'hole' for the shaker part.  You can see here card here.  I've used vellum to give a frosted glass look for my shaker bottle from the Bottles and Bubbles Stampin' Up! framelit dies and coordinating Stampin' Up! stamp set Bubble Over.

I started by stamping the large bottle onto a piece of whisper white card. Then die cutting the bottle out to create the aperture for my shaker. I stamped the bottles to the left and right of this one and all the other stamping on this layer, before adding any vellum to give the whole project depth and make it look like the bottles are behind.


I then stuck a piece of vellum on the reverse using tear and tape to cover the aperture. I've added the striped paper just so that you can see the vellum more easily. To add the straw, which I die cut from the Saleabration Botanical Butterfly Designer Series papers, I made a very small slit in the top of the vellum to slide the straw through and have it in the bottle.

 I then flipped it over again and  added foam adhesive strips around the rectangle of vellum.   I added some sequin assortment prior to removing the backing strips on the foam. Removing the backing I added a piece of whisper white card to seal in the sequins.  I added extra foam strip to add this layer to a matting layer of Lemon Lime Twist card.

To finish my design I added other bottles which I had stamped and die cut to the design along with the die cut 'birthday' from the Well Said Stampin' Up! bundle in the spring catalogue and also some rhinestones. You'll see I also stamped and die cut bottle labels including one in sparkle glimmer paper which I coloured with a Lemon Lime Twist Stampin' Write Marker.  I also used the two different sized bottle top dies to add silver foil caps to all the bottles.  To make it easy to stick these on I added double sided adhesive sheet to the back of the foil card prior to die cutting.  Quick Tip keep offcuts of foil that already have double sided adhesive sheet for mini die cuts like this, it saves breaking into a larger piece of foil.   A handful of rhinestones amongst the bubbles add to the 'pop'.


I'm really pleased how this turned out and I know that my neice will love this purple and pink pop bottle card. 

Now we have a new way of you visiting our team of International Demonstrators for this hop to click through the pictures below. You should be able to click on the next picture from the next blog, but you can also return here and go to each in turn. Enjoy our Shaker cards and tutorials.  

Thanks for stopping by and remember there are only a few days left for Saleabration.  To receive bonus products with qualifying purchases visit my online stampin shop. You can also be a discount shopper and a part of my team. Go to  Join Stampin' Up! for more information.

Hugs all Zoe x


You are invited to the Inlinkz link party!
Click here to enter

Monday, 16 April 2018

Christmas Card Club Challenge - Christmas Poinsettias and foliage


I'm a little behind the curve as we had a busy weekend celebrating Charlie's birthday which included a visit to see Olivia at university and also the main reason I haven't posted for a few days my desk top has been on strike not wanting to play.
No matter the age cake is always wanted!
However I'm here now sharing my club challenge card set by Mary.  I made a shaker card using the very pretty stamp set Peace This Christmas which I will be very sad to see retire from the Stampin' Up! range in May.  It's been a trusty set of mine and fab for foliage cards like this.  I used one stamp and coloured it with my stampin markers to stamp it twice and then fussy cut them out. I then also stamped the whole image with cherry cobbler ink to be able to fussy cut the central flower and add a little dimension with glue dots to my floral sprigs.  I also stamped a sentiment from the same set in Mossy Meadow ( a returning colour for Stampin' Up! in June) and the border is cherry cobbler from the same set too.  I used this set for previous challenges,   you can see a couple an earlier stamping scene posts and also here. The latter uses the very popular Large Letter Dies that I'm pleased to say are staying in the new Stampin' Up! catalogue and gives a different use to the popular eclipse cards. 


To make the shaker I used the Stitched Shape framelits largest circle die and cut from a piece of very vanilla card 9.5cm x 13.8cm.  I placed the vanilla layer onto my mossy meadow base card (10.5cm x 29.7 scored at 14.8cm) and let the cut circle stay on the base card whilst carefully removing the outer vanilla card. I kept my finger on the circle and drew a light pencil circle around it for respositioning later when I put it all together.  I added window sheet to the back of the vanilla layer and a circle of adhesive shaker strips.  Half a teaspoon of gold glitter flakes sit nicely on the sentiment before replacing the vanilla layer with window and sticky strip to hold it all in place.
Top Tip
Did you know that you can reduce the static by using an embossing buddy on the sentiment and window sheet before putting it all together?

Please do visit the club members and take a look at their wonderful foliage creations.

Thanks for popping by and see you soon.

Zoe x