My STAMPING PAPERCRAFT blog - Stamping Scene

Hello and welcome to my blog. I'm a paper craft addict and love sharing my passion for paper crafting . I run online and face to face card making, memory keeping and all sorts of 3D projects. I also sell many of the products I use. If you'd like more information do drop me an email. Thank you for visiting I hope to see you again soon. Zoe x
Showing posts with label handmade card ideas. Show all posts

Saturday, 1 August 2026

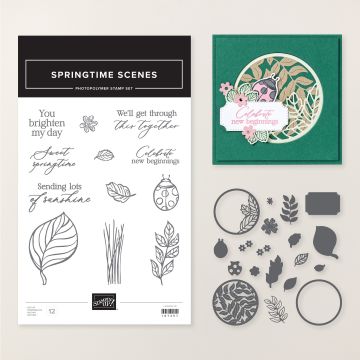
How to do die cut masking using Springtime Scenes Bundle


fancy fold reveal card


As summer continues to keep us bathed in sunshine I've made a card to send you sunshine using the Springtime Scenes bundle to share a simple example of the die cut masking technique for the Totally Techniques blog hop.  

This bundle has proved to be a favourite for me as I particularly like the sentiment I've used in my video and who doesn't love a card with a ladybird or two.  

die cut masking of ladybird
My card also features a fun fold that has a hidden little panel that only shows when you open the card.  I hope you enjoy it and think about what you could use to create something similar.  This bundle if perfect for all sorts of designs as the dies lend themselves to other uses as well as the obvious cut out the coordinating images.  


Continue with the hop below.

Have a fun week as I'm sending sunshine your way.

Zoe x

You are invited to the Inlinkz link party!

Click here to enter


Supplies Used and where to buy

Springtime Scenes die and stamp bundle


Monday, 28 July 2025

Long Time No See fun handmade cards for all the family


handmade dog Dacshund birthday card idea

Are you a dog or a cat person?  Or maybe you adore both.  It's fair to say I'm an animal fan, but my first choice would be a dog, and hence why I love this stamp set which has a small, but eclectic group of animals.  I think the Dachshund is uber cute and the llama or alpacha whichever you want it to be is just fun.  If you missed my post using the dog visiting the Eiffel Tower you can see it on my earlier Stampingscene post. 


I've enjoyed using them so much and I think you will too!  Today I'm sharing this fun 'sausage dog' ,'as we called them when I was a child, dog card or is it a bee!

 Tips to Create

  • stamp the dog on masking paper and cut out
  • stamp dog on matt layer and cover with mask
  • stamp flowers, grass , wings and antennae
  • stamp the dog onto an offcut of card and colour with alcohol markers. Fussy cut out. Adhere with glue dots
  • colour flowers
  • use wink of stella with ink from smoky slate pad or a watercolour pencil to create sparkly subtle wings
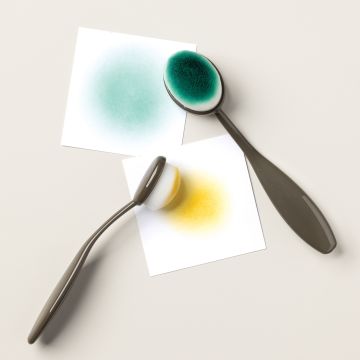
  • use a blending brush over diecut clouds to add soft sky.
  • pop stamped sentiment of choice in the sky and add tiny bee trinkets with multipurpose adhesive. 
  • add matt layer if desired to coordinate with flowers


Check back soon to meet more friends of Pierre and Bea.

Thanks for visiting and if you can't live without any of the products used please do visit my online stampin' shop. Opt in to the rewards when you create an account to earn product credit for future orders when you spend £20 or more. 

Happy stamping

Zoe x


Supply List
long time no see stamp set images © Stampin' Up!


Long Time No See stamp set

#166189


tiny bee trinkets

Tiny Bee Trinkets

#164714


wink of stella to add sparkle
Wink of Stella 

#141897


Bee my valentine stamp set anniversary wedding valentine card stamps

Bee my Valentine

#162547


blending brushes

Blending Brushes

#153611 large

#160518 small  


masking paper

masking paper

#155480


Friday, 31 January 2025

How to create a fringing effect on your handmade cards

fringing technique example using stampin' up! ® wildflower birthday suite


Hello crafty friends! A few days ago chatting with a friend I suggested that January had been a long month and she replied that it was about time I realised it was 756 days long!!! Ha Ha but it has seemed very long and slow this year.  
I'm glad to celebrate the end with this pretty card created using the Wildflower Birthday Suite which is gorgeous.  Full of gold touches making it luxurious, but also full of fresh colours and the implication of brighter days to come with Spring not too far away now.  

The card features the Fringing Technique which you can create with paper and scissors and could use as a feature on a handmade card like this one or indeed as an embellishment for a scrapbook page.  I used a pair of fringe scissors which makes it even easier, but not essential for you to create the same effect.  Add some lovely printed die cut flowers or balloon from the suite and you have a stunning birthday card. 

I added some extra embellishment using some Party Dots part of the suite, a pink baker's twine bow and a die cut sentiment that says what you need for a dear friend.  

I've recently joined a video tutorial group and in February you can receive the digital tutorial bundle featuring 12 more video tutorials using this fabulous suite of products either free with an order of £45 or more or you can purchase it from me by contacting me via my subscriber button above. 

Here is the video tutorial. Please do subscribe to my Youtube channel for more tutorials. 


Here you can see a close up of the example I created in the video above to compare the fringe differencies.  You can use just ordinary scissors to set your own fringing size. 

fringing without decoration for size comparison

Enjoy clicking on the links below to see more Fringing Technique ideas for your cardmaking and scrapbooking.  

Thanks for visiting.

Zoe x

You are invited to the Inlinkz link party!

Click here to enter
1.  Diane Evans - Canada 
2. Sandra Black - Germany
3. Fanny Minne - Austria
4. Zoe Tant - UK   you are here
5. Annette Elias - Netherlands 
6. Dena Rekow - USA
7. Mette Nordling - Australia

birthday celebrations dies for paper cutting die cutting


wildflower birthday designer series paper for papercrafting


papercraft embellishments


die cut sentiments printed


pale green cardstock - soft sea foam


Friday, 25 October 2024

Blackout Embossing Technique for card making


Hello crafty friends and welcome to my take on the Blackout Embossing Technique that the Totally Techniques Team are sharing with you this month.  

You don't need many supplies and can create pretty backgrounds, layers or diecuts once you've used this process.  Gather together a 3D embossing folder, colouring tools and an inkpad that is a darker colour than all the colours you use to colour your embossed images; a great place to start is with a black ink pad as it will work with all colours.  


The colours used include Mossy Meadow, Fresh Freesia, Peach Pie, Granny Apple Green.  The embossing folder is from the Happy Hibiscus Hybrid Embossing Folder which will be available to you in my shop from 1 November 2024.  There is also a stamp set and the bundle will be available also. 

I also used twisted gold thread and Blooming Pearls to enhance the die cut flowers.  

Drop by all the blogs on our Totally Techniques hop to get more ideas for your crafting with the Blackout Embossing Technique.  

Take care and happy stamping

Zoe x

SHOP PRODUCTS


You are invited to the Inlinkz link party!

Click here to enter

Thursday, 18 July 2024

Just two weeks to go

bouns days at stampin up

Our July offer will soon be over.  For every £45 spent on product in July in my Stampin' Up! shop you will earn a bonus day coupon from Stampin' Up! which you can spend on product in August 2024.  


Take a look at the Simply Zinnias suite with this gorgeous paper full of colour and great for summer makes.  The stamp set and dies coordinate and can be used for all sorts of projects.  Check back on Friday night for my next card using Simply Zinnias and a fun technique to use them with. 

handmade card thank you

 Thanks for stopping by.

See you again soon

Zoe x

Friday, 26 May 2023

Simple Shaker card tutorial for Totally Techniques blog hop

shaker card using dies and stamps from stampin up uk with zoe tant


totally techniques stampin up blog hop logo

Welcome to my make for the May Totally Techniques blog hop.  Lovely Lynsay Mahon in Canada chose our theme of Shaker Cards and I created this card for the 2023 Sales and Promotions Demonstrator Council new product spotlights for our global facebook group for demonstrators and it also happens to be a simple shaker card to make. 

You'll need the following
  • A tent fold base card mine is Bubble Bath a new Stampin' Up! colour. 
  • A matt layer 0.5cm/0.25" narrower and shorter than the base card. Same or coordinating as base 
  • circle die - Stylish Shapes
  • Gorgeous Garden dies - yes they are in the annual catalogue page 164
  • Wanted to Say dies - page 167 for the flowers
  • Sending Smiles stamp set for the sentiment
  • Shaker sparkle of your choice
  • Irrisdescent Pearls
  • window sheet
  • foam adhesive strips
Start by cutting an aperture in the matt layer.  To the reverse of this adhere a piece of the leaf dies from the Gorgeous Garden dies that is big enough to more than cover the aperture.  On top of this layer on the reverse add a rectangle of window sheet again large enough to cover beyond the circle aperture.  You can add glue dots to the back of the leaves once the window sheet is in place from the front of the card by lifting them carefully with a pokey tool to save getting wet glue everywhere.

Add some foam adhesive strips in a square bigger than the circle again on the reverse side making sure there are no gaps at the corners or along the side so that your shaker sparkle doesn't leak out.   Also add foam adhesive across the top and bottom of the matt layer reverse so that when you come to stick this onto the card base this whole layer is supported. 

Add your shaker sparkle to the front of the closed card roughly where your circle aperture will be over it and then remove the backing paper from the matt layer and stick onto the front of the card.  

Now to the front of the card you can add the sweet die cut flowers with iridescent pearls and also a flower in the bottom right corner of the card front.  If you use the flower from the Wanted To Say dies I carefully stuck three layers on top of each other and kept the pink centres from the other flowers used to add a coordinating centre to the white flower again sticking them together carefully first. 

Heat emboss a sentiment in white onto black for a finishing touch. 

A simple but wow card to impress your friends.  Have fun making one yourself. 

Thanks for stopping by, enjoy the rest of the hop 

Happy stamping
Zoe x

You are invited to the Inlinkz link party!

Click here to enter


Supplies

Gorgeous Garden dies stampin up


Wanted To Say dies for card making


bubble bath card stock


foam adhesive strips for shaker handmade cards


designer series paper DSP sale in june 2023


Friday, 28 April 2023

How to do faux watercolouring with Totally Techniques Blog Hop


faux watercoloring handmade card of koala using stamping and water painter brushes

totally techniques blog hop logo

Hello and welcome to my share for the Totally Techniques Stampin' Up! demonstrator blog hop sharing lots of tips and tutorials for the Faux Watercoloring Technique.  

I wasn't at all sure what to do for this challenge, but I hope I've covered the brief and that  you can follow my video and have a go yourself.  It's not rocket science and is actually a very forgiving technique that could lend itself to lots of different stamp images and creates fun cards using as few or as many ink colours as you wish.  

I used the stamp set Wild and Sweet which includes a Racoon, Koala and a Panda.  I've made a card using each of the images and a couple of additonal stamps or embellishments to just add more texture.  

For once I've even made a video that I hope you'll take a look at and be kind, I'm no top performer, but it's honest and covers the brief I think.  

The handmade card above showcases the lovely Koala which I framed very simply with Deckle Edged Rectangles and a sentiment from Botanical Layers. 

The video to create the watercolour scene is here:-


My second card uses the Racoon and again is very simple letting the image do the talking.  I matted my image onto retiring Evening Evergreen card and then onto Mossy Meadow.  Just like the card above I stamped tone on tone with Grey Granite ink and card to create a subtle base.  
Racoon handmade watercolored card

My final card and the final stamp in this nature lover's stamp set shares the Panda image.  This image is matted onto a Mossy Meadow border and then onto the returning colour Pretty Peacock which can be green or blue depending upon which colours you team it with and makes it very flexible and a popular returning colour to our main colour offering.  I stamped a simple Happy Birthday in copper embossing and added some copper brushed metal dots onto dry embossed card base.  I used the 'stripes' folder from a double pack of folders.  

panda birthday card masculine card or for animal lovers


I hope you love my take on the challenge, but don't forget to visit the rest of the hop and also remember that the Last Chance List will be gone forever by the end of 1 May in readiness for the new annual catalogue launching on 2 May.  If you wish to have a copy please do contact me soon to find out how to get your hands on one. 

Have a great bank holiday weekend for all my UK readers.

Hugs Zoe x

You are invited to the Inlinkz link party!

Click here to enter


Supplies Used


water painters


Wild and Sweet stamp set


fluid 100 watercolour paper