My STAMPING PAPERCRAFT blog - Stamping Scene

Hello and welcome to my blog. I'm a paper craft addict and love sharing my passion for paper crafting . I run online and face to face card making, memory keeping and all sorts of 3D projects. I also sell many of the products I use. If you'd like more information do drop me an email. Thank you for visiting I hope to see you again soon. Zoe x
Showing posts with label shop stampin up online uk zoe tant. Show all posts

Friday, 30 June 2023

Dry Emboss Vellum Technique - It's blog hop time

card to show the dry embossing on vellum technique with stamp set layering leaves stampin up uk


Welcome to the June Totally Technique Stampin' Up! demonstrator global blog hop.  This month we are sharing ways that you can dry emboss vellum and add it to your card making and scrapbooking. 

I have used the new colour Bubble Bath - such a cute name for a lovely baby pink - and teamed it with some Distressed Gold Specialty Paper.  It's lush and perfect for a girly card or summer wedding.  

I've also used the popular Layering Leaves stamp set and Bough punch to add detail to my circle focal point.  


dry embossing on card and vellum thumbnail picture with zoe tant

As you know this girl loves a bit of bling and so the subtle layering of dry embossed vellum over a piece of the specialty paper just softens it to add extra detail and is such an easy way to add some embossed vellum.  When embossing vellum you want to make sure that you don't overload the pressure when passing your embossing folder through your die cutting machine.  Too much pressure can actually cut the vellum as well as emboss and you may end up with unwanted die cut effect.  Be gentle with it and if needs be play about with your plates.  I also dry embossed the pink card with the Fern 3D folder and then gently added some ink around the edges using a blending brush.  


dry embossing on card and vellum thumbnail picture with zoe tant

The specialty paper is thick enough to use a punch on it and adding just a touch of seed pods makes the little bouquet sparkle.  You could use this layout and do the same with the gold paper with so many colours to match your occasion. 

Do check out my lovely friends blogs for other ideas using dry embossed vellum.  

Have an awesome weekend we are gardening hopefully if it's dry, but I also secretly hope it rains for the garden and a cosy weekend crafting and getting other indoor chores covered.  

Happy crafting

Hugs Zoe x

You are invited to the Inlinkz link party!

Click here to enter

Supplies used

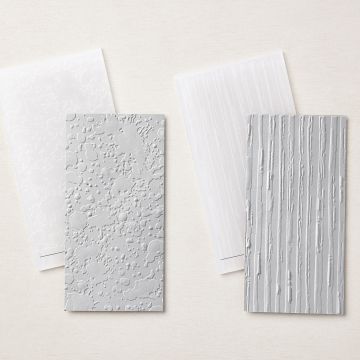
spots and splatters embossing folders


Spots and Splatters embossing folders


fern 3D embossing folder stampin up online shop

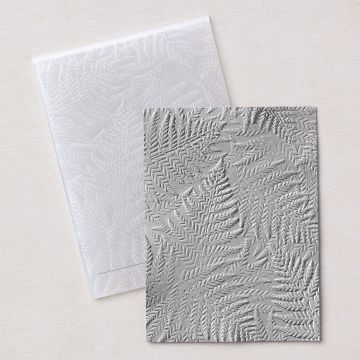
Fern 3D Embossing Folder


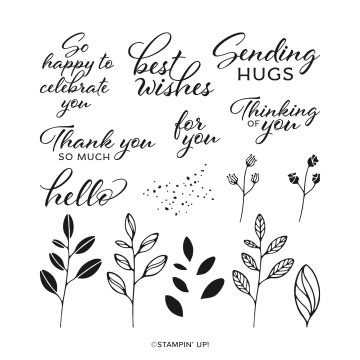
layering leaves stampin up stamp set

Layering Leaves stamp set


distressed gold specialty paper

Distressed Gold Specialty Paper

Sunday, 26 September 2021

Cute Christmas Trees for our Christmas Card Club challenge

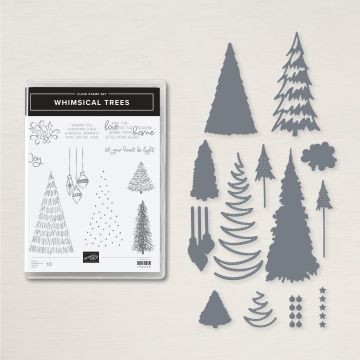
Whimsical Christmas Trees card making dies stamps with stampin up demo zoe tant

 It's my turn to choose our Christmas Card Club challenge today and the theme is Non-traditional Christmas colours.  I've used white, Early Espresso, Soft Suede and Kraft to create my CAS card for you today.  

I die cut an aperture from a piece of white and added the die cut trees using Christmas Tree dies part of the Whimsical Tree bundle in the Stampin' Up! winter catalogue.  I also die cut a frame for the circle aperture and the trees are carefully stuck to the back of the aperture and are adhered to the embossed background layer using stampin dimensionals to give the impression of depth.  I've then matted it all onto a piece of Early Espresso card before adding to a white base card.  

christmas tree dies and stamps from stampin up zoe tant uk demo shop

I just love these trees with their long trunks and narrow stitched tops.  They look great in any colour, but I liked the neutral look on the white embossed background.  I'm going to do more with other colours as this was a relatively quick card to put together.  

tree dies for christmas craft with mini star dies stampin up

I needed it to be easy as we took our son to University for his first term yesterday. I miss him already and can't wait to see how he gets on.  He's in a flat of 6 with 2 lads and 4 girls.  It will be interesting to see how life pans out for him.  I'm so excited for him and the adventures that await him.  Can't believe my baby boy is so grown up!

Have a lovely Sunday all and enjoy checking out more inspiration with my fellow club crafters by visiting them via the CC Club list above. 

keep safe and keep stamping 

hugs Zoe x


christmas tree dies and stamps for craft

Whimsical Trees Bundle


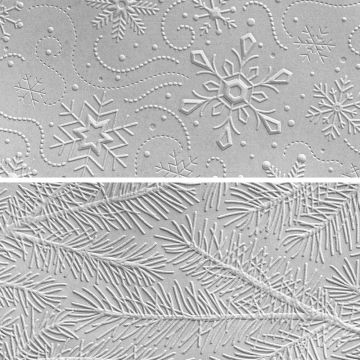
wintry 3D embossing folders stampin up

Wintry 3D embossing folder duo


layering circle dies for paper crafting

Layering Circles dies


SHOP ALL PRODUCTS

Sunday, 10 November 2019

Christmas Card Club - Anything Goes

 It's my turn to choose the theme for our Christmas Card Club Challenge today and I've gone with a really simple one ie Anything Goes.  It leaves the doors wide open for everyone to choose whatever. 

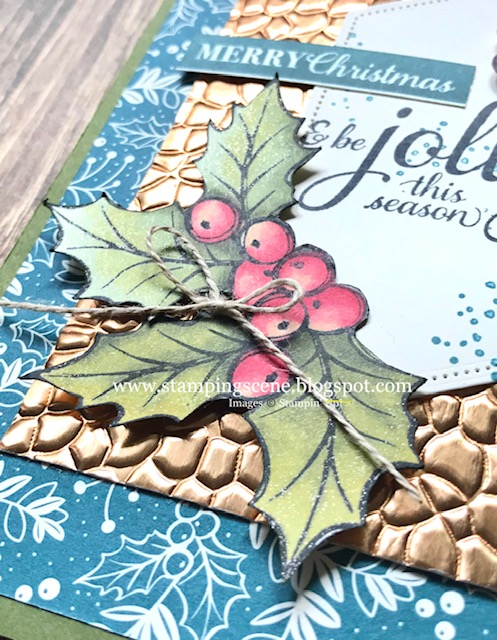
For my card I've used the fabulous Stampin' Up! Christmas Gleaming stamp set and famous dies 'scissors' tee hee for the fussy cutting of the holly.  I stamped the holly in memento black ink and used my Stampin' Up! alcohol blends markers to colour it.  Colours included Mossy Meadow, Old Olive, Soft Sea Foam, Cherry Cobbler and Ivory.  I'm really pleased with how the holly and berries turned out.  The gorgeous copper foil layer is embossed with a folder called Hammered Metal and the background paper is from the very, very popular Brightly Gleaming Specialty papers.   This particular paper is Vanilla and Pretty Peacock and is just gorgeous. 
Extra bling comes in the form of Wink of Stella on the leaves and berries where they catch the light and a simple linen thread bow.  My inspiration for the card came from the Stampin' Up! winter catalogue and I've flipped the design and layers a little.  When your mojo is low the catalogues are always a great source of inspiration. 

All the products are available in my Stampin' Up! Online Shop are are detailed below

Christmas Gleaming Stamp Set 150464
Brightly gleaming Specialty paper 150429
Copper Foil card 142020
Hammered Metal Embossing Folder 150646
Stampin' Blends various Annual Catalogue p179
Linen Thread  104199
Memento Black Ink132708
Pretty Peacock Ink Pad150083
Mossy Meadow Card stock 133683

Happy Sunday

Hugs Zoe x


Thursday, 2 August 2018

Cycle Crazy for Moving Along with The times


Our challenge at Moving Along with the Times is themed as 'One for the Boys' . I've made this cycling card which covers the boys and the men in our lives.  The cyclist is from Enjoy Life an eclectic mix of stamps, but one that gives you plenty of scope to create an array of family cards.

I started with my base card of thick whisper white and stamped the cyclist in Tuxedo Black Memento ink.  I then cut a piece of smokey slate card to the shape I wanted and then placed it over a piece or real red and used my trimmer to give a border.  I stamped tone on tone again with the cyclist stamp and then added a die cut 'celebrate' from the Celebrate You thinlets which I got as a free gift during Saleabration but you can now buy them from the annual catalogue too.  I used the double sided adhesive paper on black card and die cut before removing the second backing paper.

Simple and quick, but looks like you did more just by cutting a pennant type shape with your trimmer.

Do come and join us with the challenge and add your card on the MAWTT page.

You can also buy any of these products in my stampin up uk online shop.

Thanks for popping by.

Zoe x


Wednesday, 18 April 2018

Springtime Daffodils


At Moving Along with the Times we are sharing a Springtime theme this fortnight.  I love my stamp set You're Inspiring and have made a few cards and projects with it, but I was also 'inspired' by a lovely swap I received at the Stampin' Up! demonstrator Onstage event recently made by fellow demo Emma Goddard. I've made my own version using water colouring like she did as the colouring medium for my flowers.  

I like using washi tape but often forget to get it out. It's a great way to add colour and depth without bulk to your projects.  I've also spattered some droplets of ink by getting ink onto a damp, but not dripping aqua painter and flicking it across my project.  The ribbon embellishment is also a great way to use up ends of ribbon supplies it is just two pieces folded in half and then placed on top of each other before using a single staple to attach them. Remember to attach them to a matting layer, in this case my art work piece before adhering to the base card so that you hide the staple back somewhere safe.  

Come join in our challenge at MAWTT. We'd love to see your springtime creations. There's still a week to go to enter. Just follow the link above.


I also used this stamp set to make a home decor piece for my lovely mum for Mother's Day. You can see the full details on my stampingscene post.


Don't forget go join our challenge!

Hugs Zoe x


Friday, 28 July 2017

Totally Techniques Blog Hop - die cut masking technique


Hi and welcome to July's Totally Techniques blog hop.  We're sharing our take on the die cut masking technique this month. It's a technique that is easy to do and you can have a lot of fun with it.  There's a great tutorial here that will help to get you started or you can follow the simple instructions below.

1. Using removable note sheets or removable 'sticky' tabs cut out the die cut of your choice.  I used the Stampin' Up! Large Letter dies.

2. Position the die cut pieces on your card layer making sure that they are secure, but still removable.

3. Spritz, stamp, smudge, sponge or whatever ink over the masks to build your design.  I used sponges, stamps Timeless Textures and Touches of Texture.  Colours used were Pink Pirouette, Crumb Cake, Soft Sky and Rose Red.

4. You can add extras like glitter dots with a fine tip glue pen at this stage, but before removing the masks make sure everything is dry so as not to smudge any glue or ink.  

5. Remove the masks to reveal the clean letters in the original card stock colour.  

As the Meerkats would say 'Simples'!!

To finish my card I add flowers which were stamped using the Touches of Texture smallest flower and then punched with the Sprinkles punch, an addition to my sentiment from Lovely Inside and Out and some additional flowers.  The design is matted onto Crumb Cake card which has been smudged around the edges with the same colour ink and then a Soft Sky card base.  

You're here in the UK with Zoe Tant, but please do go on a mini globe tour to see the designs with Die Cut Masking from my lovely demonstrator friends.  

All products can be bought in my online store HERE 


1. Nadine Weiner Germany
2. Shelagh Freemantle  Canada
3. Shannean Moncrieff   Australia
4. Zoe Tant  UK
5. Barbara Meyer Austria


Thanks for checking in...
Zx


Wednesday, 27 April 2016

Stampin' Up! Grand Vacation Blog Hop - Baby Love


I can't believe a month has passed since the last Mediterranean Acheivers Blog Hop.  Welcome wherever you've come from today to our Baby Love theme hop.

I finally caved and bought the fab Stampin Up set Made with Love to make these cards and I've enjoyed it so much I've made more which I'll add to my for sale boxes.  It really is a cute set and leads to some fab cute cards.


For the baby boy card I used some thick whisper white card stock and put the patterned designer series paper on the inside rather than the front.  I've turned back the top corner revealing the paper inside.  I stamped the baby grow in mint macaron and then used marker pens to colour it.  I'm sad to see the triple punch pack go with the cute little star, but couldn't resist using it here as all babies are little stars and of course made with love.


My baby girl card is uber cute with the cute little dear and some stamping from the I love You Sew hostess set in the spring catalogue.  A little washi tape and some silver, clear and white sequin hearts made for this sweet card.  Again a touch of subtles DSP just to remind you it's for a pink baby i.e. girl

I encourage you to visit the other blogs on the list below to see lots of fabulous inspiration for baby cards and more.  Enjoy the hop.  You're currently with me Zoe Tant

If you've seen any products that you like the look of you can buy them in my online shop.


See you again soon.
Zx