My STAMPING PAPERCRAFT blog - Stamping Scene

Hello and welcome to my blog. I'm a paper craft addict and love sharing my passion for paper crafting . I run online and face to face card making, memory keeping and all sorts of 3D projects. I also sell many of the products I use. If you'd like more information do drop me an email. Thank you for visiting I hope to see you again soon. Zoe x

Friday, 30 October 2020

How to do inking on embossing folders tutorial blog hop

handmade thank you card using stampin up love of leaves
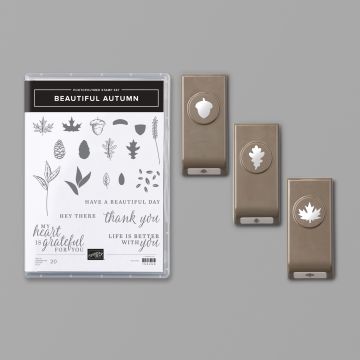
Love of Leaves and Stitched Leaves Dies from Stampin' Up! 


totally techniques international stampin up demonstrator blog hop logo

Here is a simple stamping technique that you will love and is really easy to achieve.  I chose this technique for our monthly International Stampin' Up! demonstrator blog hop this month and I hope you like it as much as I do. 

handmade thank you cards using the stampin up love of leaves stamps and dies

ink on embossing folder technique for paper crafting
In its simplest form of the technique you need to add ink to one side of an embossing folder, add your card and put through your die cutting machine. That is what I did for these cards using just one ink, one stamp set and one die set and embossing folder.  I used a sponge brayer to add ink to my Dainty Diamonds 3D embossing folder before placing a piece of white card on the unlinked side to pass the closed embossing folder through my die cutting machine.  You can experiment and use either side of the folder to create a pattern with ink on the embossed section or in the debossed section.  You can see the difference with this particular folder below.  I used Old Olive ink.  

ink on embossing folder technique for paper crafting
 Once you have your inked embossed pieces you can use them as a background, die cut them, add them as a matt layer or whatever works for your project.  I die cut leaves which I then used on some cards and also used the negative remaining and used the stitched vein die to add the detail to the leaf aperture negative. 


die cutting leaves for craft projects with stampin up stitched leaves dies


You can use the outside piece of the cutting die to make sure the stitched part is in the correct place either directly on your card base or on an additional piece of matting card that you can then use sticky foam pads to raise the embossed layer over the top. 

handmade stampin up thank you card using love of leaves

Using a single colour can be very effective and is also a great project if you don't have a big supply of colours.  I used the die cut leaves to create more cards and part of the die set includes a stitched pattern die that just does what it says marks a stitched pattern without cutting anything out except for the stitching.  It acts as a simple background to show case the pretty leaf cut from the card above. 

handmade stampin up thank you card using love of leaves

I also added some Old Olive ribbon just looped under the leaf here and alcohol marker of the same colour again to colour the clear epoxy droplets to pop a little more colour and make them show more on the white card base.  

I used the Woodland embossing folder for a couple of versions of this technique.  You can see a masculine Woodland embossing folder card or a Woodland gift box.

As I said it can be as simple a technique as you want to make it and using different folders and ink colours can change the whole look.  

Tomorrow is the last day of the Designer Series Paper sale with 15% off selected paper packs. If you haven't ordered your favourites yet be sure to get a saving ordering this month. 


Thanks for dropping by and enjoy the blog hop with more inspiration via the links at the bottom of this post. 

Keep safe and keep stamping 
Zoe x


Stampin Up love of leaves bundle


Love of Leaves Bundle


stampin up dainty diamonds 3D embossing folder

Dainty Diamonds 3D embossing folder


stampin up sponge brayers

sponge brayers


old olive ink pad stampin up

Old Olive Ink Pad


frosted and clear epoxy droplets stampin up

Frosted and clear epoxy droplets


Blog Hop Links Below


You are invited to the Inlinkz link party!

Click here to enter

Tuesday, 27 October 2020

Christmas favour box tutorial using Stampin' Up! Poinsettia Place DSP.


origami gift box with lid using stampin up poinsettia place dip


It's our last Tantalizing Stampers blog hop sharing fun ideas for using patterned papers or as we call them at Stampin' Up! Designer Series Papers, DSP for short. 

Today I've used the Poinsettia Place pack of papers to create an origami box and have then added a lid using Garden Green card and some of the offcuts of paper for a little more decoration.  You can see exactly how to make the base of the box on my Youtube channel.  There I made the box into an Easter basket, but I decided a box full of surprises is probably more appropriate for the festive season that is fast approaching. 

To make the lid for this size of box I cut a piece of card 51/2" square.  I scored on each side at 1 3/16" and cut two of the shortest score lines up to the first perpendicular score line.  I then rotated the card through 180 degrees and cut the opposite two short score lines.  I added glue to the outside fold edge of each small square and then formed the box lid. 

origami box tutorial

I then added decoration using the off cut 3" x 12" DSP, red ribbon and tiny bells threaded onto gold thread.  
I attached these by looping the thread through a hole i created in the box lid and covered on either side with DSP and card, making sure I secured the ends of the thread with double sided tape before hiding them. 
Christmas table favour origami box tutorial


Here is the video to show you how to make the box.  You can then add the lid by making it in a coordinating colour.  You can create similar boxes using A4 paper or card by using a piece that is cut to 21 x 28 cm and score on the short side at 7, 14 cm and on the long side at 7, 14 and 21 cm. The process is the same. Create a lid with a piece of card cut at 12.4 cm square and score on all sides at 2.5cm


You can see more inspiration from other members of my team, The Tantalizing Stampers via the thumbnails at the bottom of this post. 

Thanks for popping by I hope you have fun making the box. 

Keep safe and keep crafting Zoe x

stampin up poinsettia place DSP


Real Red Sheer Ribbon


jingle bells for craft projects red gold green


You are invited to the Inlinkz link party!

Click here to enter

Sunday, 25 October 2020

Frosty the Snowman in triplicate.

Stampin up snowman from snow wonder stamp set

Happy Sunday all.  I hope you've had a good week.  Here it's half term and nice to have less rush for the school run etc.  I've enjoyed having the chance to craft some fun snowmen cards chosen as our theme for Christmas Card Club by Margaret.  I've used the same snowman in similar but different ways and I'd love to know which one you like the best. 

Above I stamped with black ink grey card and then used watercolour pencils to colour the image.  Added some embellishments and an embossed matt layer using the Dainty Diamonds 3D embossing folder which is fab for Christmas cards as it's got that sort of sparkle design lights make when they hit your tree ornaments if that makes sense.  

snowman christmas card stampin up snow wonder set

For the second and third card I've used the same layout but added some slightly different touches.  On the one above it's just simple stamping in Grey Granite ink on the same colour card with just a simple sentiment in black on white from the same stamp set.  You can see I used a different embossing folder here too called Old World Paper which is great for masculine cards. 

Below I've changed it a little by adding a heat embossed sentiment which I fussy cut and also used white pigment ink to stamp the additional snowflakes and a chalk marker to colour the snowman with criss cross to create a little texture.  I had a white gel pen too to add more snow along his twiggy arms and on the ground.  I also changed the ribbon and used double sided tape so that I could pleat the ribbon rather than a bow or knot. 

snowman christmas card hand stamped

If you're on half term this week I hope you've managed to have fun despite whatever restrictions may be in place and if it's life as normal, well as normal as is at the mo, I hope you have a fun week.  Keep safe all and take a moment or two to check out everyone else's Snowmen cards - you're in for a treat. 

Hugs Zoe x


stampin up snow wonder stamp set images


stampin up chalk marker pen


sheer red ribbon

Friday, 23 October 2020

Beautiful Autumn for Card Class

Beautiful Autumn card using the bundle from stampin up with zoe tant uk demo

I've decided that I really like this type of card with this central panel as you can make it look so varied by either stamping, adding die cuts, some dry embossing with a lovely folder and of course water colouring that you can see in the same type of card in my tantalizing stamper post. 

This version is a card we made in my online class this week. I send kits to everyone and they follow along using what they have at home with the kit I have supplied. It's great fun and we have a lot of chatter and lots of giggles.  We're always open to welcoming more people to the group as it's definitely a case of the more the merrier.  

So I used the colours Terracotta Tile, Old Olive, Crushed Curry, Early Espresso and Soft Suede and stamped lots of images from the Stampin' Up! Beautiful Autumn set.  To create the outer splatter patterns I used the corn grain stamp but used second and third generation ink and also used a couple of markers for ink splatter.  

Beautiful Autumn Thank You card using stampin up

 I also added a flourish of Bumblebee gingham ribbon prior to adding my simply stamped sentiment also in the set onto a stitched circle die cut.  

The measurements for this particular card are as follows. 

Card back in Terracotta Tile  14.8 x 10.5cm
Embossed layer in Vanilla 14.3 x 10 cm
Card fold in Terracotta Tile 28.9 x 7cm scored on the long side at 14.8cm
Stamped layer in Vanilla 14.3 x 6.5cm 

The great thing is that you still have room to stamp inside and write sentiments. One of the card club ladies wasn't happy with her embossing layer so she moved the folded panel to one side and that looked great too.  Here are most of the cards.


It's simple to do so I hope you'll have a go. Via my other share you can also link to Linda in my team to see where I got the idea and the beautiful version she did with Forever Fern. 


Have a fabulous weekend and remember to ........
Keep safe and keep stamping.

Hugs Zoe x

stampin up beautiful autumn stamp set


Tuesday, 20 October 2020

Ideas for using your Stampin' Up! DSP with The Tantalizing Stampers


Hi and welcome to another Tuesday blog hop and share of all things fun about using Designer Series Papers (DSP) on your projects.  The Tantalising Stampers are sharing ideas every Tuesday in October because Stampin' Up! has a nice discount on selected DSP during October.  You can see all the papers included in the offer and more in my Stampin' Up! Shop. 

love of leaves stampin up card with papers dies and stamps

For my share this week I've used the fun and colourful Plaid Tidings DSP on page 57 of the winter mini catalogue.  Having said colourful I've probably used one of the less bold pieces of 6 x 6" paper because I was making my card for one of the guys.  

I used the Love of Leaves bundle and took one stitched leaf die to create an aperture for my matt layer of DSP to shine through.  I've added a sentiment from the coordinating stamp set and used an off cut to matt that too.  

leaf thank you card using stampin up dsp and love of leaves

Here I used the die cut leaf shape which comes with a die that just adds the leaf veins taken from the card above.  The left over piece of dsp from the 6 x 6" shape fitted nicely onto my card base and I added some  greenery using the sprig punch. Before adhering the leaf I used a piece of double sided tear and tape to add a randomly looped piece of linen thread.  

Both cards have some enamel dots added for a little more texture.  

Simple but effective card making.  You can find all the materials in my shop.  

Enjoy the hop and all the fabulous ideas from my Tantalizing Team.  

Keep safe and keep stamping
Zoe x


You are invited to the Inlinkz link party!

Click here to enter

Thursday, 15 October 2020

Watercoloring on embossed image using Stampin' Up! So Much Love stamp set

watercoloring on embossed image with ink pads and water painters using stampin up set so much love
WOW I'm really chuffed how this random card turned out. I love it when you tinker and you end up with a card that you are so pleased with it, you want to send to yourself.   I will part with it of course, but I never thought I could watercolour, but with a bit of play, ink, water painters and kitchen towel you can do anything. The good thing is ONE SHEET IS PLENTY when it comes to the kitchen towel too!
The  layout of this card or perhaps you'd call it the fancy fold was taken from a beautiful swap that I received from team member Linda Gilbert at Linda's Craft Room.  I really liked her Forever Fern version and have done several using different stamps and colours, but this one I'm particularly fond of. 


watercoloring on heat embossed image happy birthday card


I've used a super cute simple stamp set called So Much Love and stamped partial images onto watercolour paper using Versamark ink, added white embossing powder and heated it.  Once cool I think used the pack of 3 water painters in the Stampin' Up! AC to take ink from the inside lid of Flirty Flamingo and Granny Apple Green ink pads to colour the images.  I find it easier to do if you use one brush to first add a watery layer to the part of the image you want to paint before adding ink with one of the other painters.  It helps the ink move around more freely and allows for novices like me to recover if there is too much or too little ink.  You can mop up over enthusiastic adds with the kitchen towel.  I moved around the image allowing parts to dry before going back to their neighbouring petals/leaves.  Once dry I went back to some parts like the flower buds to add more ink to deepen the colour.  

Linda used embossed card for the stripes down the sides of the bottom layer, but for this one I stamped on the inside of the base card before adhering the art work section.  

The sentiment I did in the same way, embossed it first then cut to size before watercoloring the background.   I love the additon of a simple bow in gold trim from the Forever Greenery trim pack. Just be sure to knot the end of the roll as it can fray easily. Here I wanted the ends to unravel but you can also add a knot to each end of the bow for a more formal finish. 

I also like to sometimes add some detail by stamping a partial image in the main colour on the inside of the card. 

I hope you like my watercolored card.  If you have any watercoloring tips please do share them in the comments. 

Thanks for visiting 

Keep safe and keep stamping 

Hugs Zoe x


stampin up so much love stamp set


Forever Greenery Trim Stampin Up


stampin up water painters


flirty flamingo ink pad stampin up

Tuesday, 13 October 2020

How to make a simple gift bag with patterned paper


tantalizing stampers blog hop with patterned paper ideas


Here's a quick and easy make that I'm sharing as part of The Tantalizing Stampers blog hop to bring you fun tips for using your patterned papers or as we call them at Stampin' Up! Designer Series Papers. 

This is a cute bag that will take small gifts, perhaps the type that also come in small boxes containing sparkly things, or to make some chocolates or sweeties look even more exciting. 

how to make a gift paper with pretty papers

1. Cut a piece of DSP 91/2" x 6"
2. Score on the long side at 3", 41/2", 6" and 9"
3. On the short side score at 1/2" and 41/2"
4. Fold the half inch panel on the short side so that it makes a border around the top of the bag as seen in the picture below. 


5. On the long side, with this border at the top, cut from the bottom up each score line as far as the score line to make the bottom flaps that will be the base of your bag.  
6.  Add double-sided tape to the inside bottom edge of  one long side on the bottom edge opposite the folded decorative border.   
7. Put double-sided tape onto the outside of the narrowest end of your paper when laid out in a landscape position. This will tuck inside the opposite edge to form the bag shape. 
8. Remove the backing paper of this piece of tape and connect with the opposite end to form the bag. 
9. Remove the backing paper of the tape at the bottom and fold in first the untaped short pieces and then the untaped long side followed by the taped long side.  Use a bone folder inside the bag once stood up to secure the tape by pushing it gently but firmly down. 
how to make a small gift bag with paper

10. The final part is to add a ribbon handle and a decorative tag.  

The most difficult part to is to fill it with chocolates and give it away, but remember the joy you bring to the recipient.  

Have fun and don't forget to check through the other members of my team's ideas for using DSP.  You can find them via the picture links or the typed links below. 

Keep safe and keep crafting 
Zoe x
 

stampin up forever greenery dsp


reversible green peacock ribbon


Forever Fern Stamp set and dies


You are invited to the Inlinkz link party!

Click here to enter